Connect to Wi-Fi
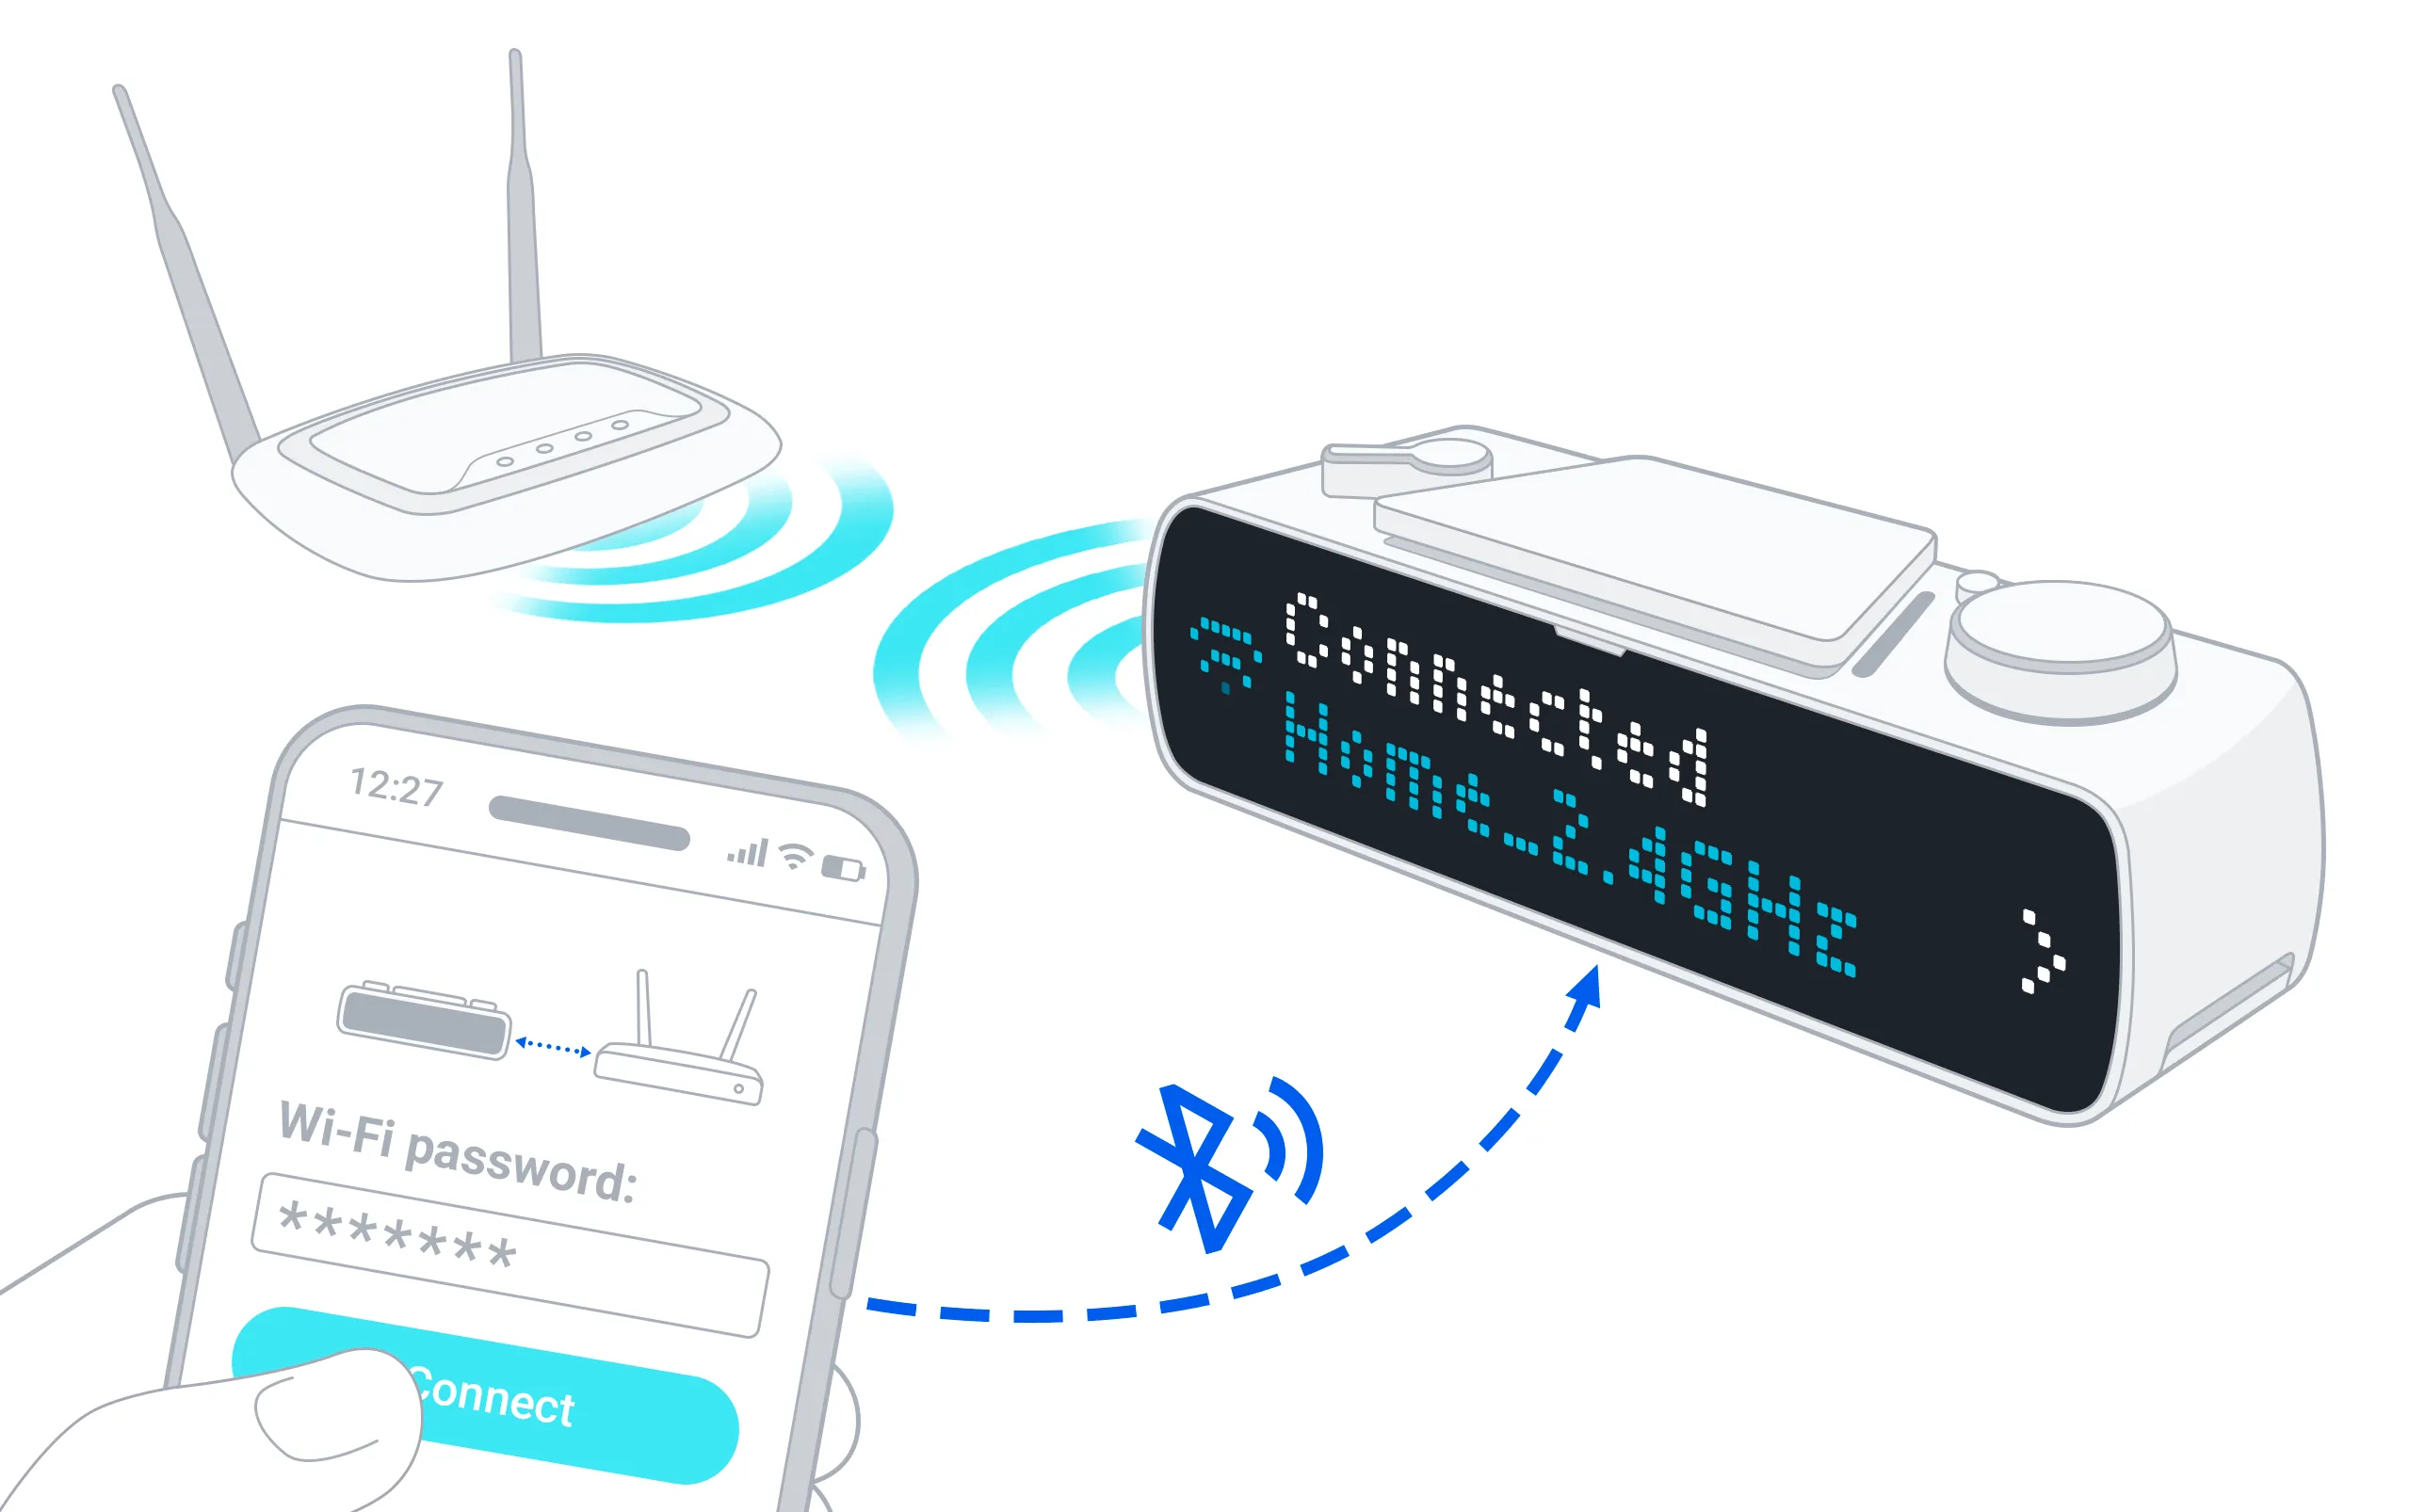
BUSY Bar needs a Wi-Fi connection for firmware updates and remote control. On this page, you’ll learn how to connect your BUSY Bar to Wi-Fi and forget a network:
Connect to Wi-Fi using BUSY App on your phone
Before connecting your BUSY Bar to Wi-Fi, make sure:

To connect your BUSY Bar to Wi-Fi:
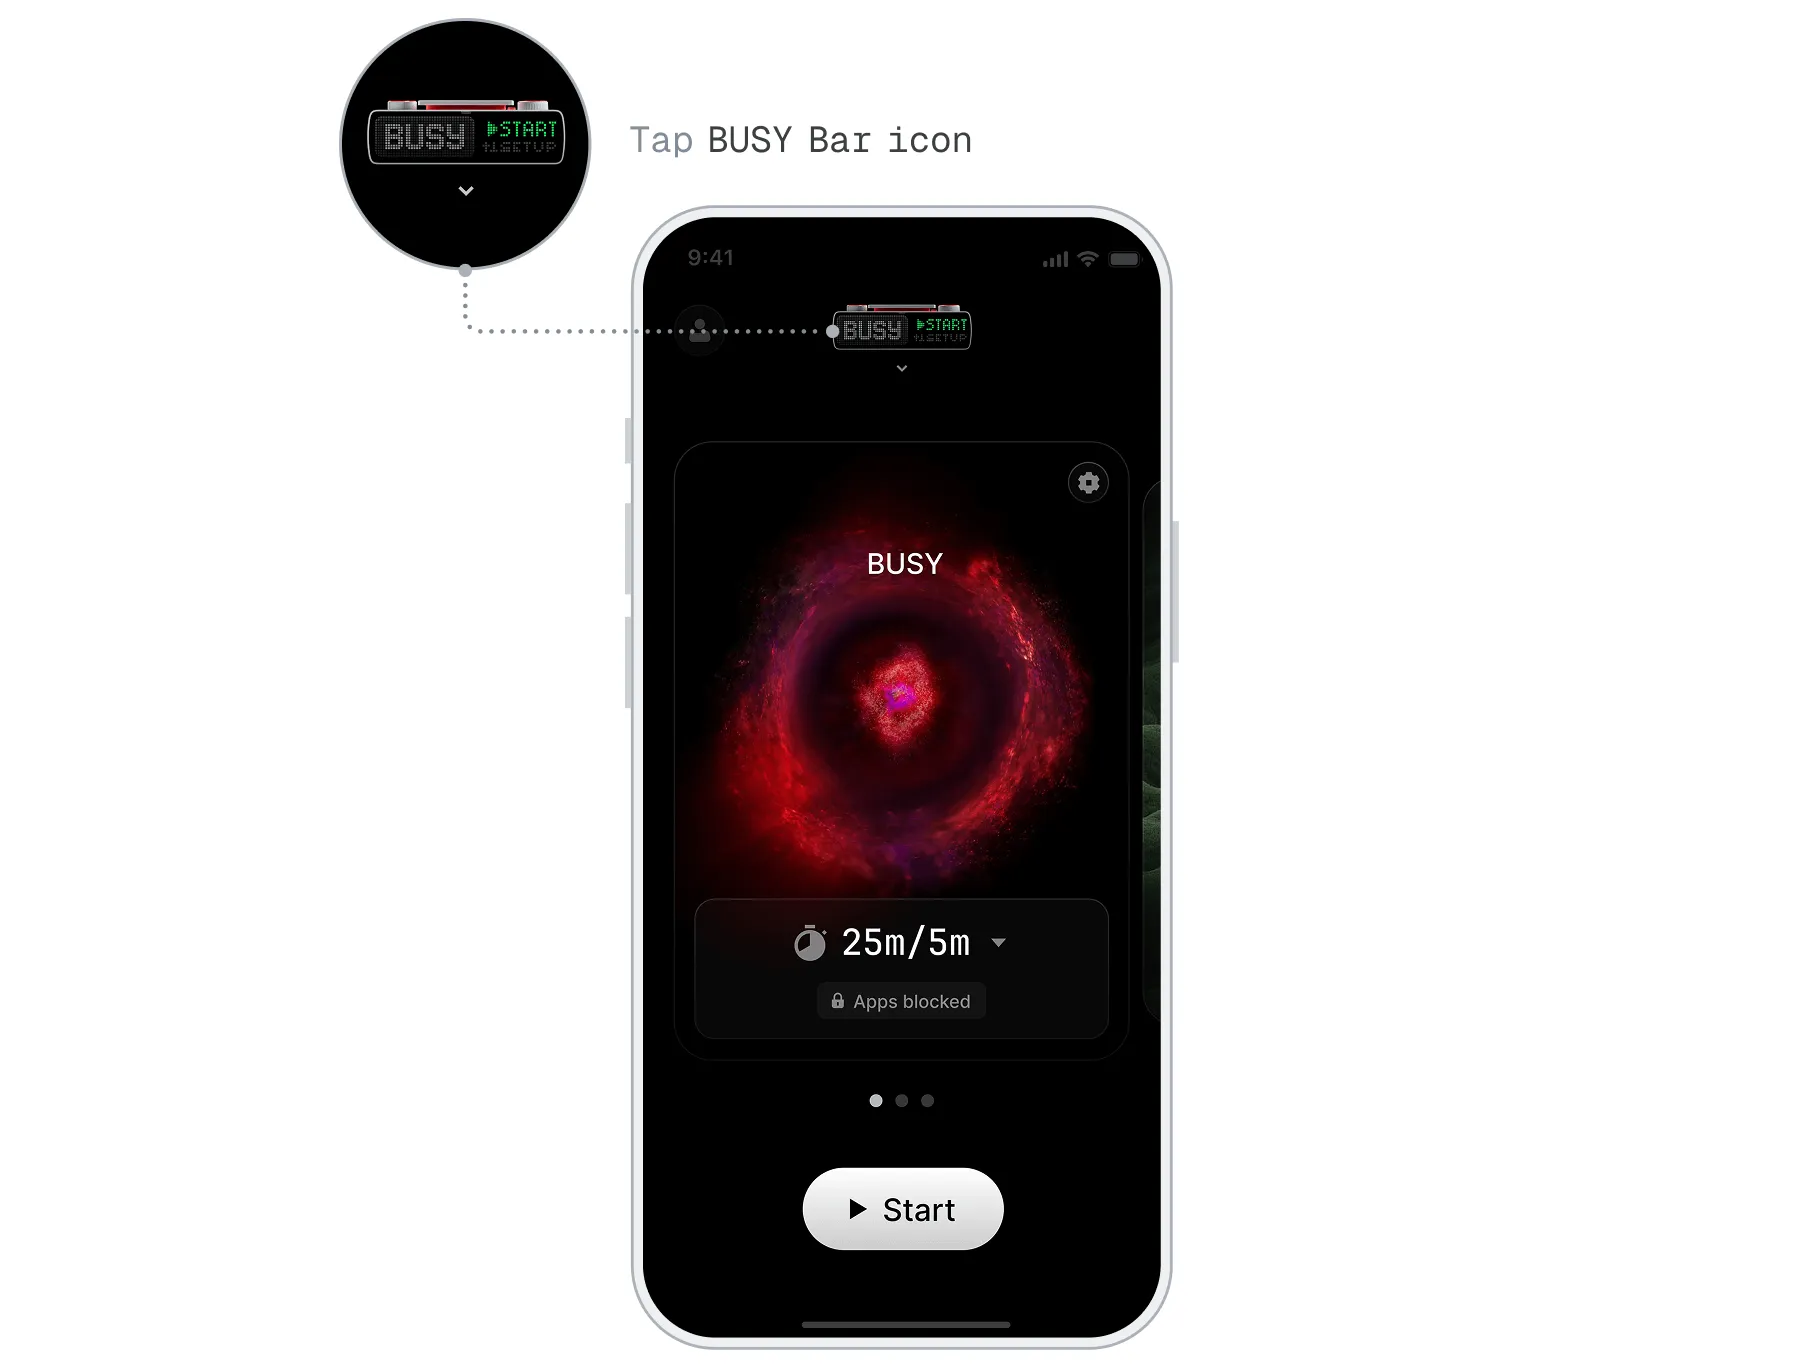
Open  BUSY App and tap the BUSY Bar icon.
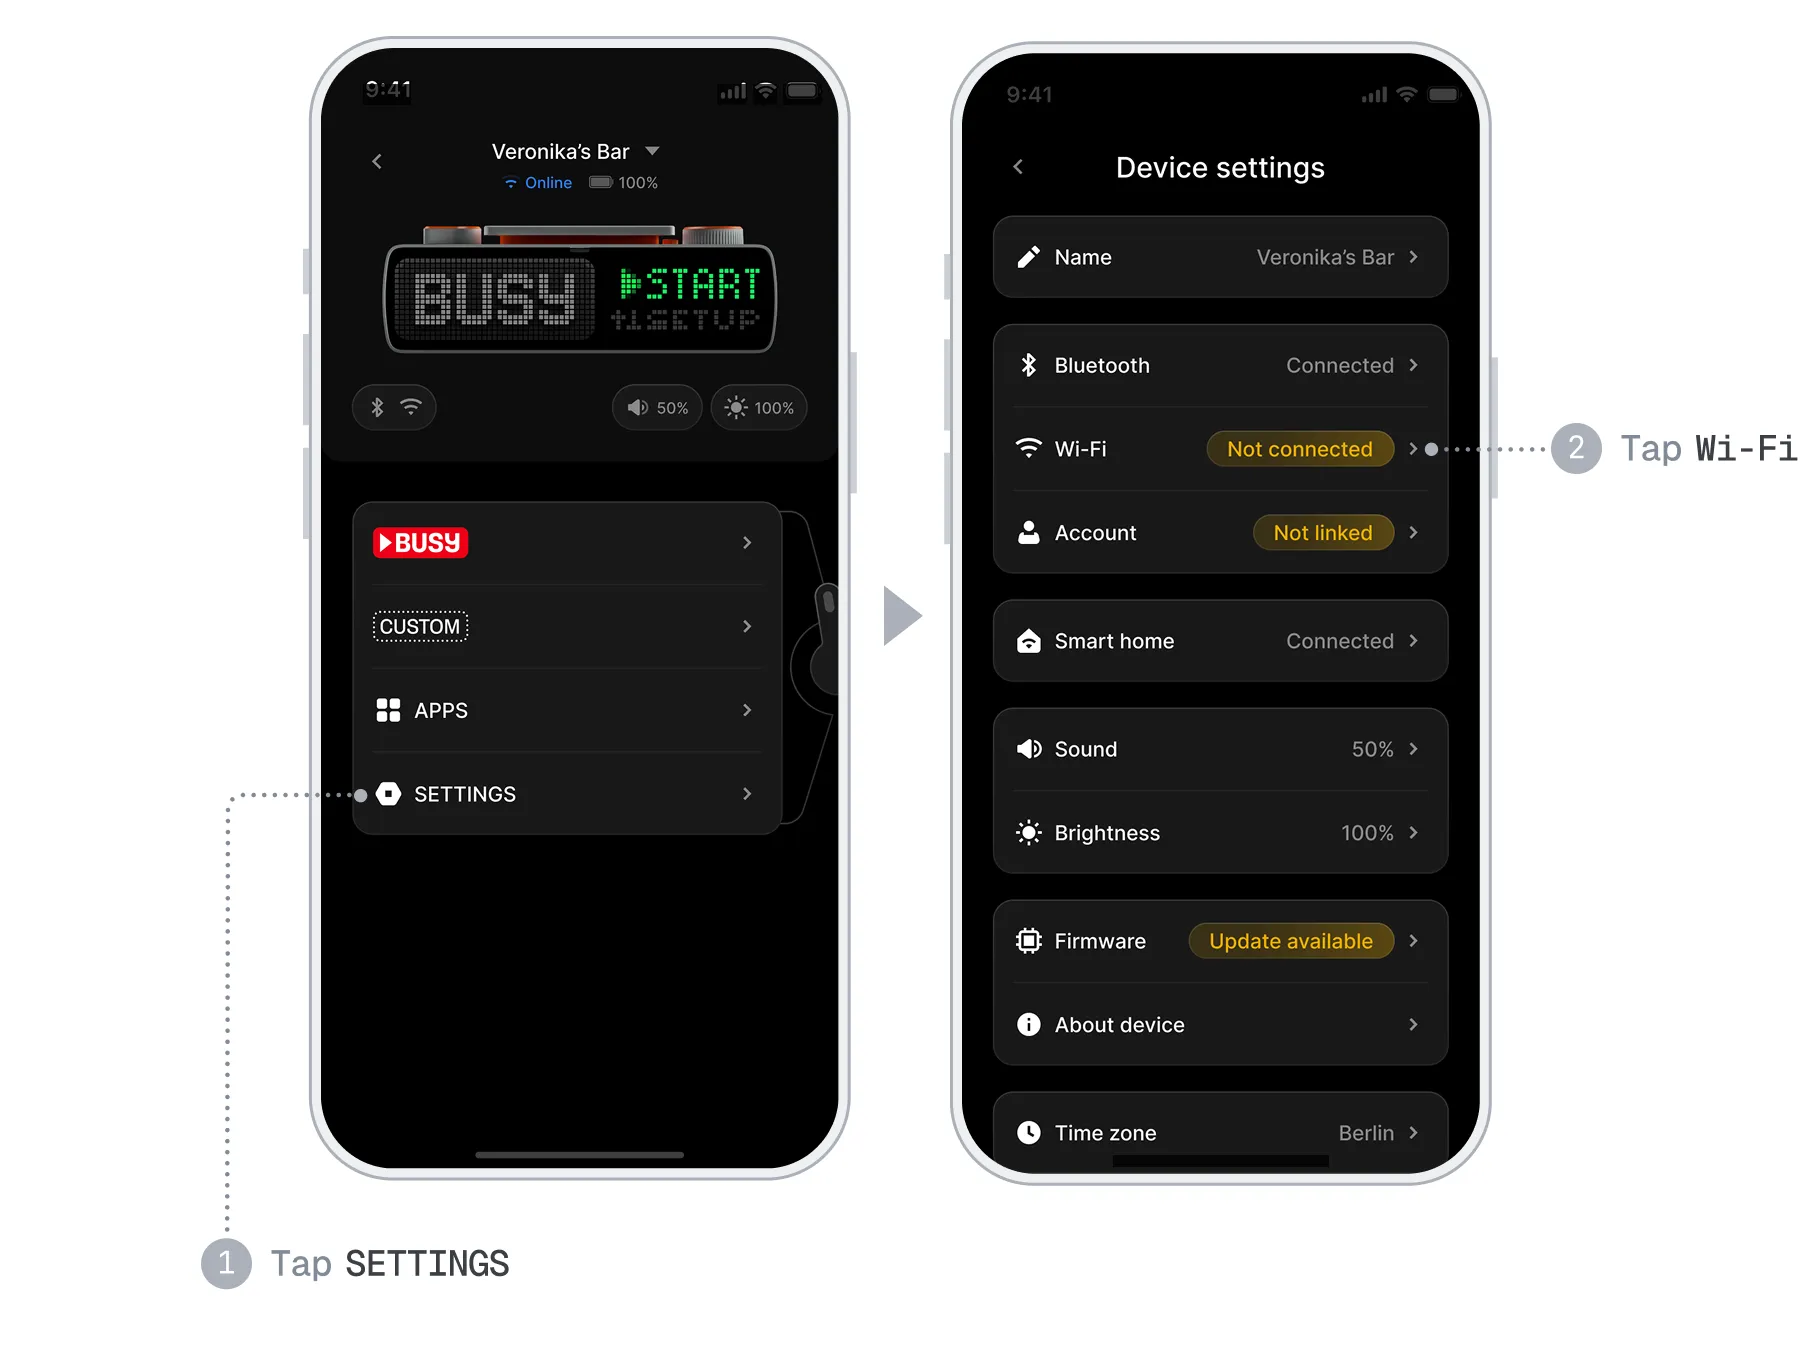
Go to Settings → Wi-Fi → Connect BUSY Bar to Wi-Fi.
Select a network from the list, enter the password, then tap Connect.
 This step takes time
Scanning for networks and connecting may take up to 2 minutes. This is normal — don't restart your BUSY Bar.
Connect to a hidden Wi-Fi network using your phone
Some wireless networks are hidden and don’t appear in the list of Wi-Fi networks. In this case, you can add your Wi-Fi manually.
To connect your BUSY Bar to a hidden Wi-Fi network:
Open BUSY App and tap the BUSY Bar icon.
Go to Settings → Wi-Fi → Connect BUSY Bar to Wi-Fi.
Tap the plus + button next to Add hidden network.
Enter the name of your Wi-Fi network.
Select a security protocol — typically WPA2 or WPA3.
Enter the password, then tap Connect.
This step takes time
Connecting may take up to 2 minutes. This is normal — don't restart your BUSY Bar.
Forget a Wi-Fi network using BUSY App on your phone
Open BUSY App and tap the BUSY Bar icon.
Go to Connection status → Wi-Fi.
Tap Forget this device.
Connect to Wi-Fi using the web interface on your PC
This method works on Windows, macOS, and Linux. You’ll connect your BUSY Bar to your PC using a USB cable and enter your Wi-Fi network credentials through the web interface.
To connect your BUSY Bar to Wi-Fi:
Connect your BUSY Bar to the PC via USB.
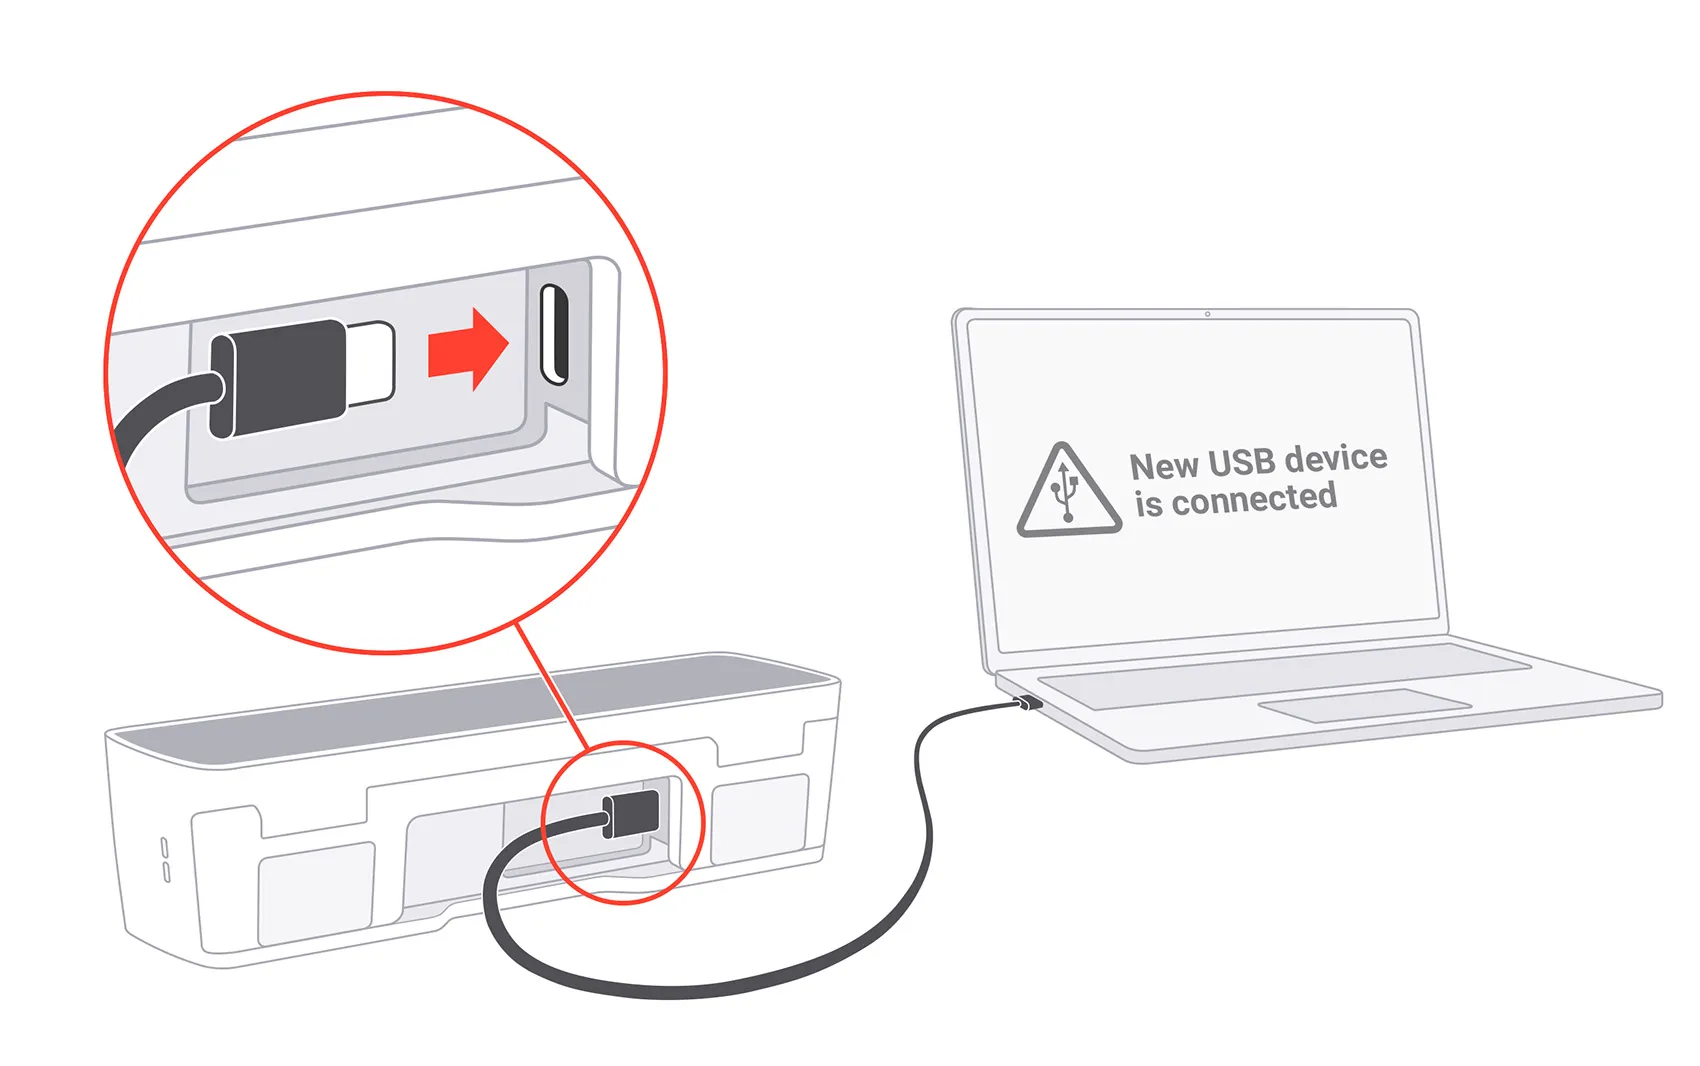
On your PC, open a web browser and go to http://10.0.4.20. The web interface will load automatically.

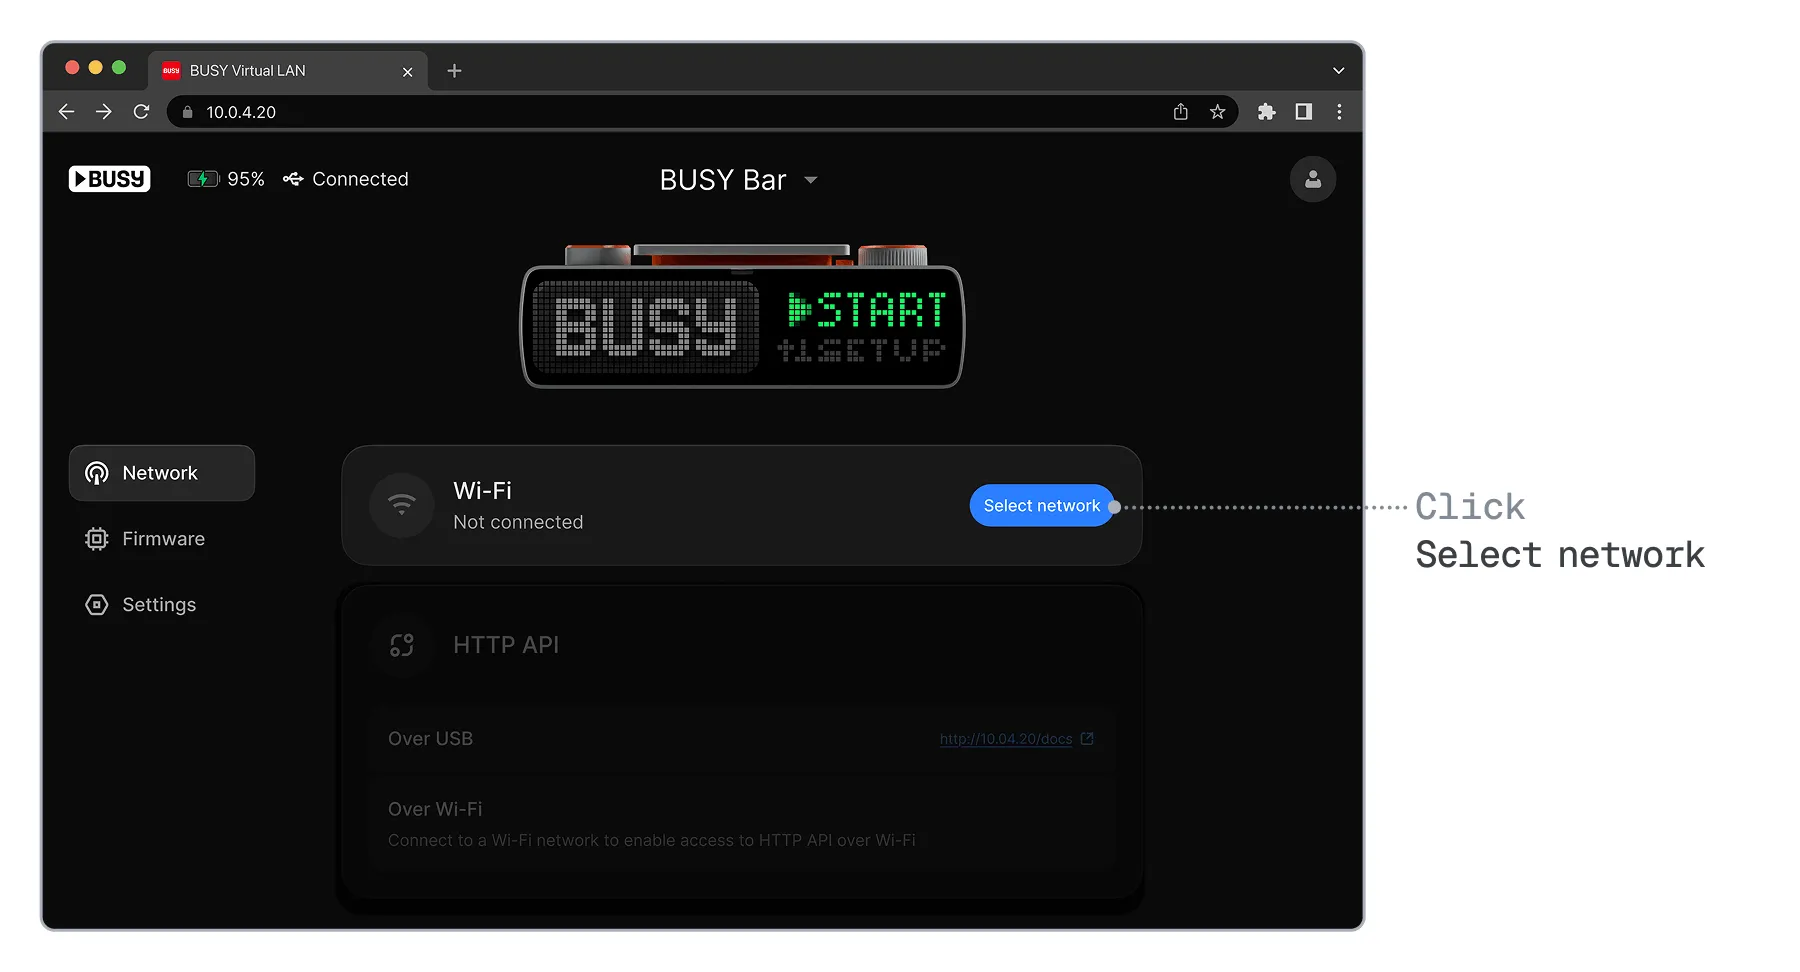
In the web interface, in the  Network tab, click Select network.
Select a network from the list, enter the password, and click Connect.
Connect to a hidden Wi-Fi network using the web interface
Some wireless networks are hidden and don’t appear in the list of Wi-Fi networks. In this case, you can add your Wi-Fi manually:
Connect your BUSY Bar to the PC via USB.
On your PC, open a web browser and go to http://10.0.4.20. The local web interface will load automatically.
In the Network tab, click Select network.
In the window that opens, click the plus + button next to Add hidden network.
Enter the name of your Wi-Fi network.
Select a security protocol — typically WPA2 or WPA3.
Enter the password, then click Connect.
Forget a Wi-Fi network using the web interface
Connect your BUSY Bar to the PC via USB.
On your PC, open a web browser and go to http://10.0.4.20. The local web interface will load automatically.
In the Network tab, click Forget network.
Connect to Wi-Fi using BUSY App on your Mac
In this method, you do all the setup within BUSY App on your Mac to connect your BUSY Bar to Wi-Fi.
To connect your BUSY Bar to Wi-Fi:
Download BUSY App on your Mac from the App Store:
Once the app is installed, it will appear in your Mac’s menu bar.
Click the  BUSY App in the menu bar, then click Connect.
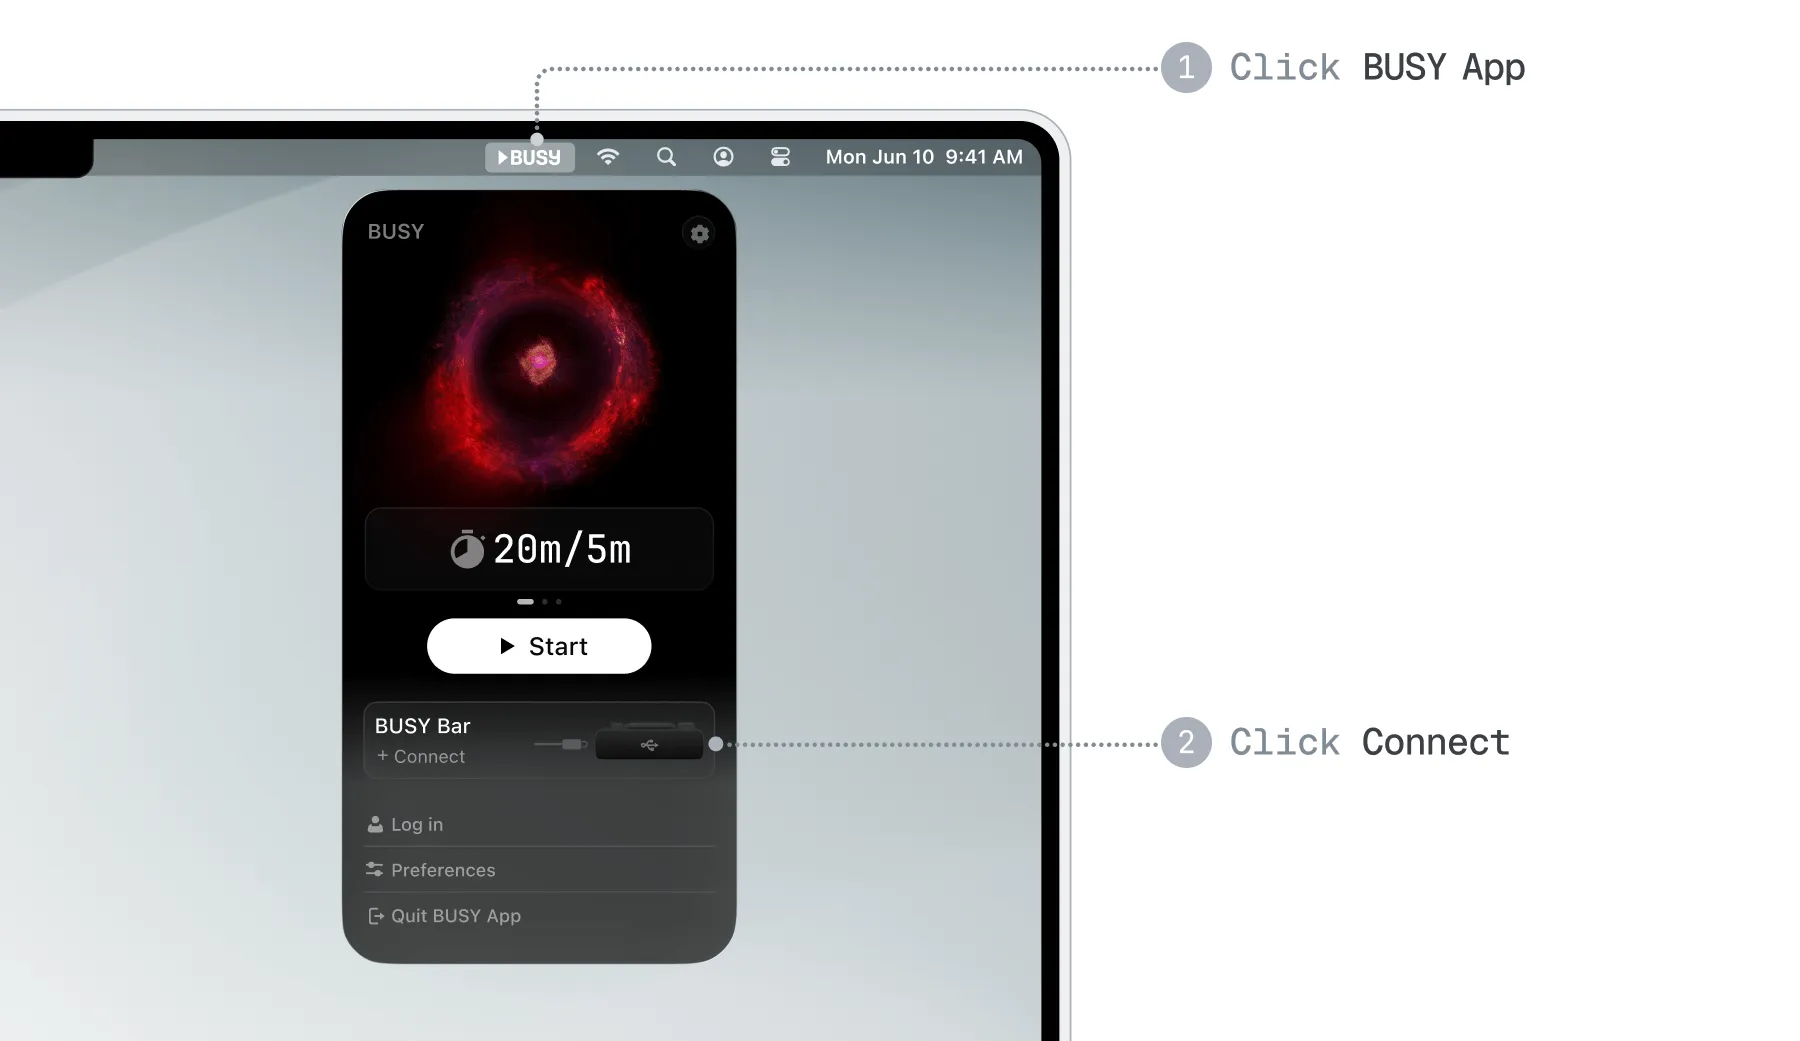
Alternatively, you can click the BUSY App icon in the Dock.
Connect your BUSY Bar to the PC via USB.
You’ll see a window asking for your permission to connect the BUSY Bar — click Connect.
 Important
Don’t unplug your BUSY Bar while it’s connecting to your Mac!
Once your BUSY Bar is connected, go to Connect to Wi-Fi network → Select network.
Select a network from the list, enter the password, and click Connect.
Forget a Wi-Fi network using BUSY App on your Mac
Connect your BUSY Bar to your Mac via USB.
You’ll see a window asking for your permission to connect the BUSY Bar — click Connect.
Open BUSY App on your Mac.
Click the BUSY App in the menu bar, then click BUSY Bar.
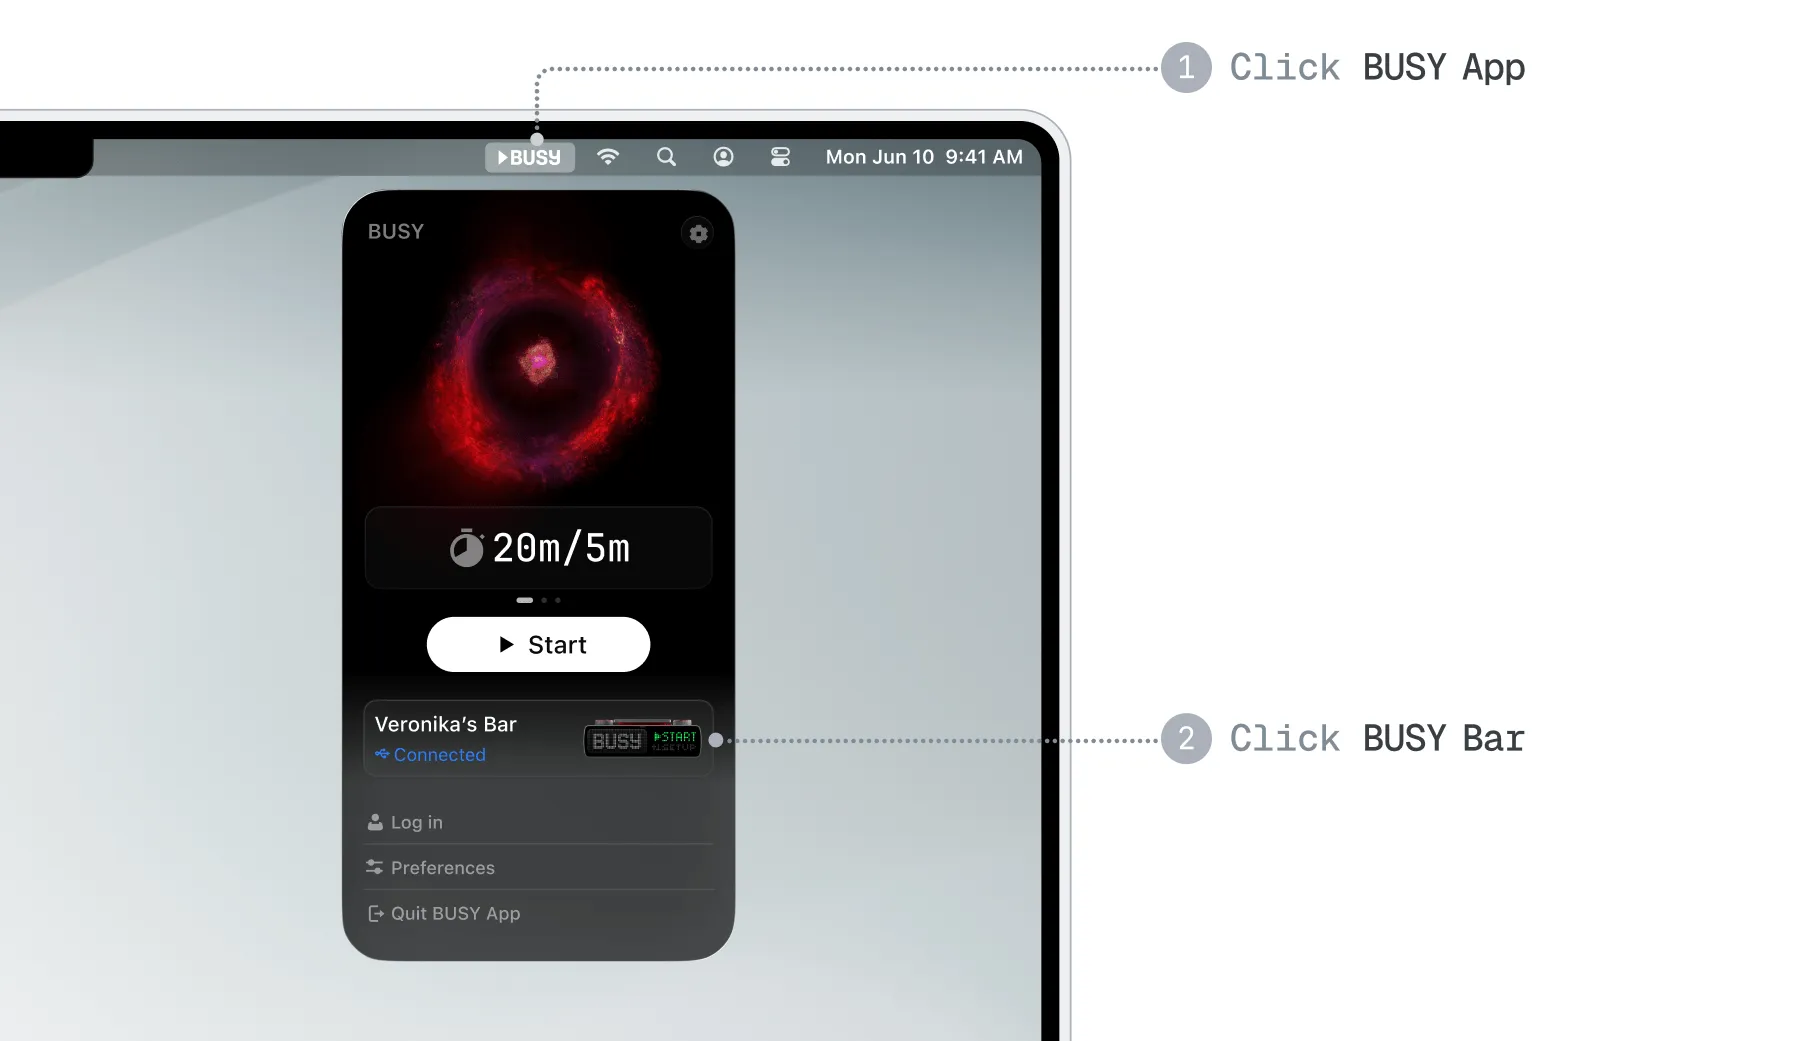
In the  BUSY Bar tab, click Wi-Fi, then click Forget network.