Set up via PC
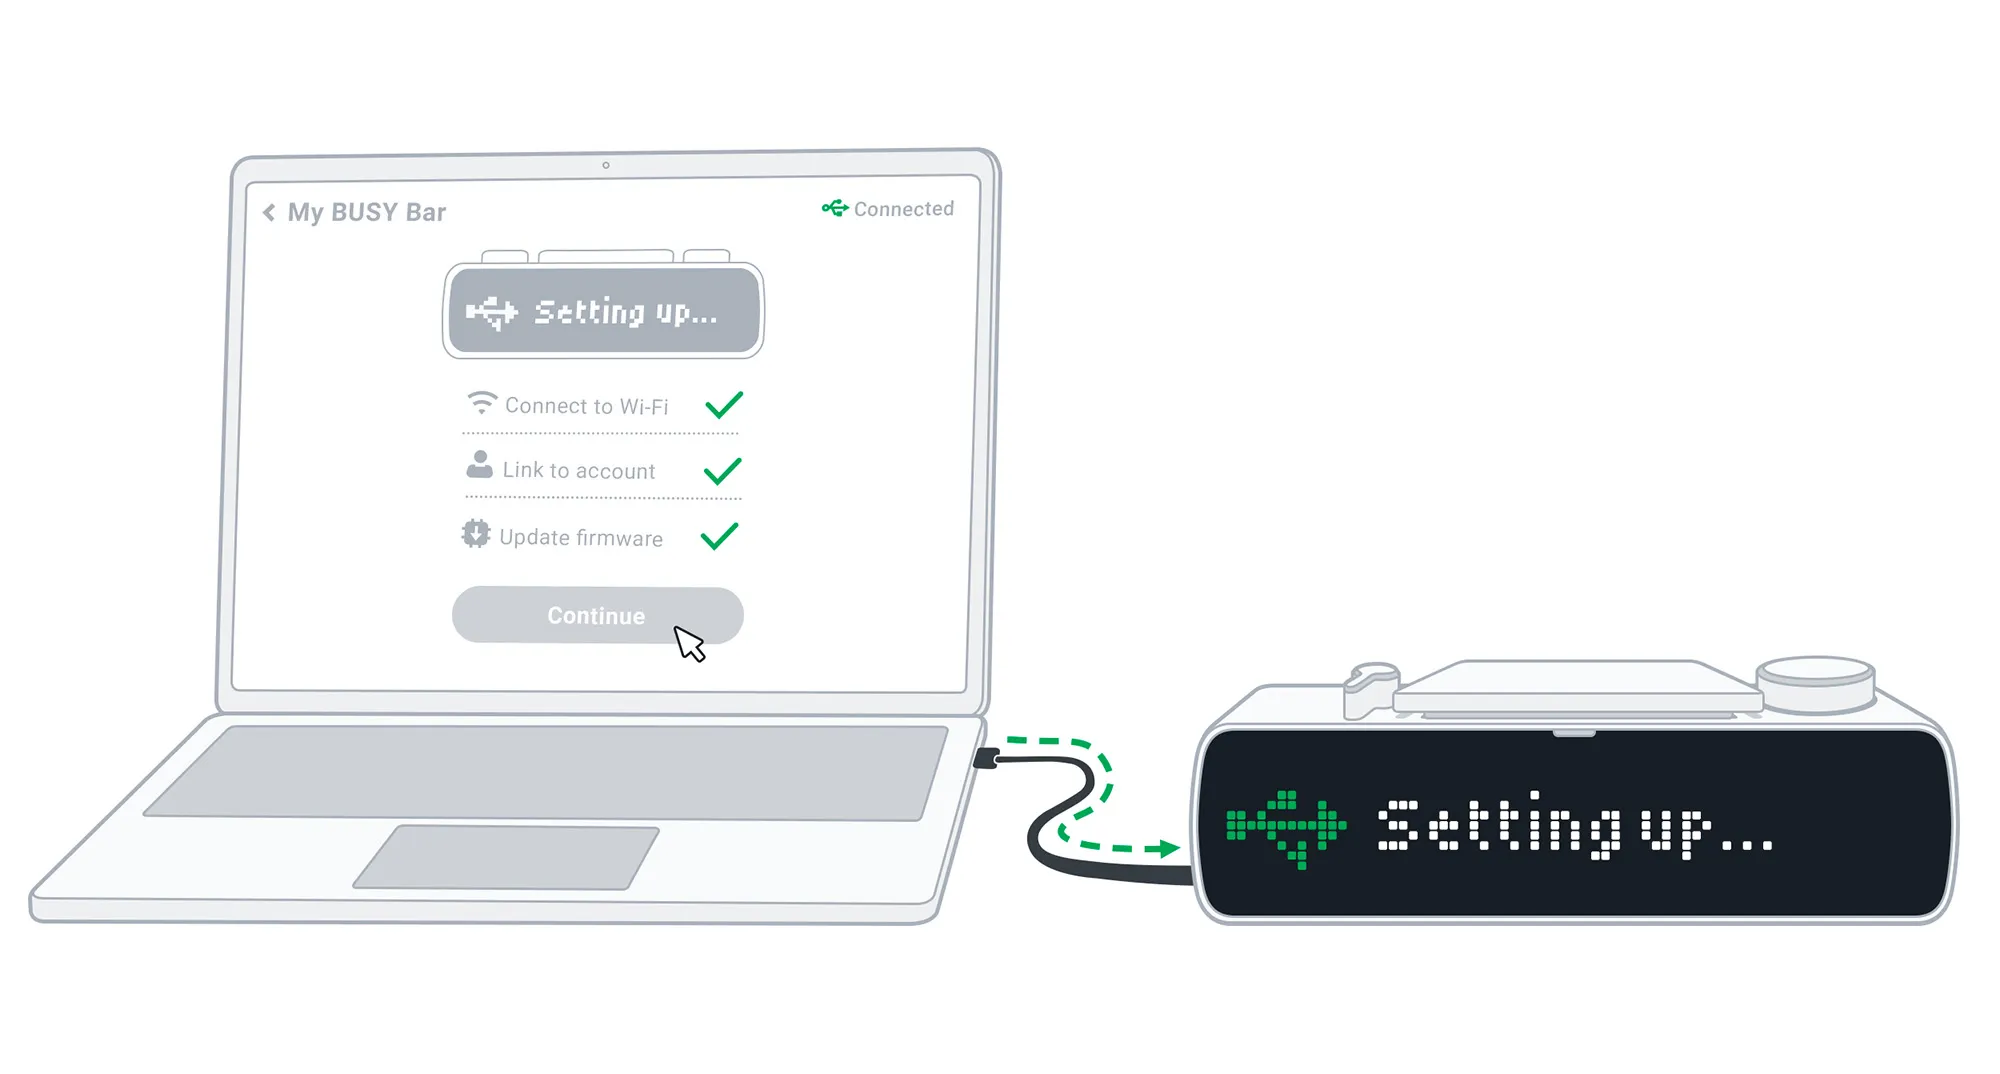
To get the most out of your BUSY Bar, complete the setup: connect it to Wi-Fi, link it to your BUSY account, and update its firmware. Setting up on a computer takes around 5 minutes.
On this page, you’ll learn how to set up your BUSY Bar via PC:
Set up using the local web interface
You can open the local web interface in any browser on your computer — it works on Windows, macOS, and Linux. A USB connection is all that’s required.
Step 1: Connect BUSY Bar to Wi-Fi
Connect your BUSY Bar to the PC via USB.
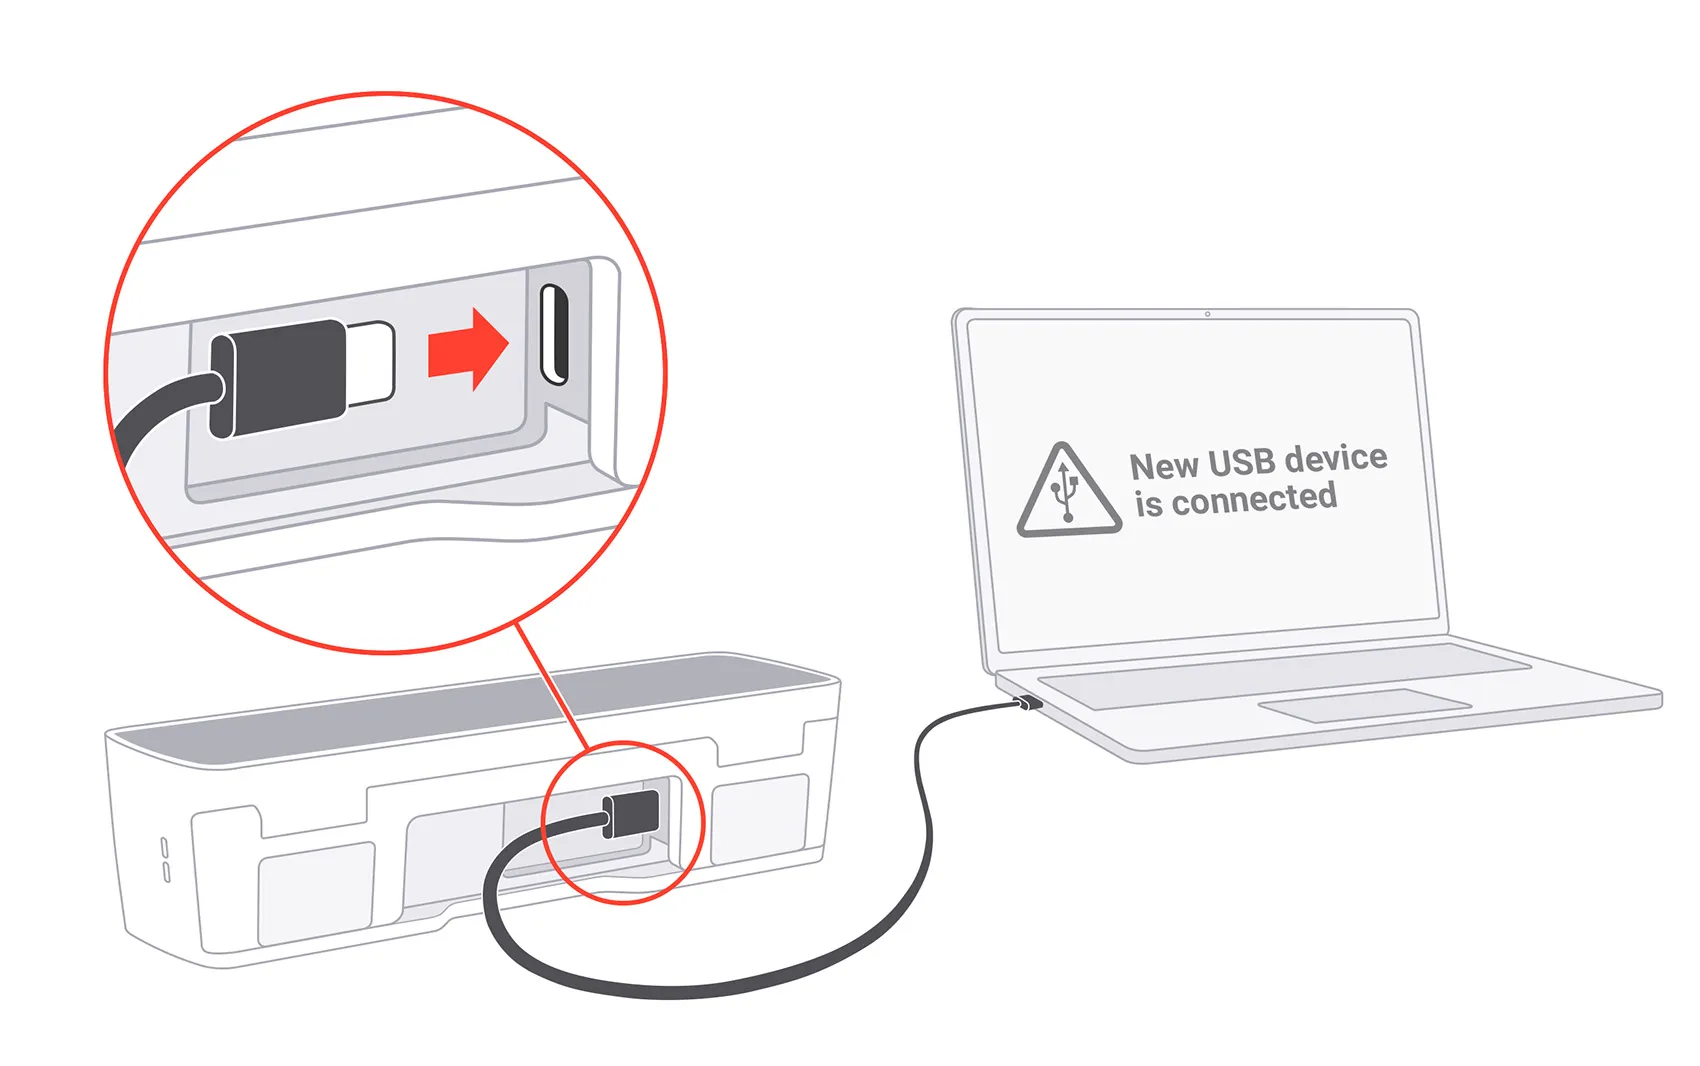
On your PC, open a web browser and go to http://10.0.4.20. The local web interface will load automatically.

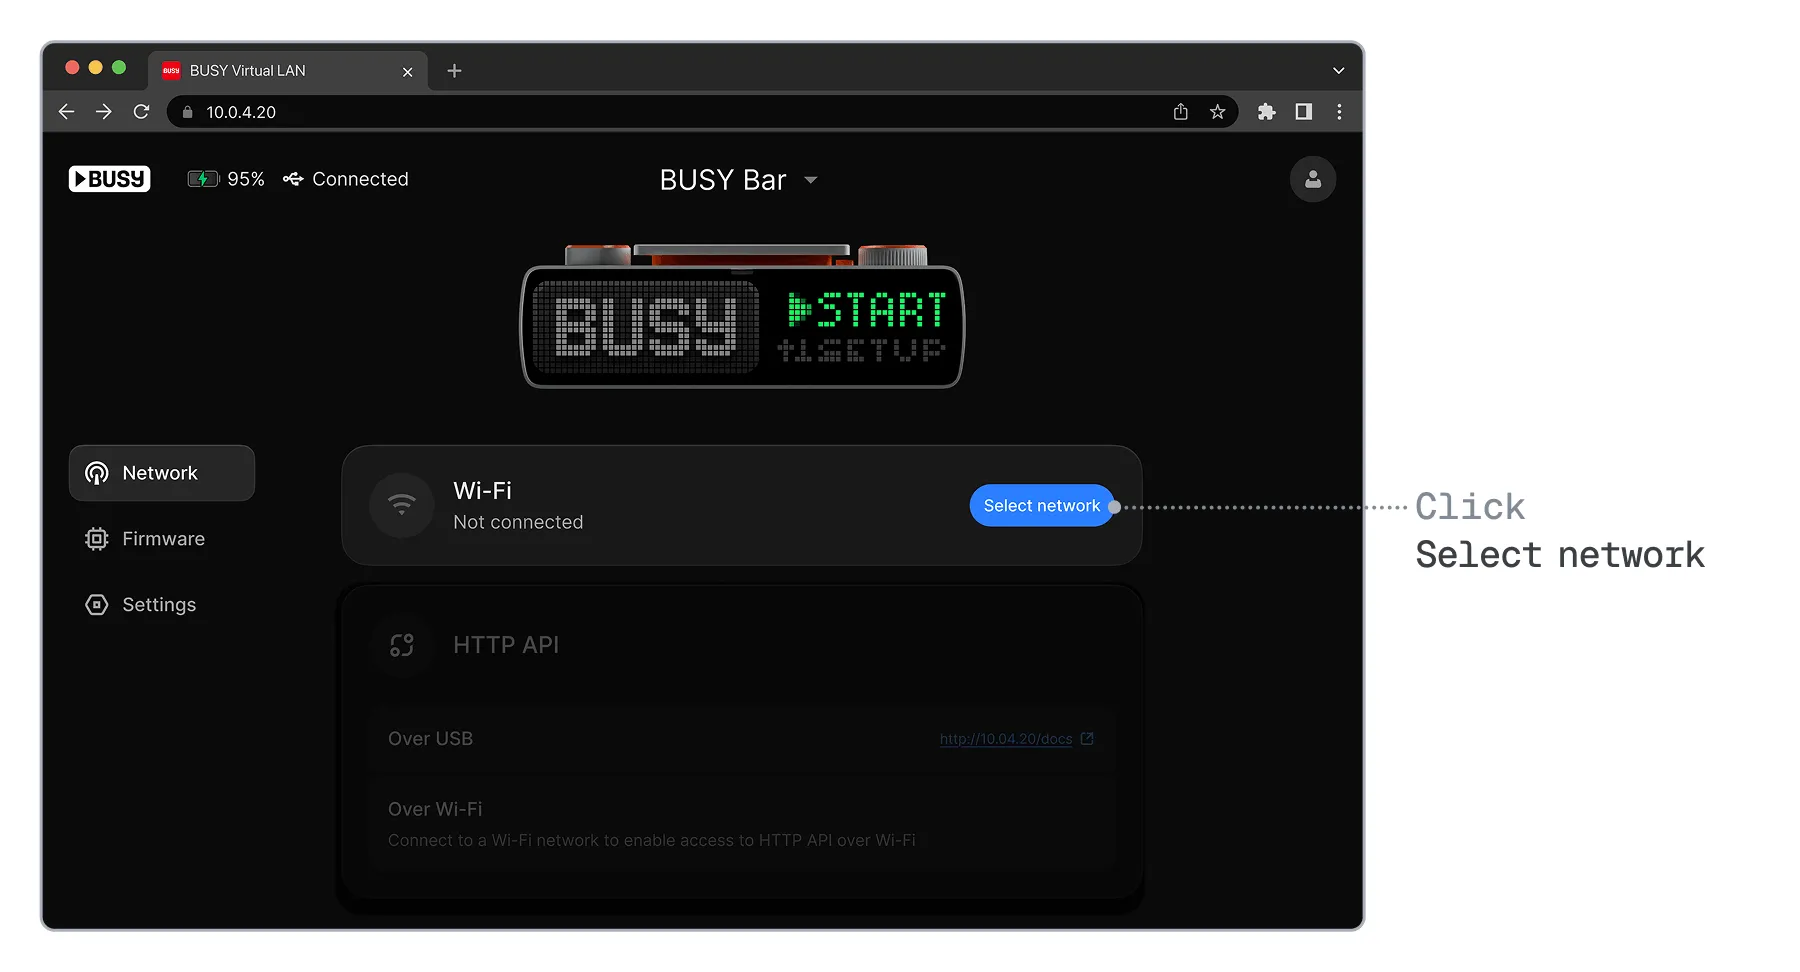
In the web interface, in the  Network tab, click Select network.
Select a network from the list, enter the password, and click Connect.
Step 2: Update BUSY Bar firmware
Before updating the firmware, make sure:

To update the BUSY Bar firmware:
Go to the  Firmware tab, click Update.
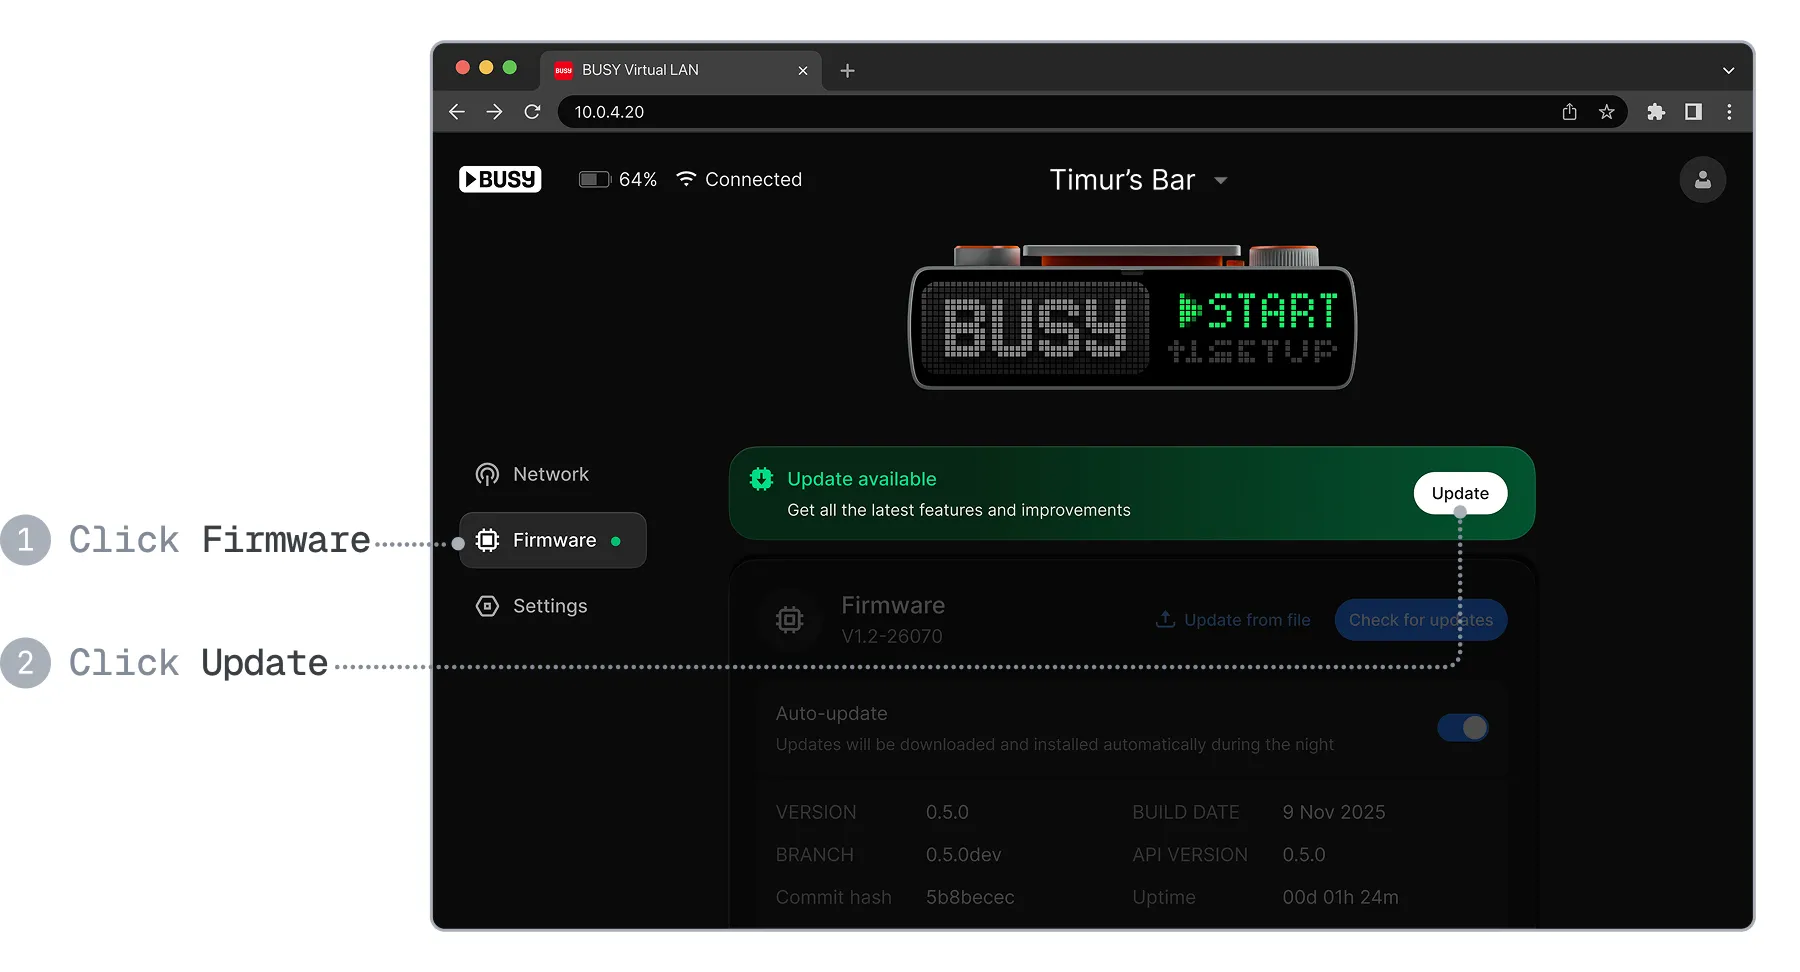
In the window that opens, click Start update — the update will take around 3 minutes.
Step 3: Link BUSY Bar to your BUSY account
In the web interface, click the  Account icon in the top-right corner.
Click Log in to BUSY account.
Log in to your BUSY account with your email address, or continue with Google, Apple, or Microsoft.
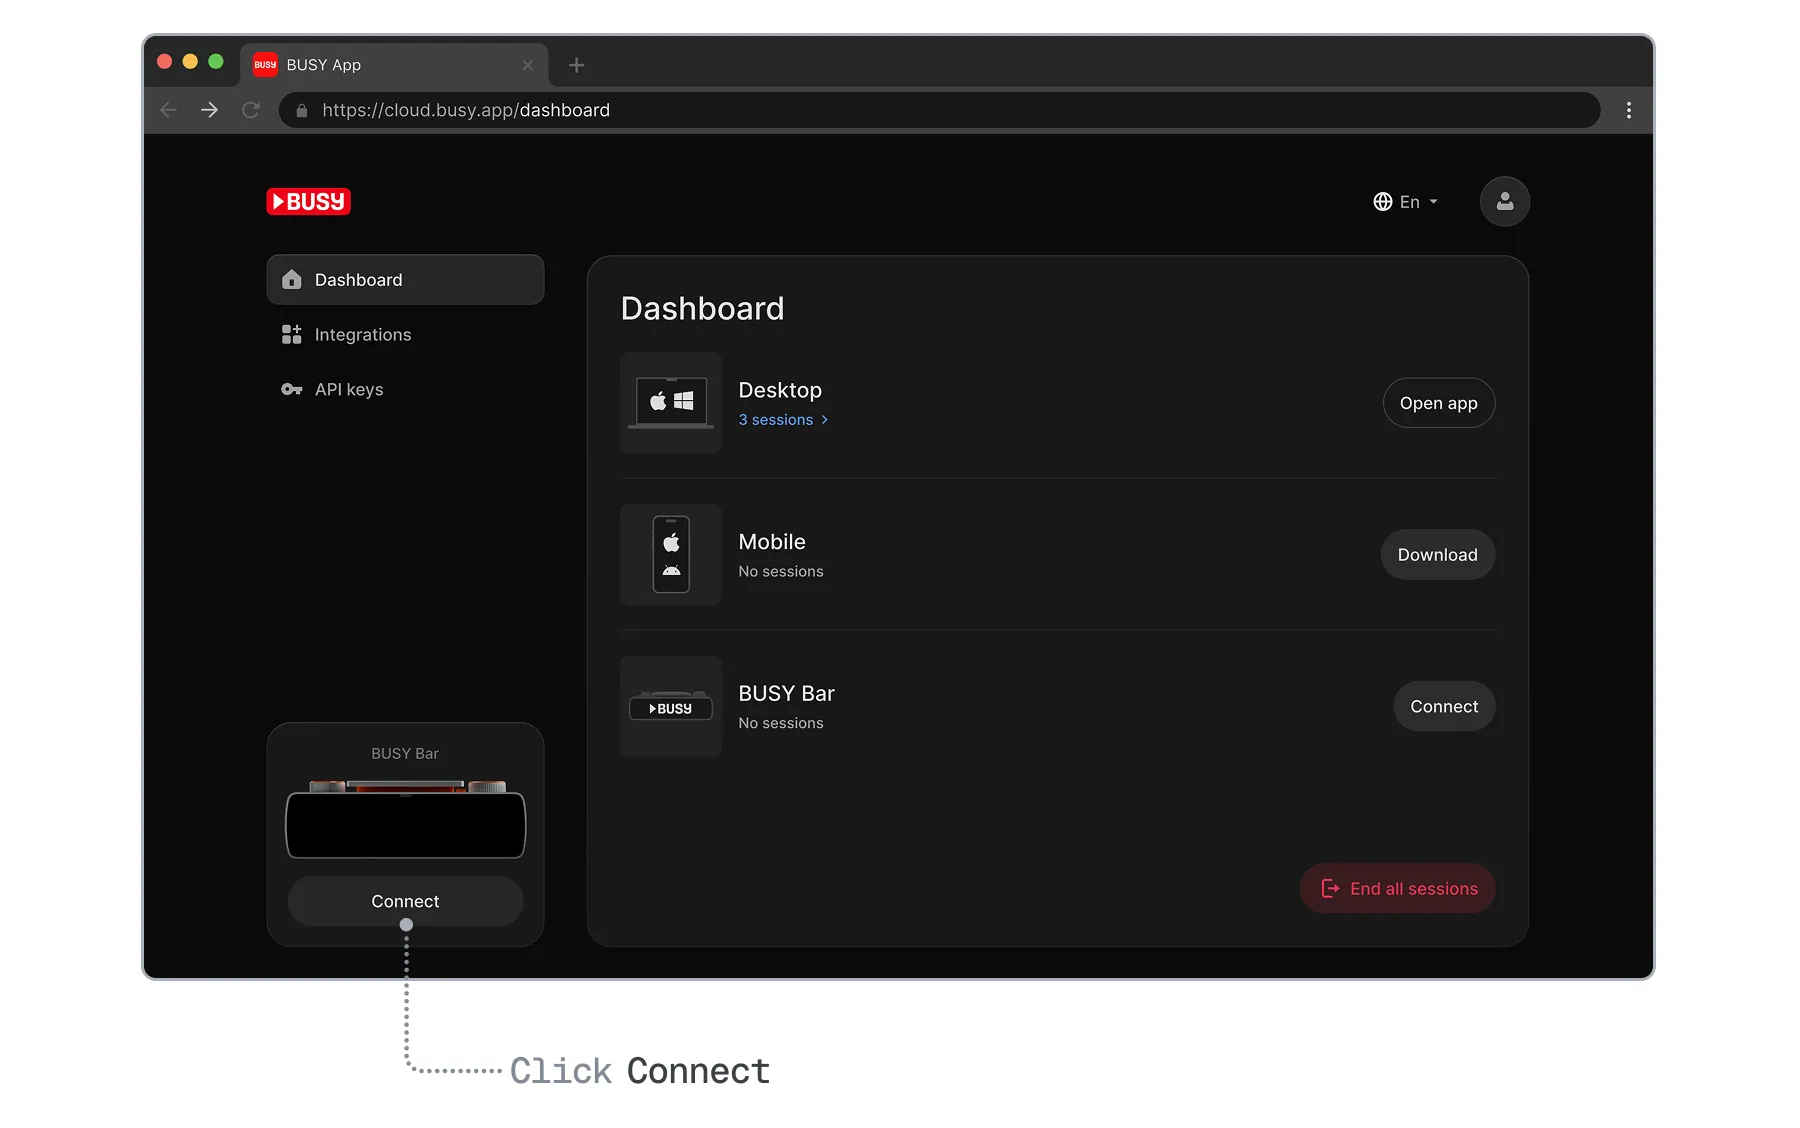
In your BUSY account, click Connect under the BUSY Bar screen.
On your BUSY Bar, go to Settings → Account → Get pairing code — BUSY Bar will display a pairing code.
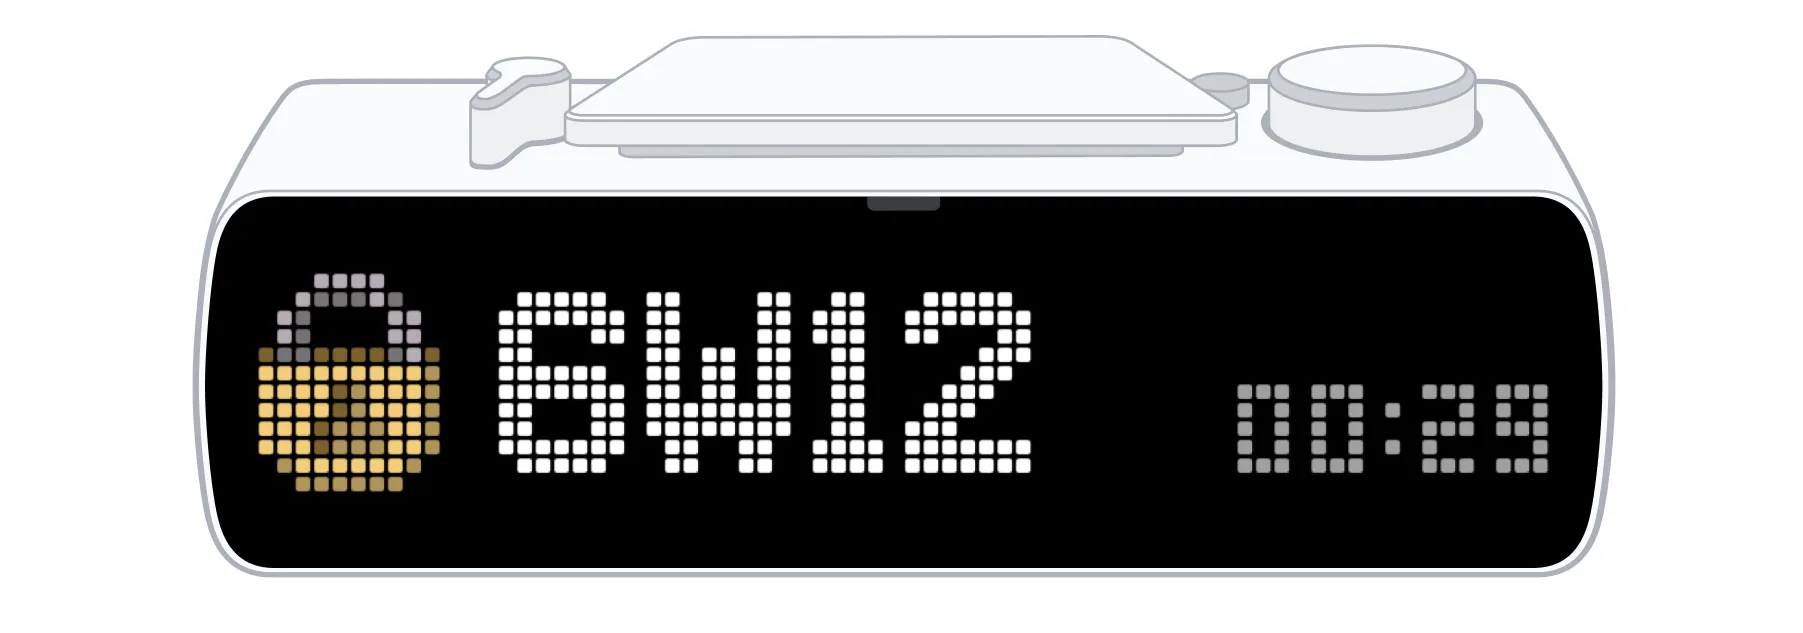
In your BUSY account, enter the code and click Connect.
 Your BUSY Bar setup is all done and ready to use!
If you got here from the First start guide, you can click here to head back.
Set up using BUSY App (Mac only)
You can complete the first-time setup in BUSY App on your Mac — just follow the steps below.
Step 1: Download BUSY App on your Mac
Step 2: Connect your BUSY Bar to BUSY App
Click the  BUSY App in the menu bar, then click Connect.
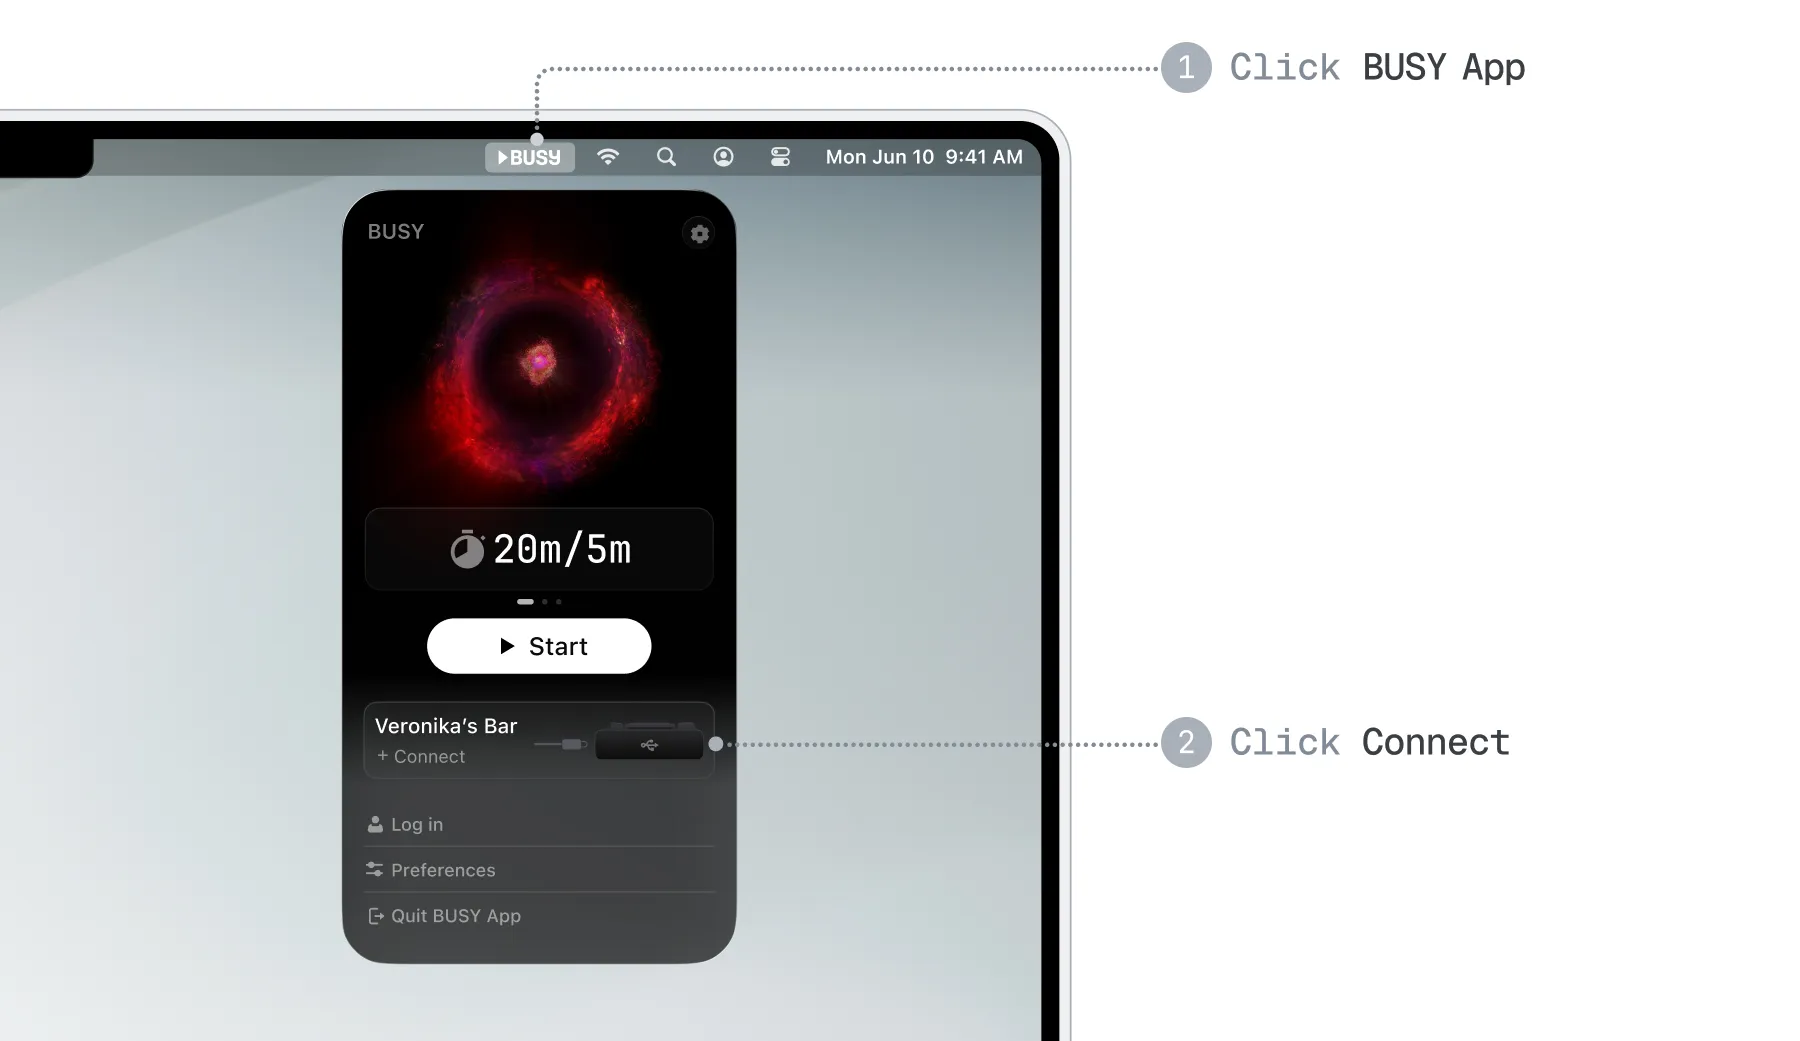
Alternatively, you can click the  BUSY App icon in the Dock.
Connect your BUSY Bar to the PC via USB.
You’ll see a window asking for your permission to connect the BUSY Bar — click Connect.
 Important
Don’t unplug your BUSY Bar while it’s connecting to your Mac!
Step 3: Update BUSY Bar firmware
Before updating the firmware, make sure:
To update the BUSY Bar firmware:
Once your BUSY Bar is connected, go to Update your BUSY Bar.
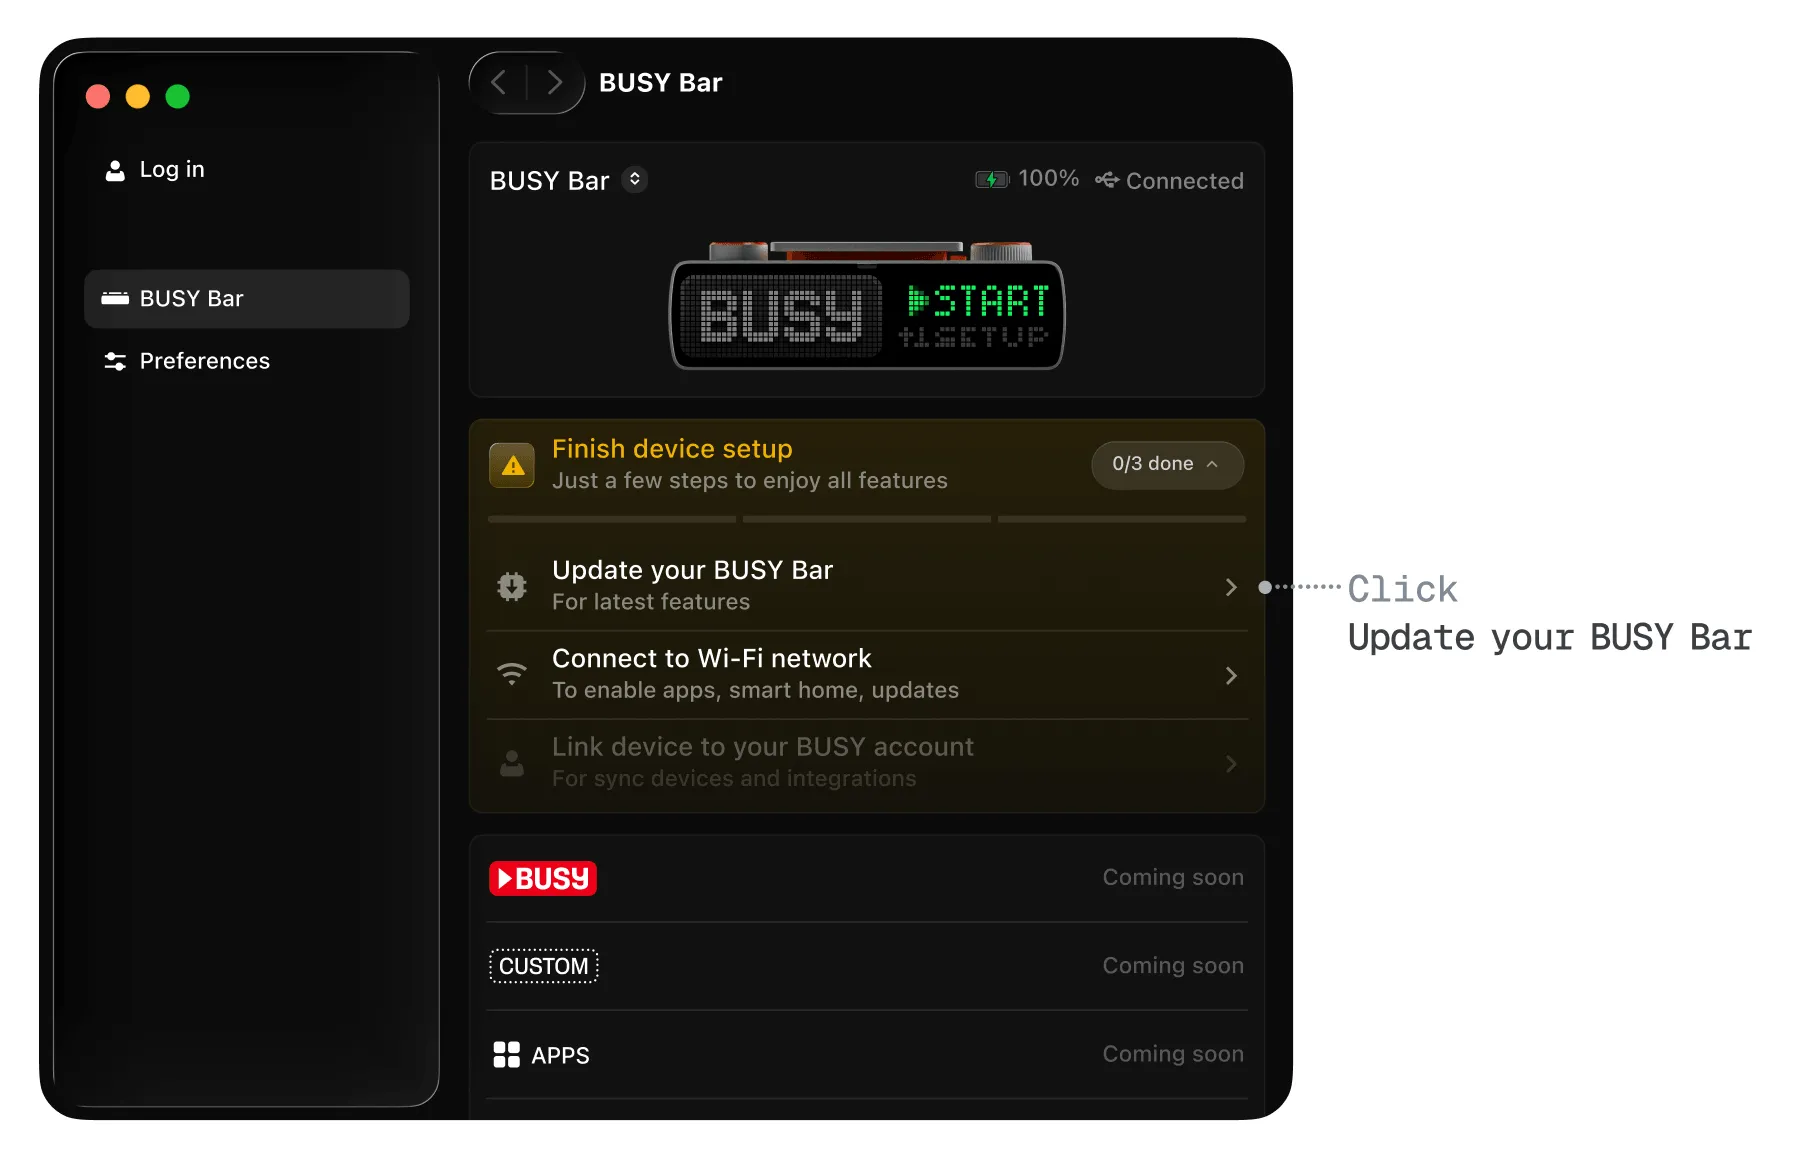
In the window that opens, click Update — the update will take around 3 minutes.
Step 4: Connect BUSY Bar to Wi-Fi
Go to Connect to Wi-Fi network → Select network.
Select a network from the list, enter the password, and click Connect.
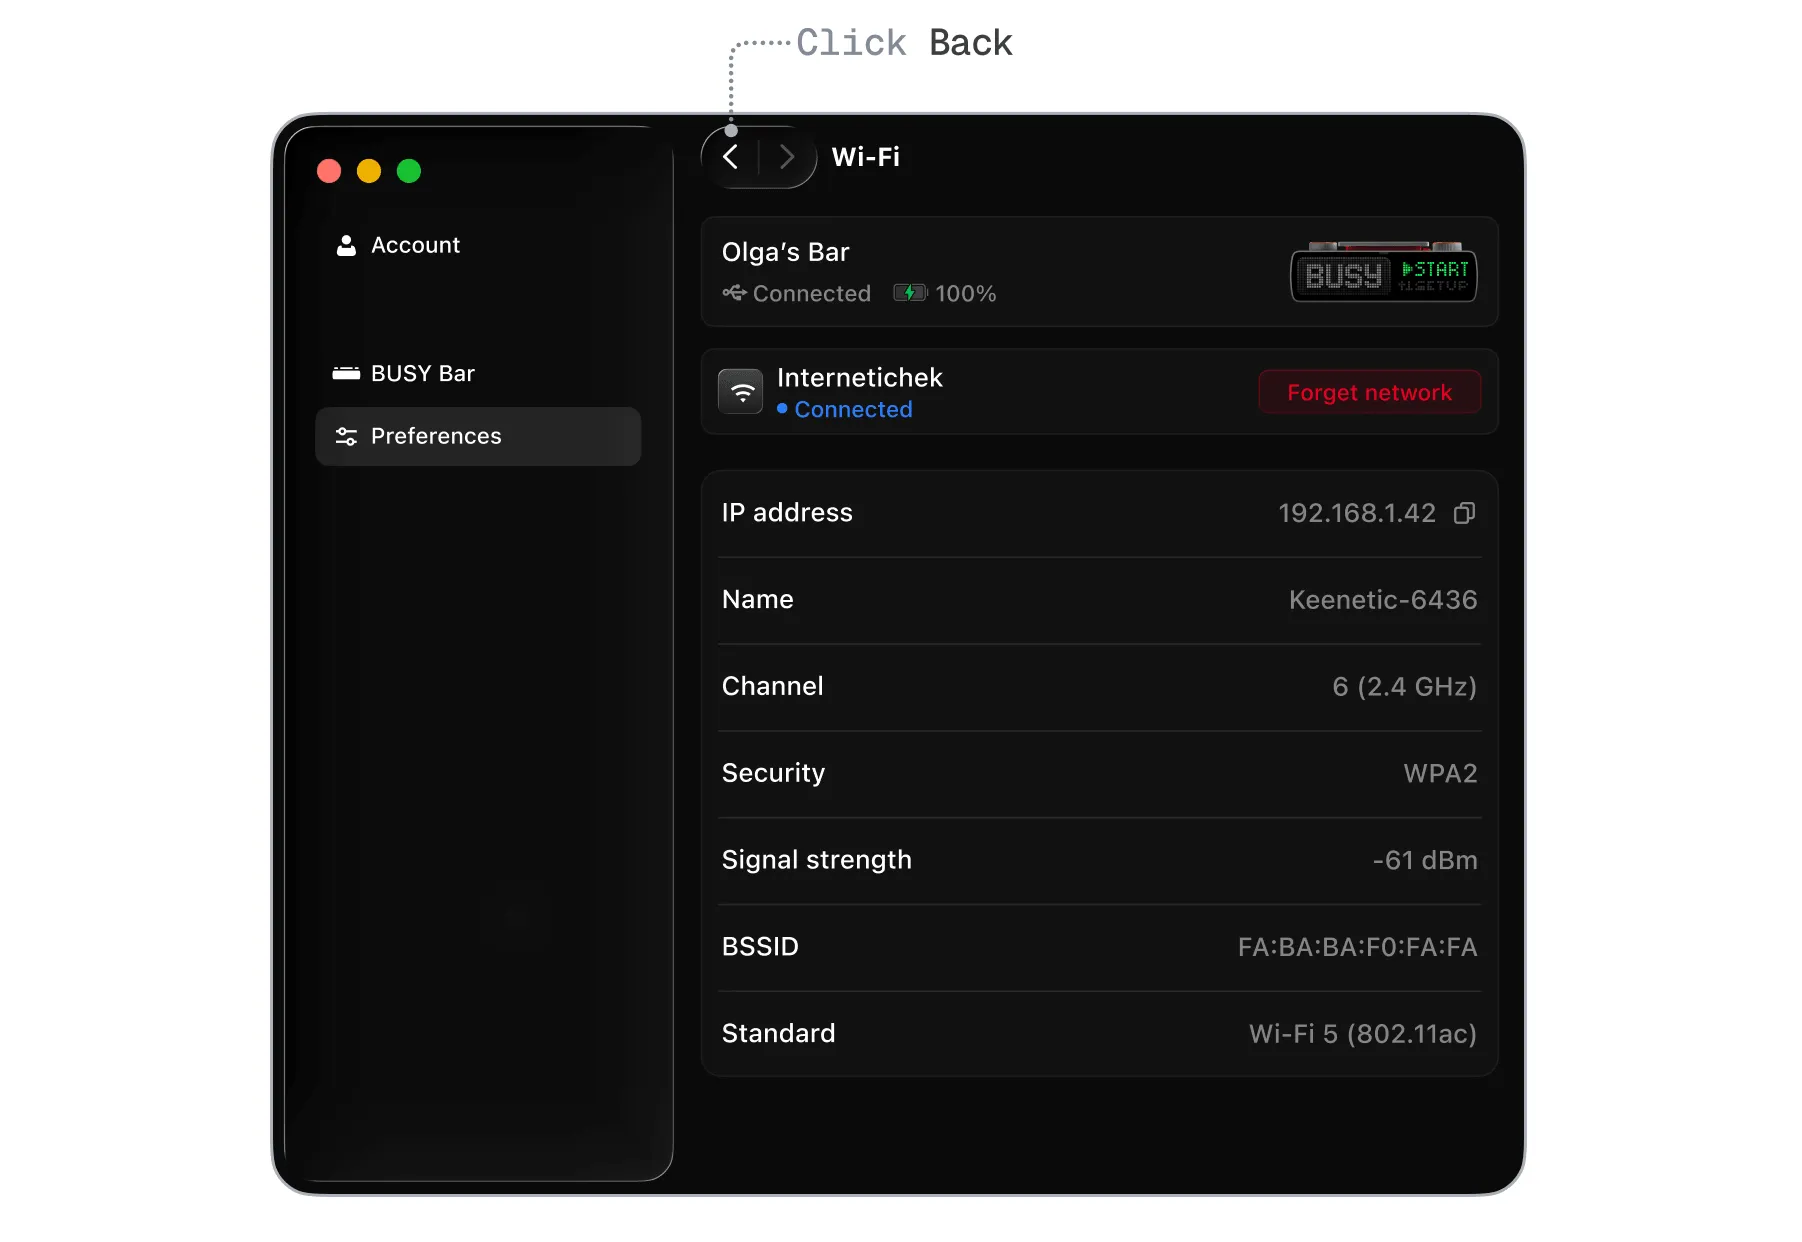
Once your BUSY Bar is connected to Wi-Fi, click  Back.
Back.
Step 5: Link BUSY Bar to your BUSY account
Go to Link device to your BUSY account → Log in — you’ll be redirected to the BUSY account page.
Log in to your BUSY account with your email address, or continue with Google, Apple, or Microsoft. Once you log in using the desktop app, your BUSY Bar will be automatically added to your BUSY account.
Your BUSY Bar setup is all done and ready to use!
If you got here from the First start guide, you can click here to head back.