First start
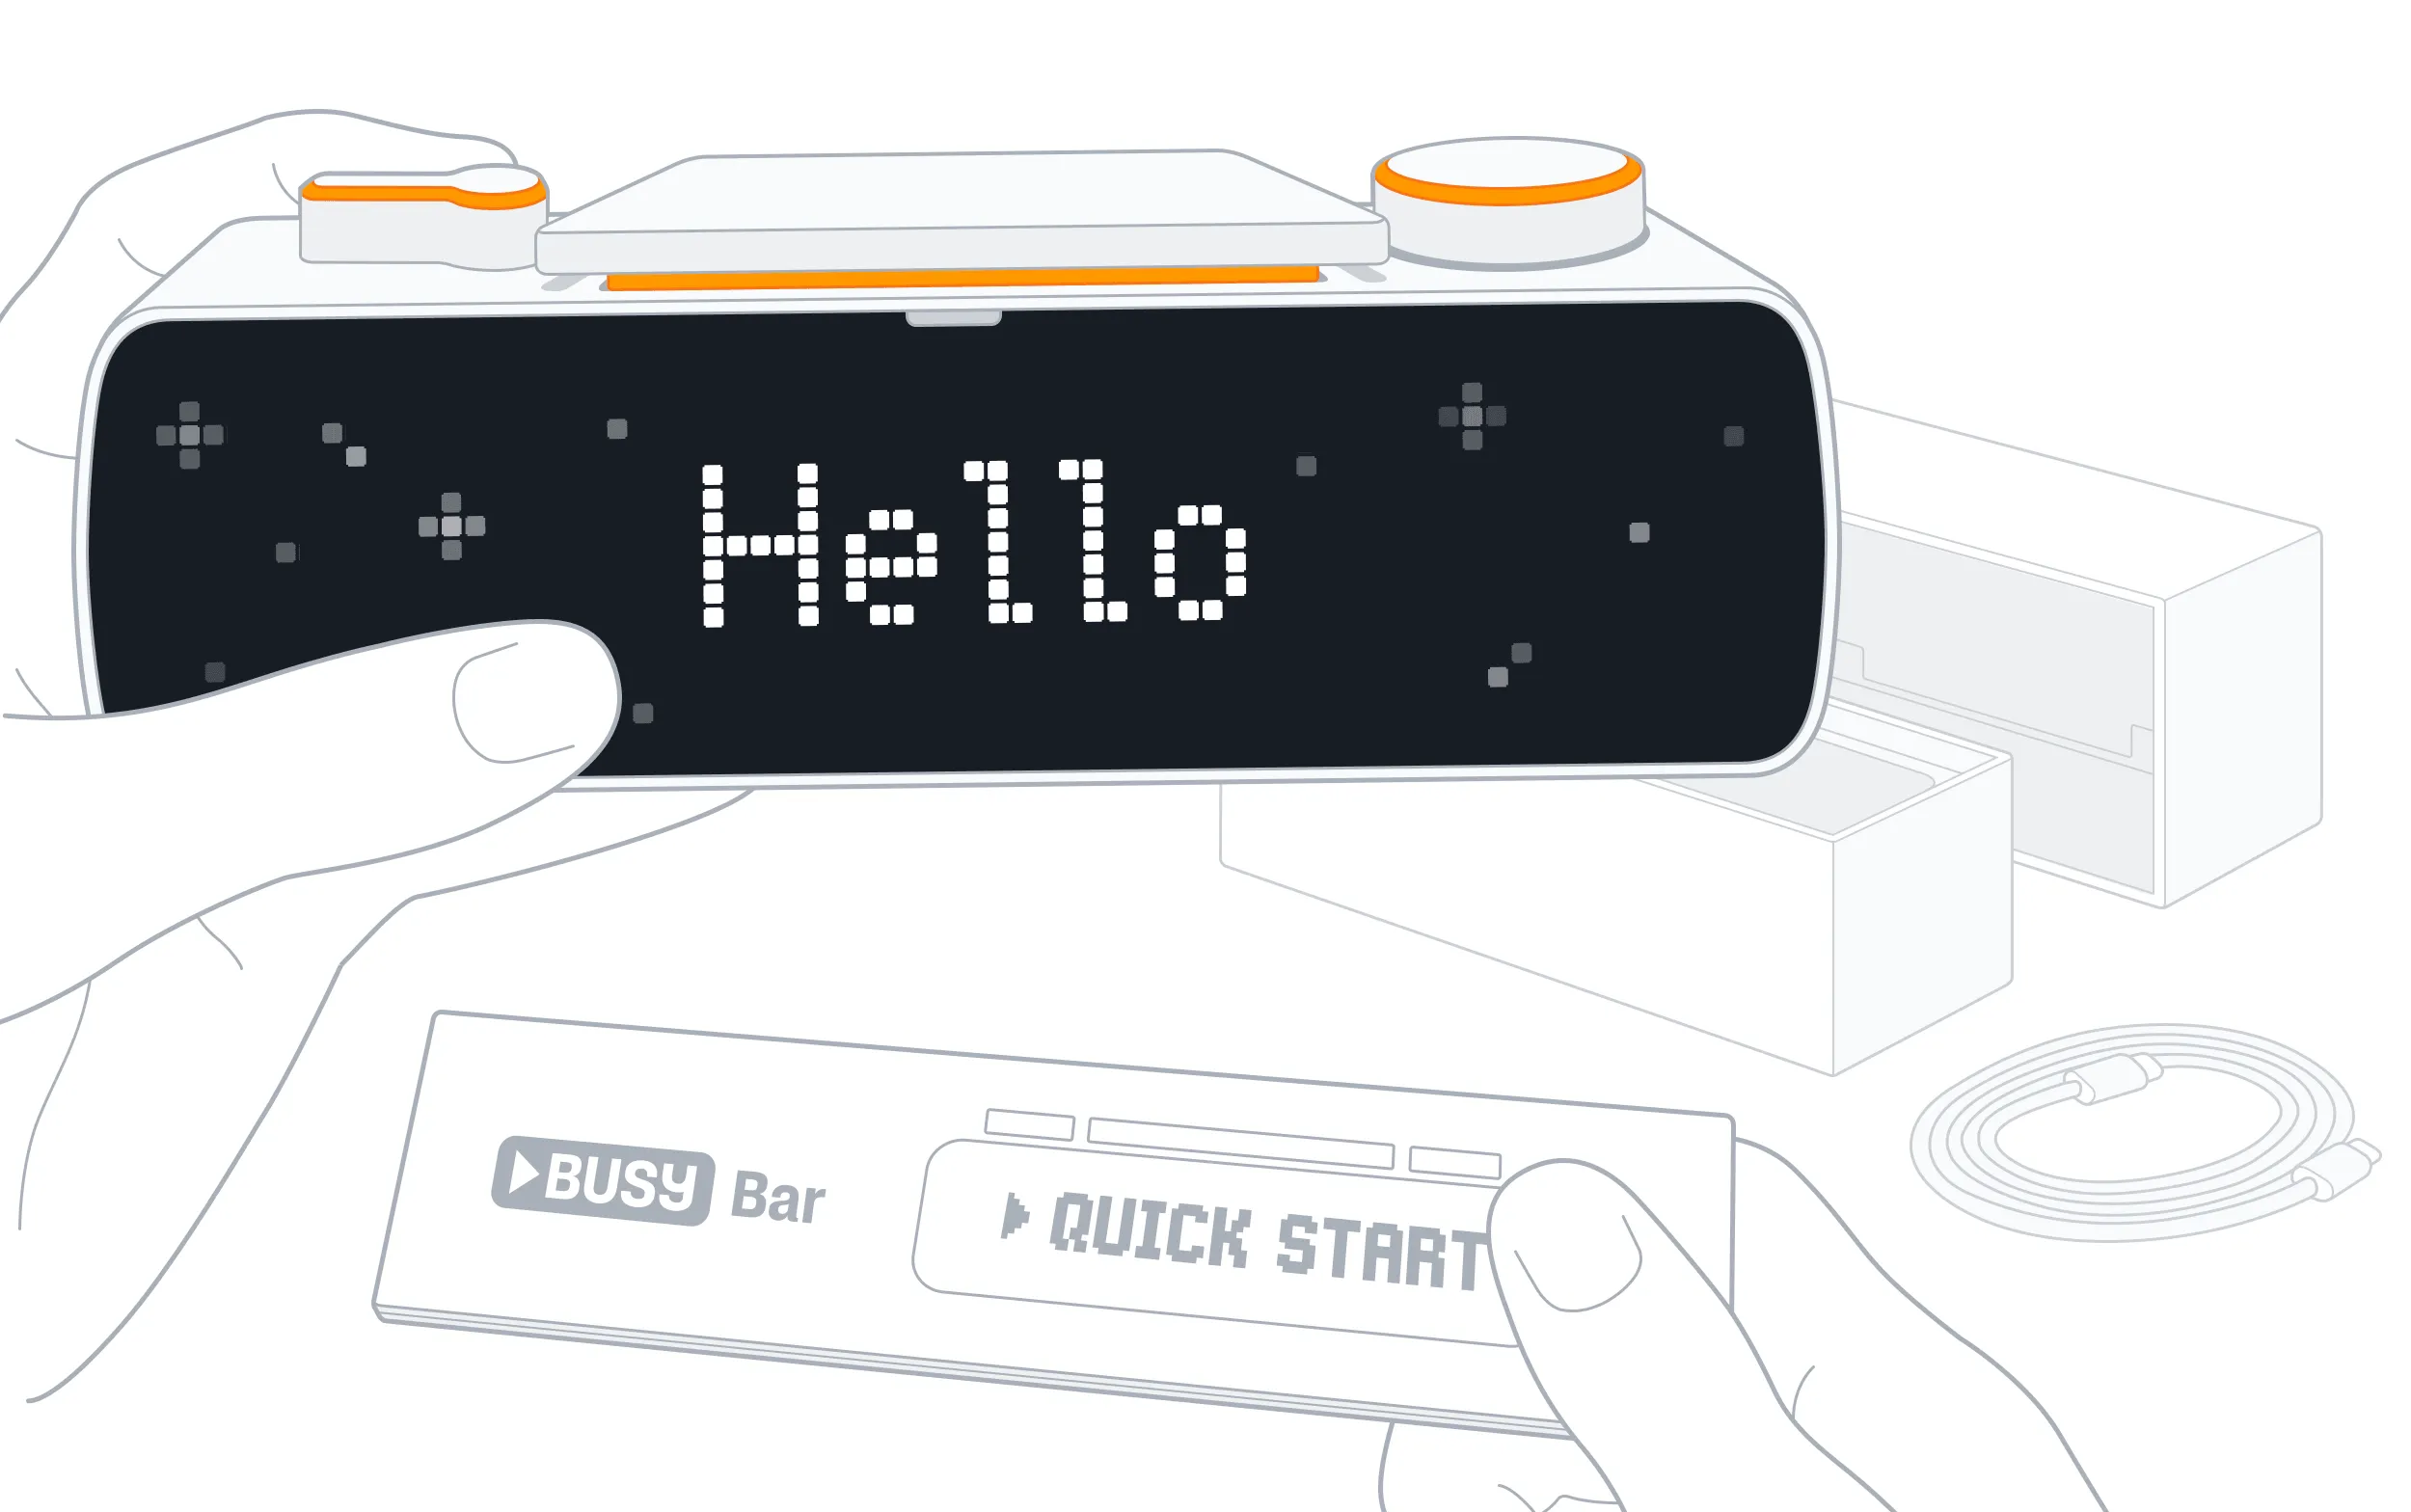
Your BUSY Bar has arrived, ready to help you protect your focus and do your best work. Follow the setup steps in this guide to get started in minutes. Enjoy your new BUSY Bar!
 If you have glue residue on the screen
Some BUSY Bars from the first batch may have glue residue on the front screen after you peel off the protective film. Follow this guide to remove the residue 
Power on
To power your BUSY Bar on, press and hold the  Back button for 3 seconds — you’ll see a “Hello” message on the screen.
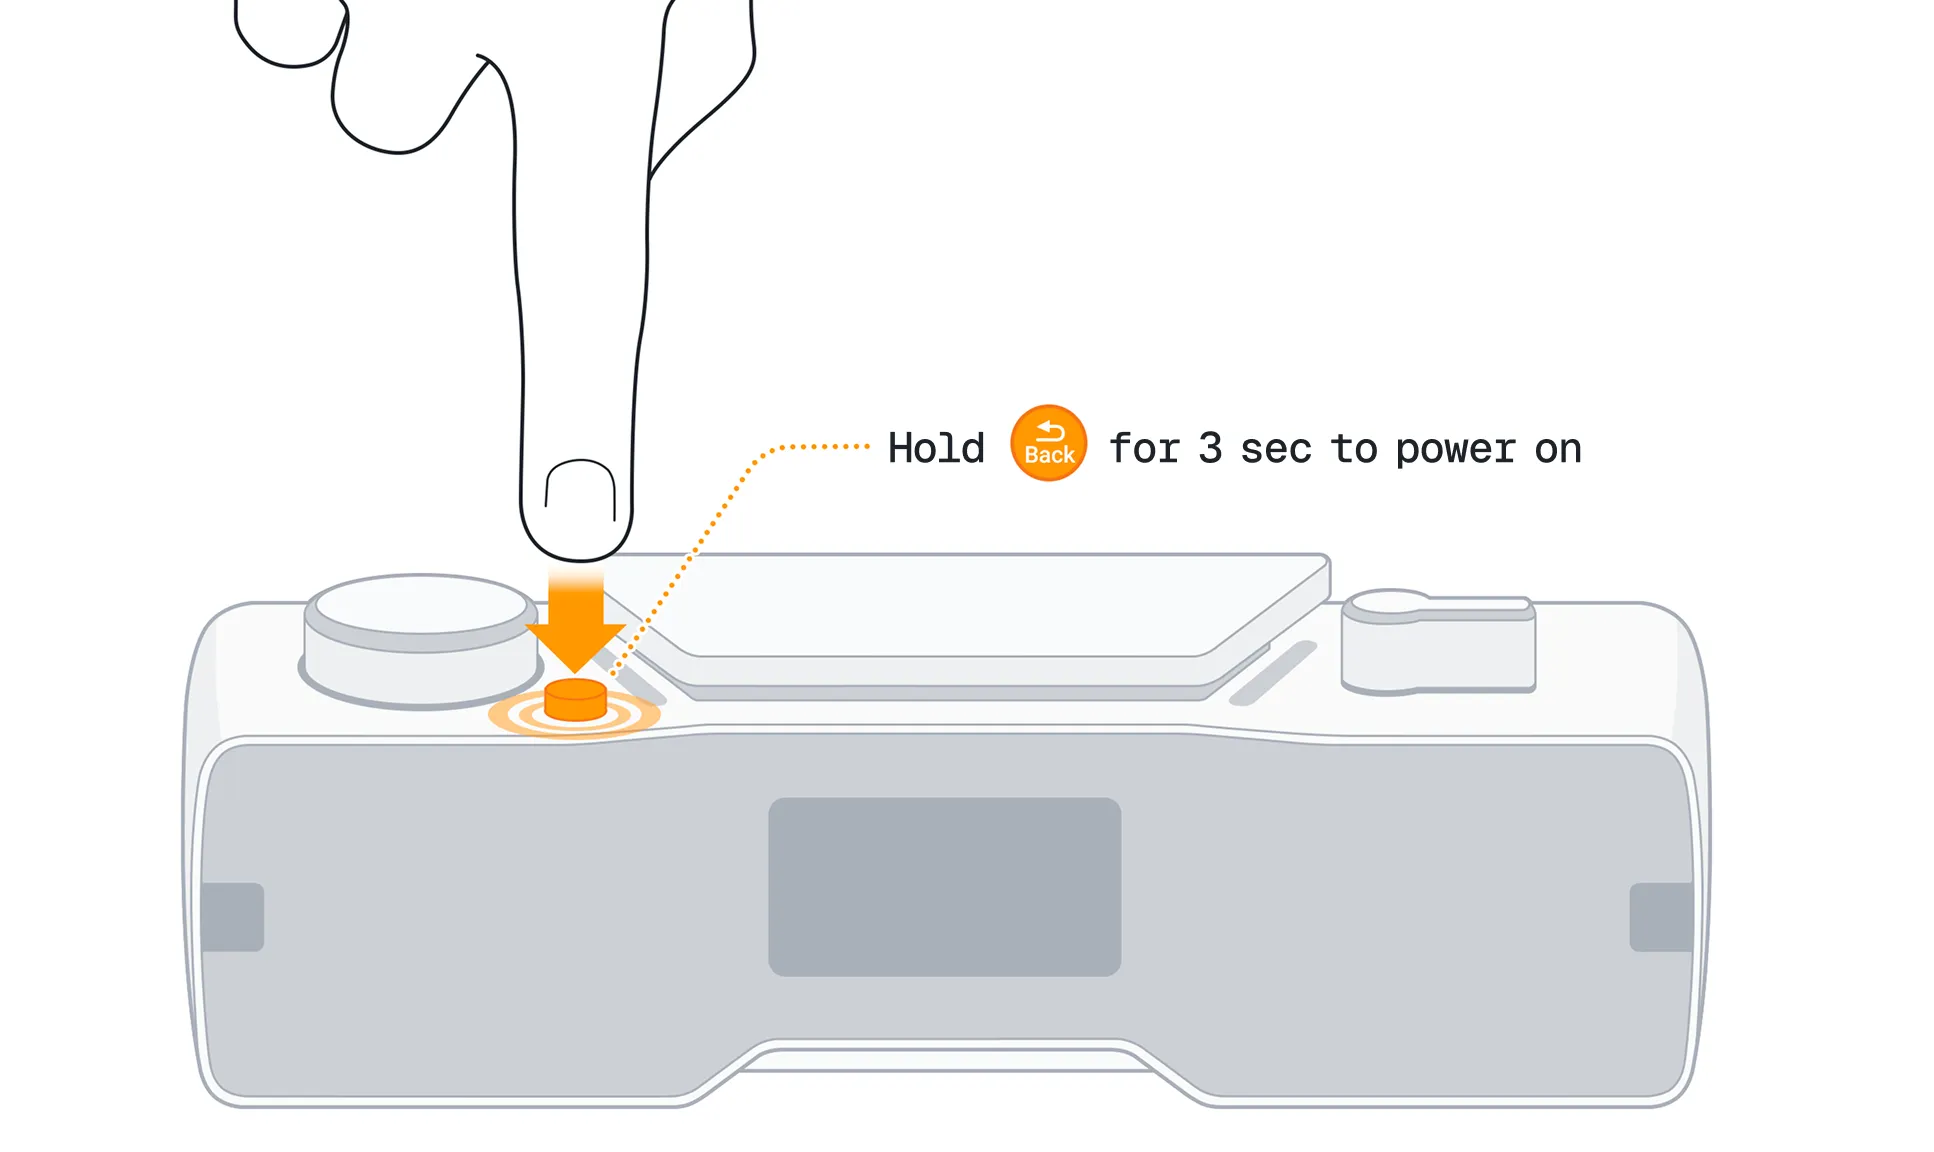
If your BUSY Bar doesn’t power on, try charging it
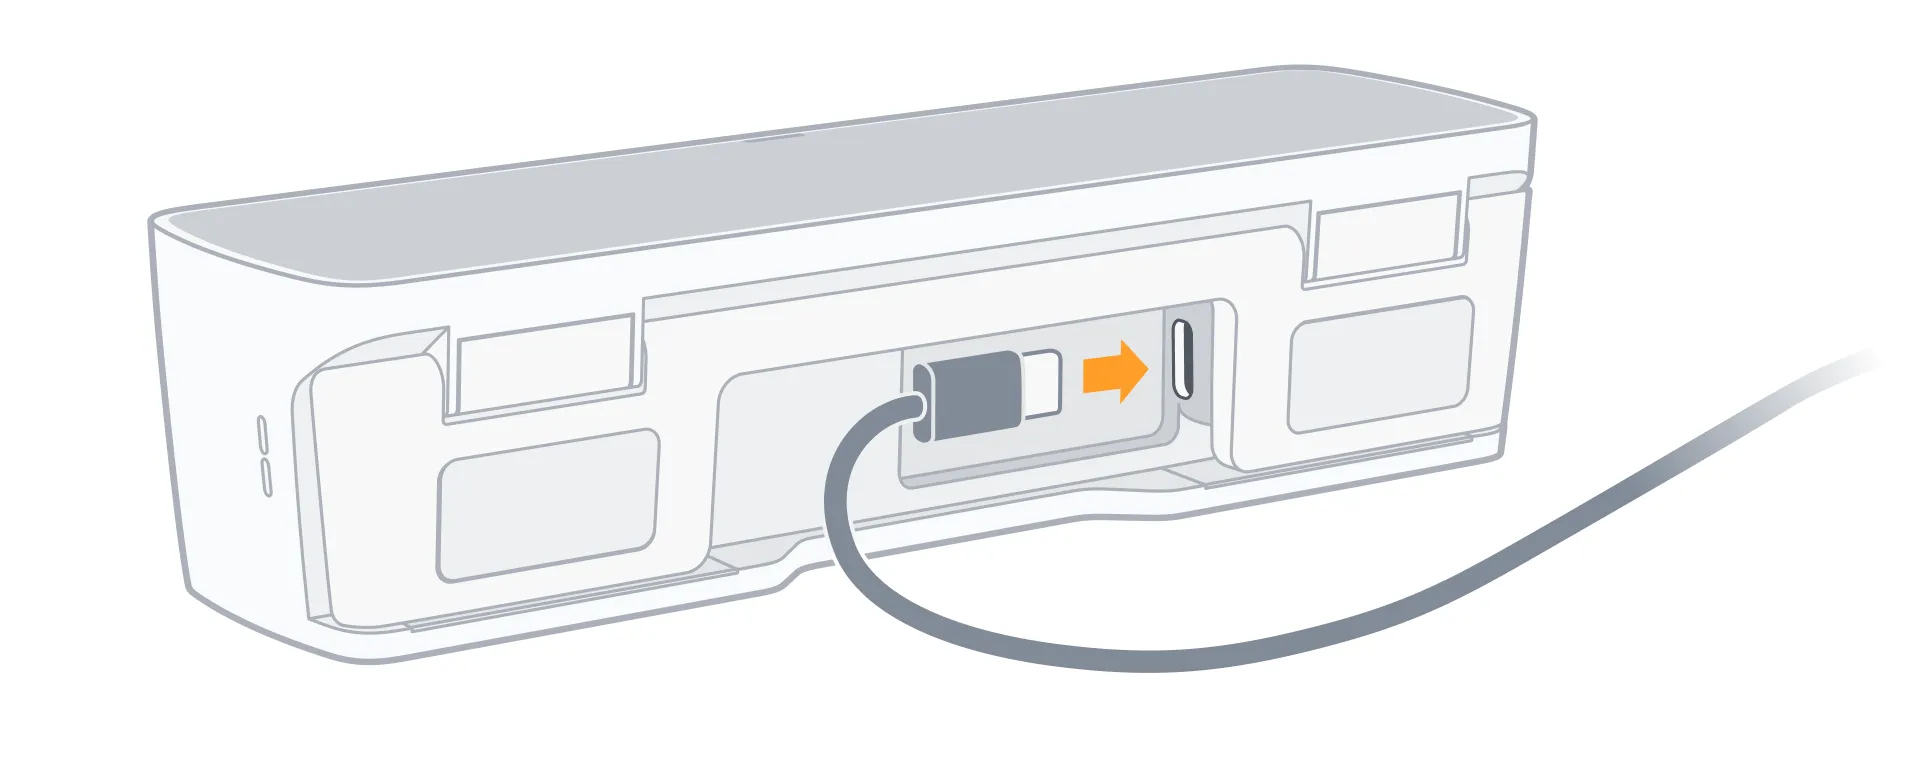
The battery may be fully drained. Charge your BUSY Bar with the provided USB cable — it will turn on automatically
How to charge BUSY Bar
The USB-C charging port is located on the bottom. BUSY Bar supports Power Delivery (PD) up to 15W. It charges at 5V⎓3A or 9V⎓1.5A, reaching a full charge in about 2.5 hours with an 18W (or higher) PD charger.
How to restart BUSY Bar
If your BUSY Bar freezes and fails to respond to button presses, try restarting the device by pressing and holding the  Start / Pause and Back buttons for 3 seconds.
Learn controls
Physical buttons and switches let you control the BUSY Bar without connecting to a computer or the mobile app. The controls are designed for easy use, even without looking at the device.
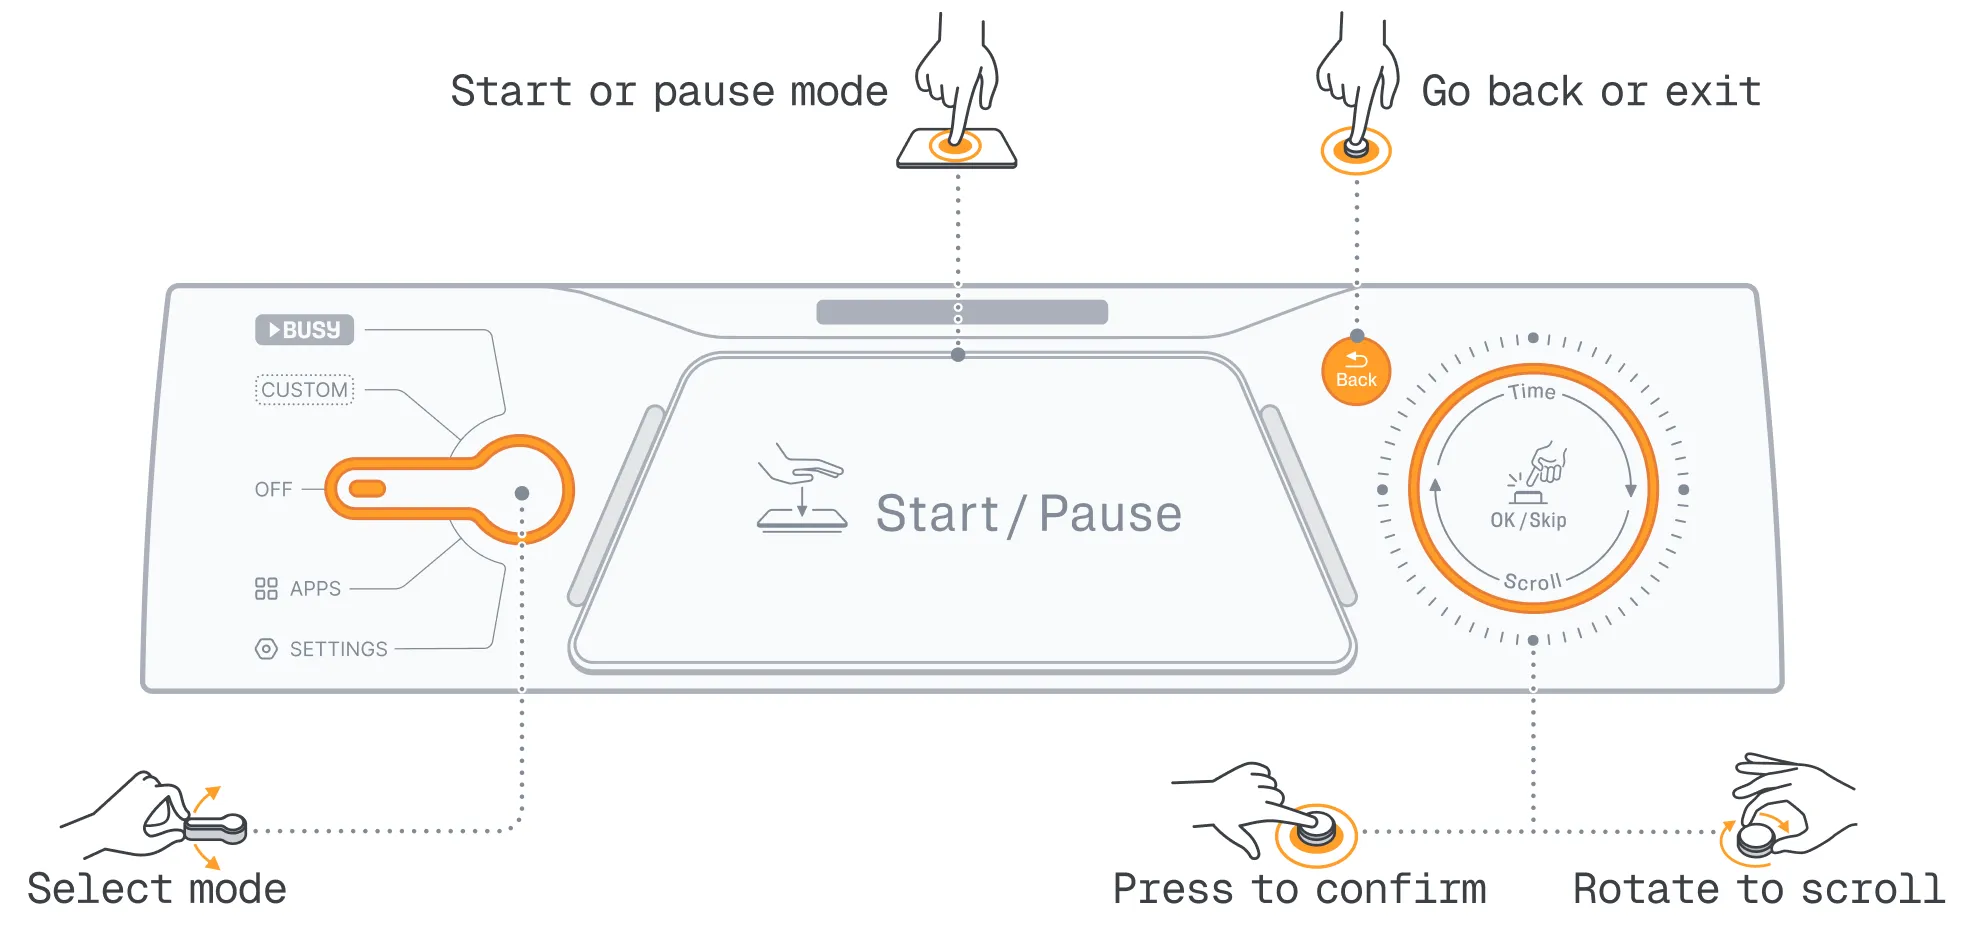
BUSY Bar controls:
-
 Start / Pause button — Start or pause modes, also OK
-
 Mode selector — Select modes, open apps, or access settings
-
 Scroll wheel — Navigate menus, also OK / Skip
-
 Back button — Go back or exit apps
Get to know modes
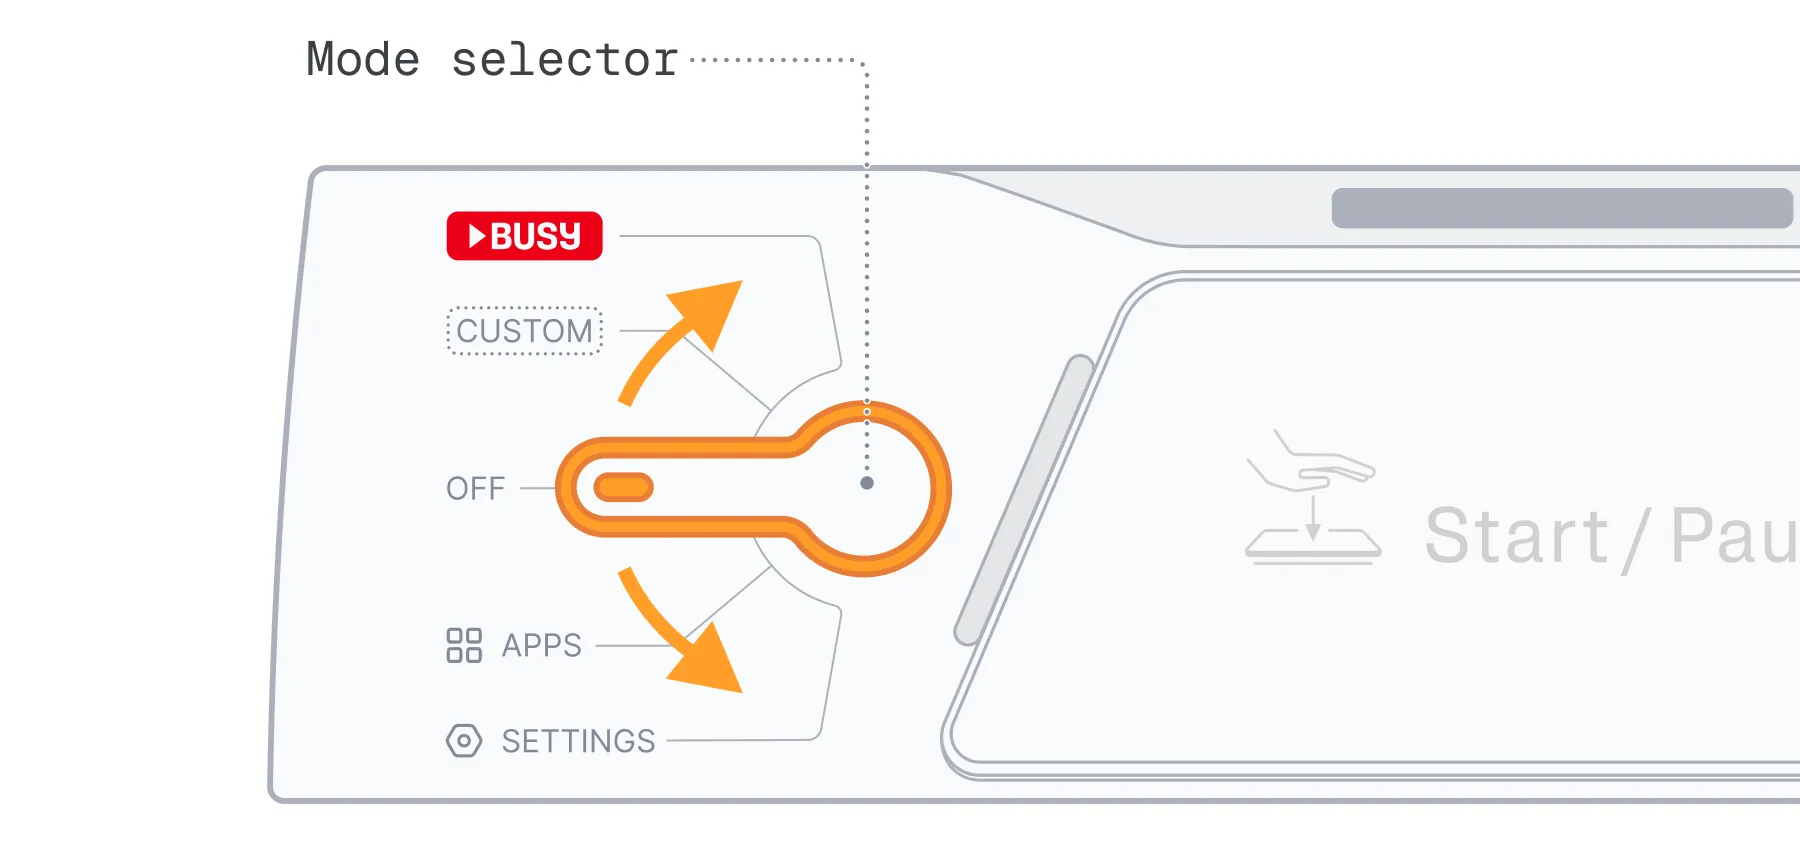
Switch between modes, open apps and access settings using the  mode selector:
-
 — Main focus mode, by default set to BUSY interval timer
-
 — Second focus mode, by default set to custom status
-
 — Sleep mode with both screens off
-
 — Clock and user-added apps (coming soon)
-
 — Wi-Fi, Bluetooth, brightness, sound, firmware update, and more
About OFF mode
OFF mode puts the BUSY Bar to sleep, not a full shutdown. Notifications, focus session started in the app, and the ON CALL status will still show.
To shut down your BUSY Bar completely, go to Settings → System → Power → Shut down. To power it back on, press and hold the Back button for 3 seconds.
Set up BUSY Bar in the mobile app
You need to set up your BUSY Bar to enable syncing across devices over the internet and automatic firmware updates. Setup takes about 6 minutes and is done in BUSY App on your phone.
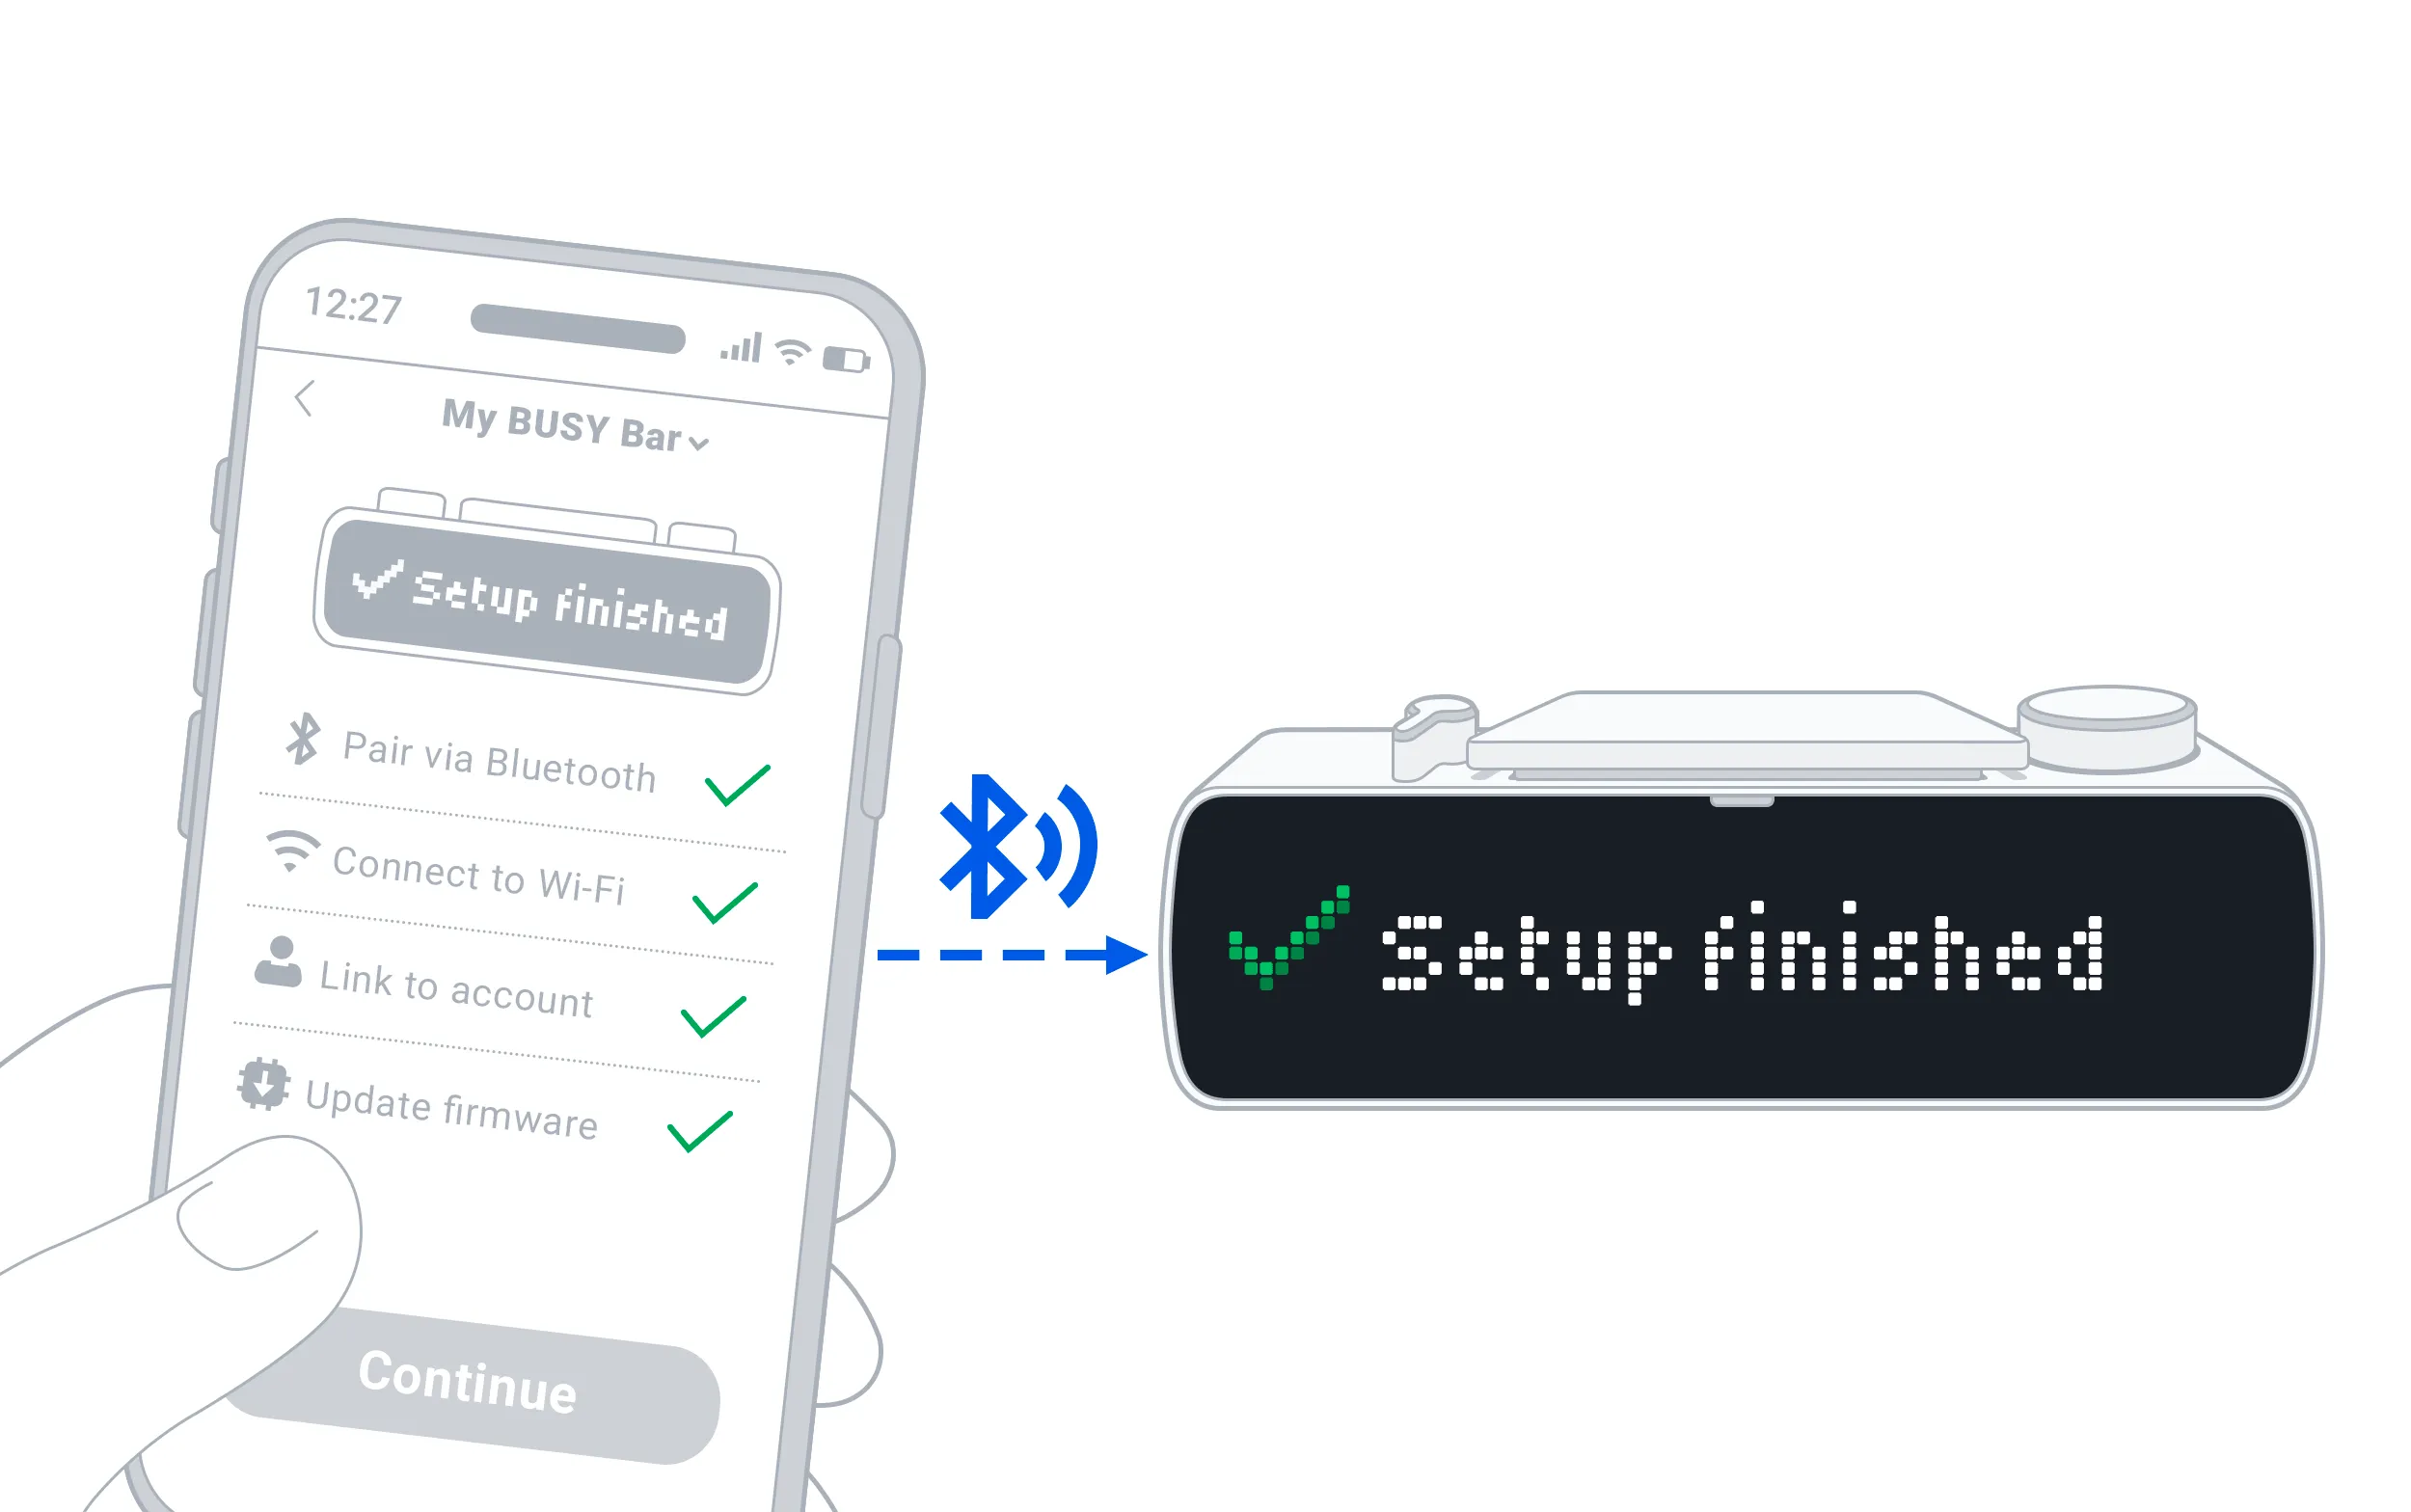
Can’t complete the setup?
You can resume setup anytime in BUSY App by tapping Go to setup. Previous settings are saved automatically.
If you don’t have access to a phone, you can set up your BUSY Bar using a PC.
Step 1: Download BUSY App on your phone
The app is available on iOS and Android:
Step 2: Pair BUSY Bar with your phone
Switch BUSY Bar to pairing mode: go to Settings → Bluetooth.
On your phone, make sure Bluetooth is ON.
Open  BUSY App and tap the BUSY Bar icon.
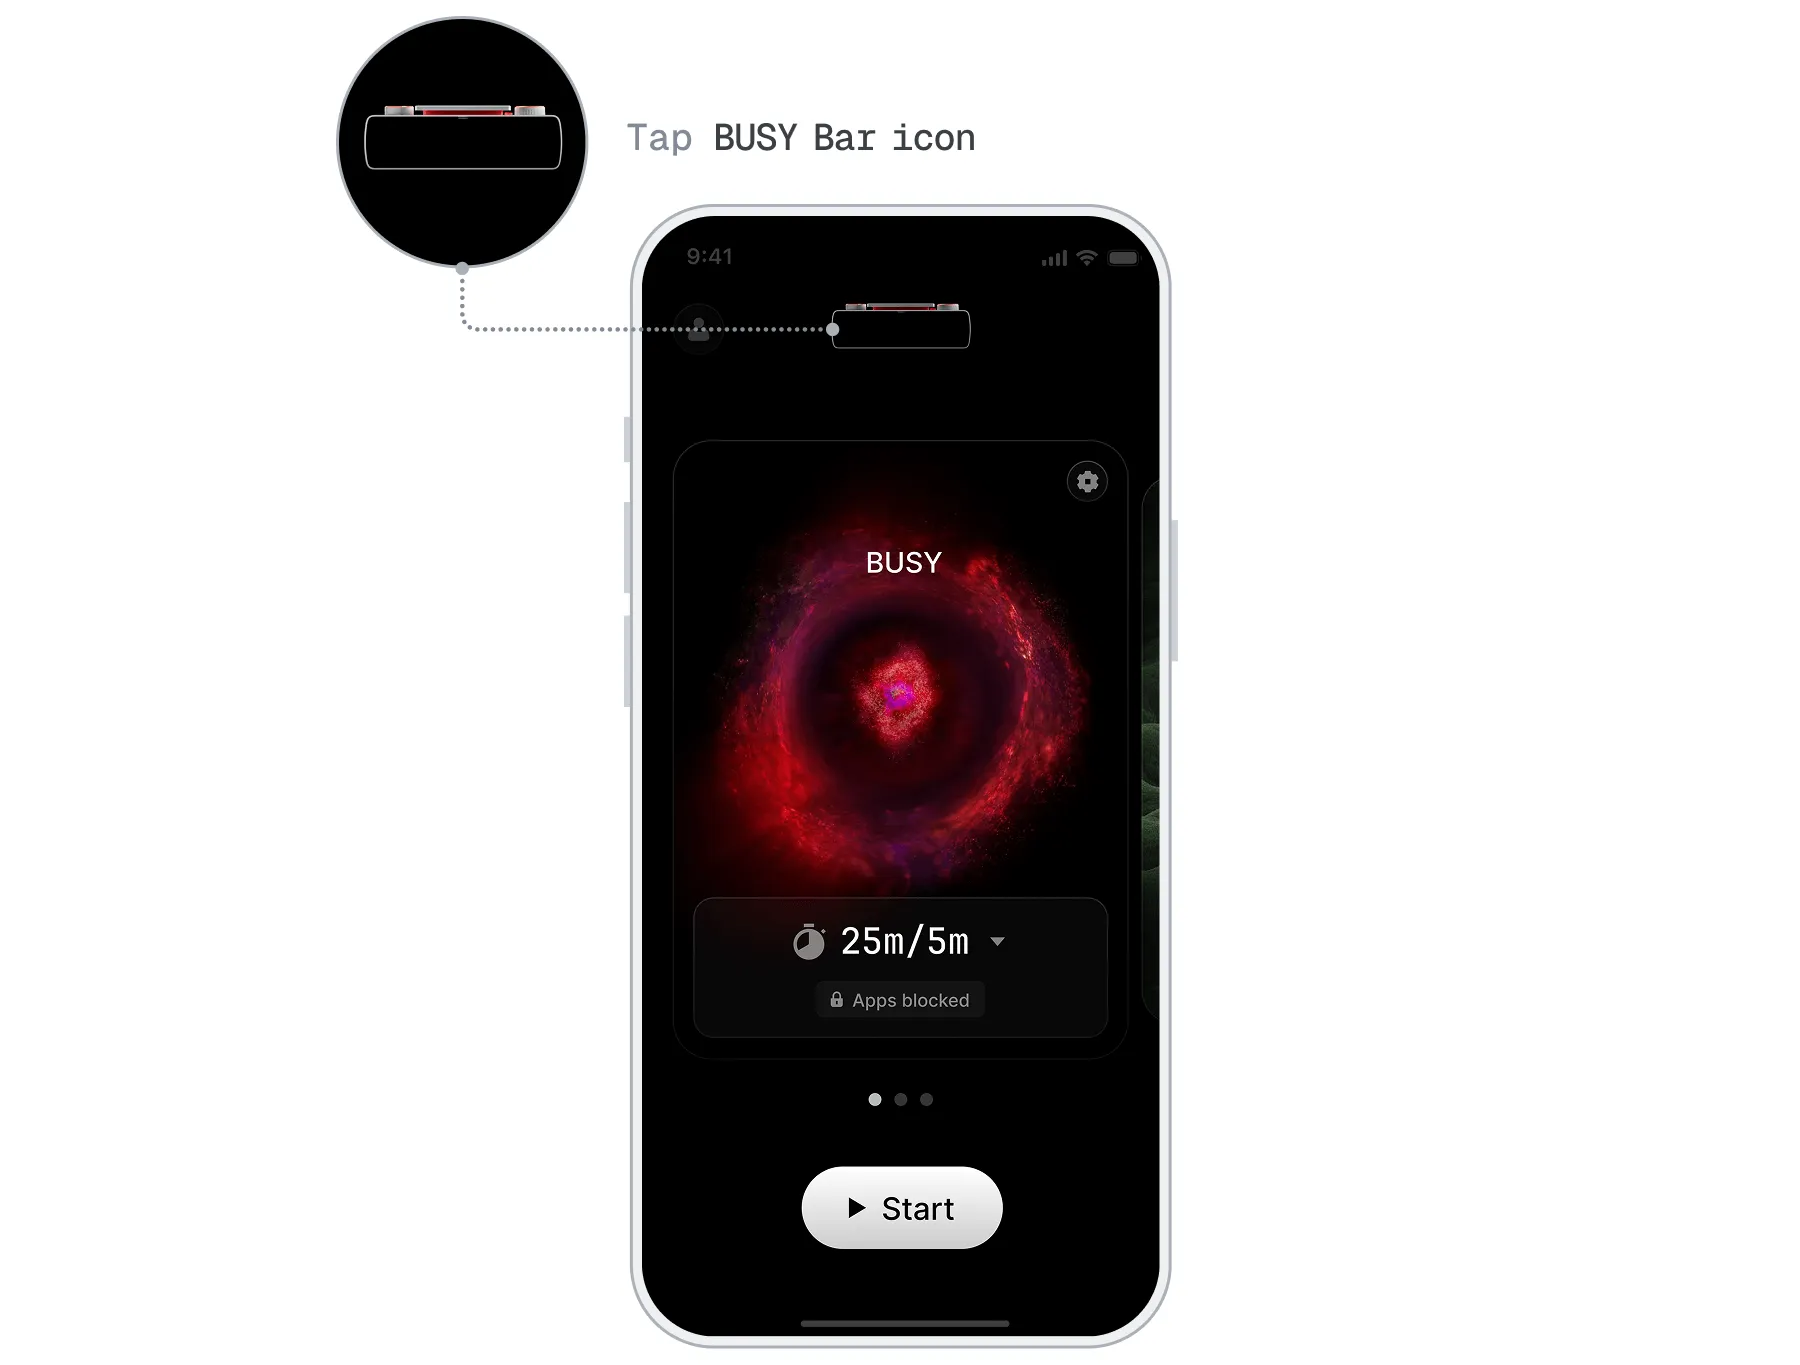
Tap the Connect BUSY Bar button.
Your BUSY Bar should appear in the list of devices — tap Connect.
Follow the onscreen instructions.
Step 3: Connect BUSY Bar to Wi-Fi
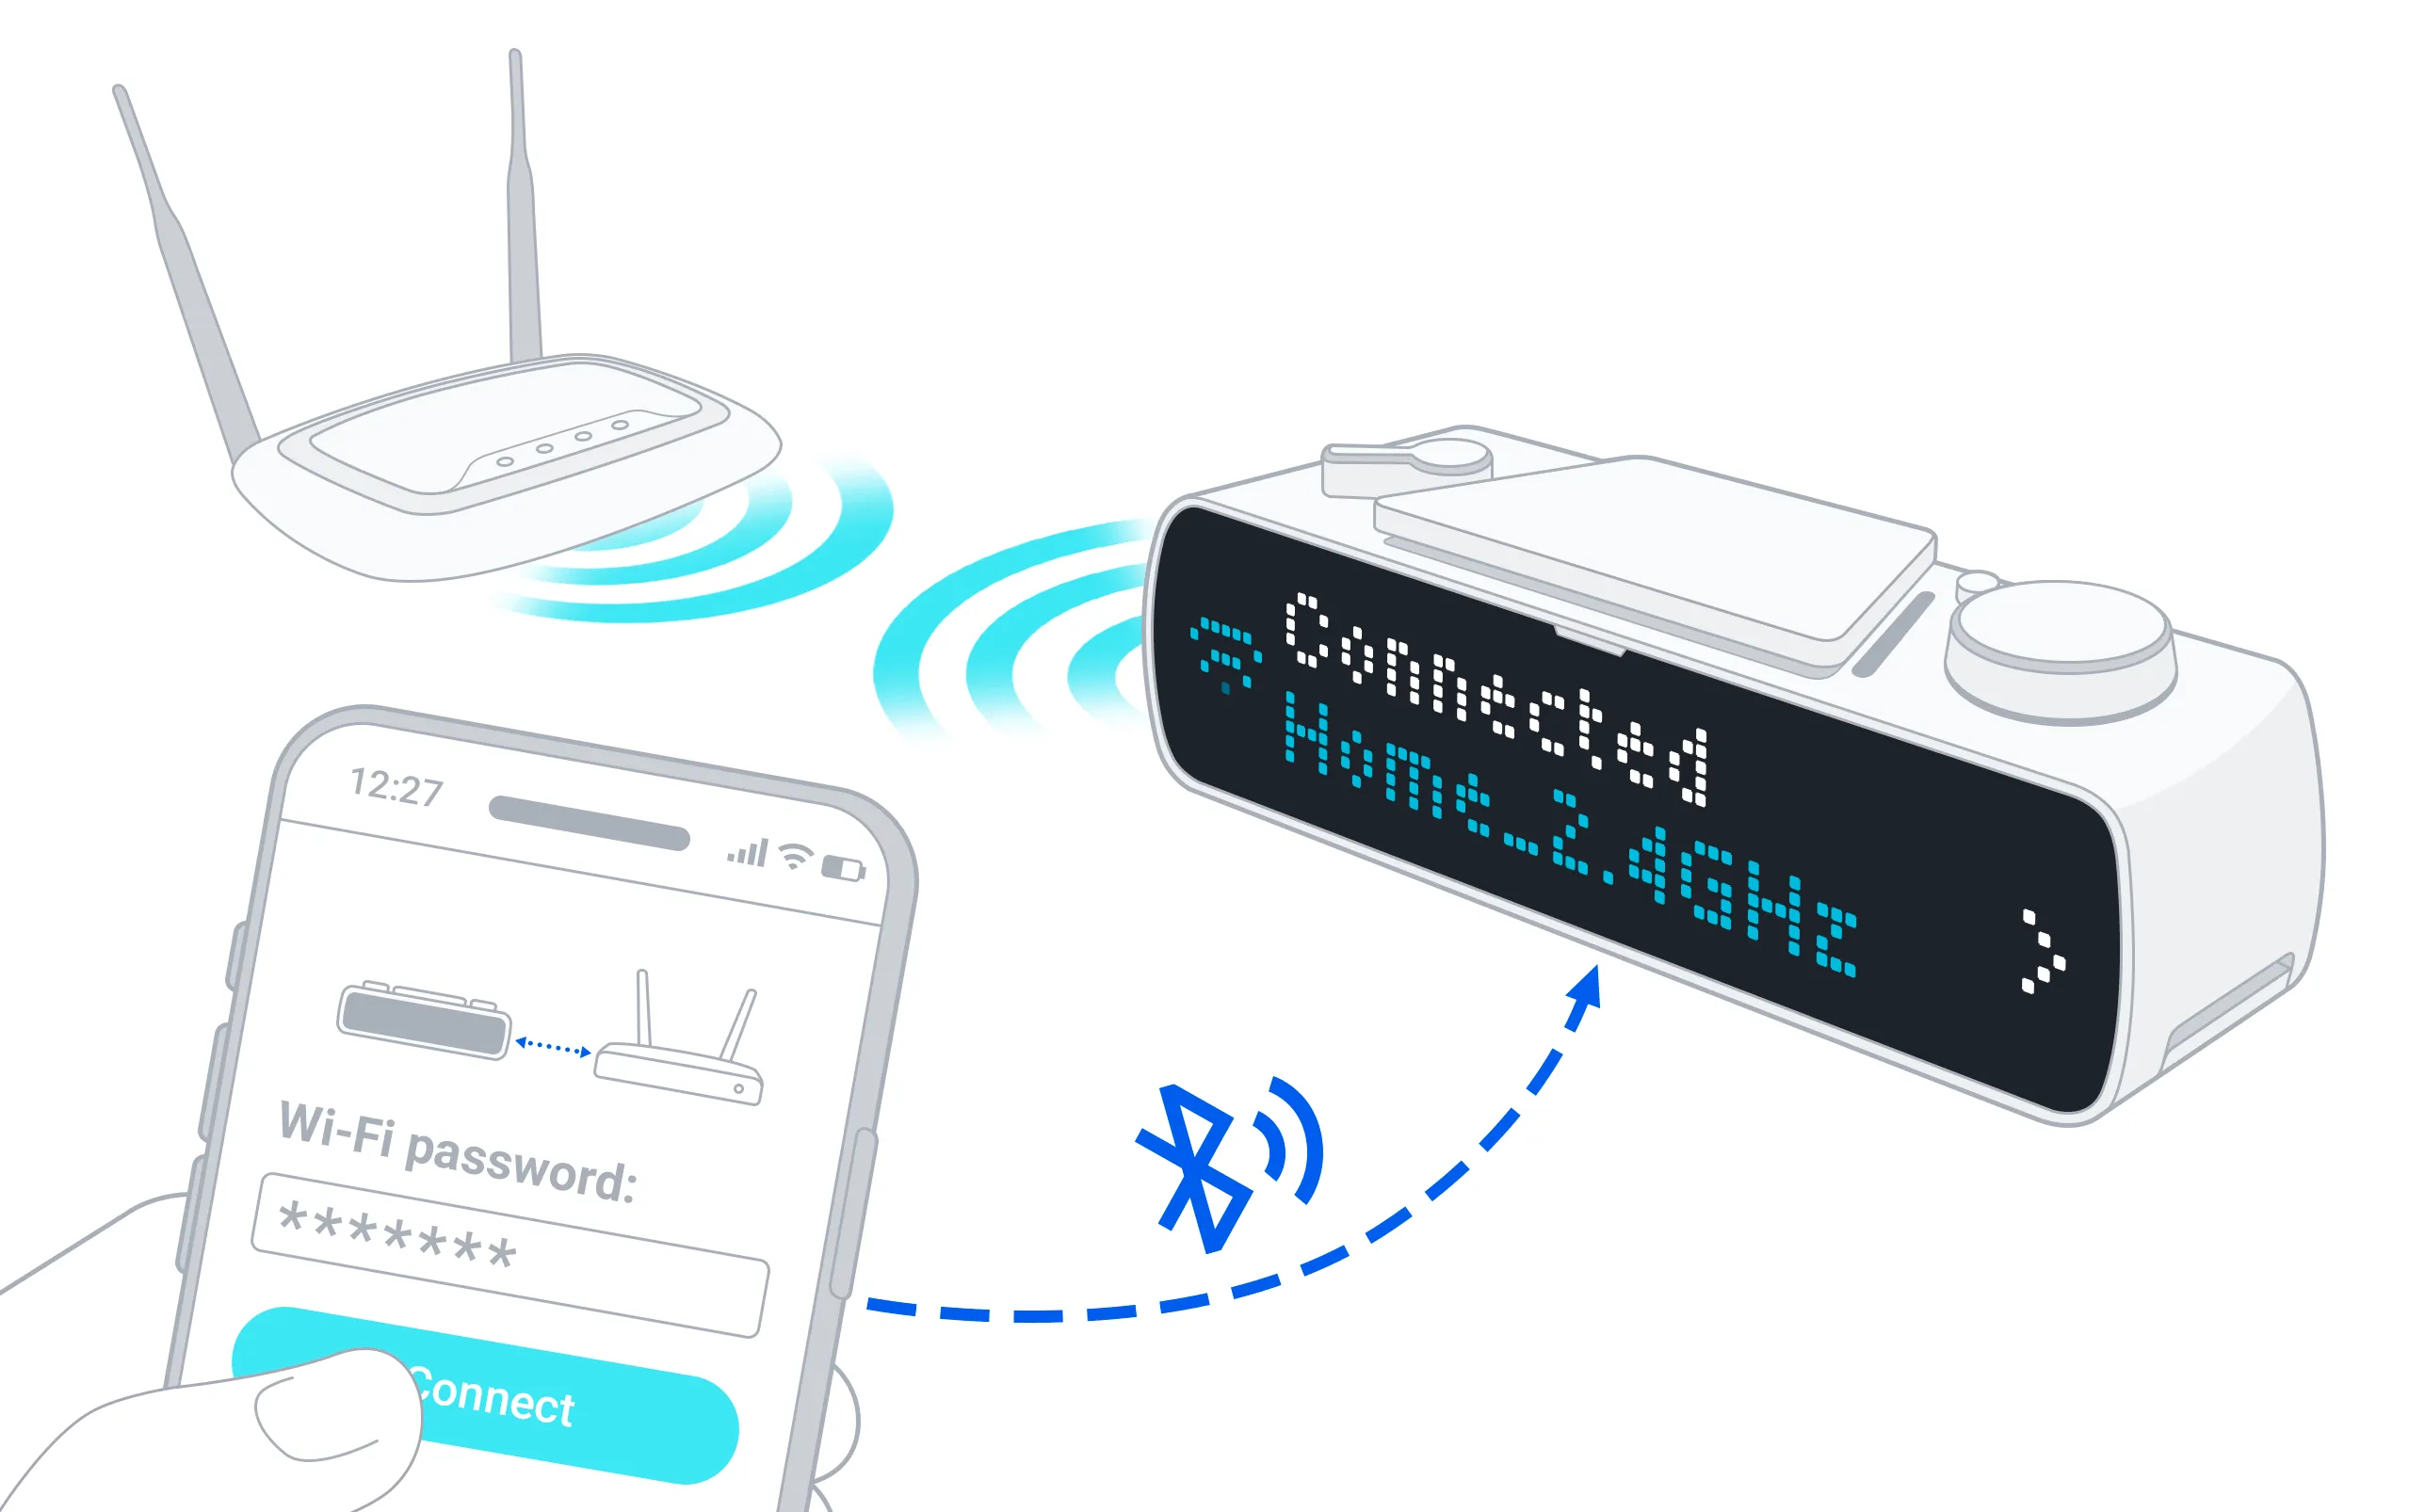
You’ll see a list of available 2.4 GHz Wi-Fi networks — choose the one you want to connect to, then enter its password.
This step takes time
Scanning for networks and connecting may take up to 2 minutes. This is normal — don't restart your BUSY Bar.
Step 4: Log in to BUSY account
To access advanced features such as synchronizing your focus sessions over the internet, syncing with Google Calendar, and creating API tokens — log in to your BUSY account:
In BUSY App, tap Go to setup.
Tap Link to your account.
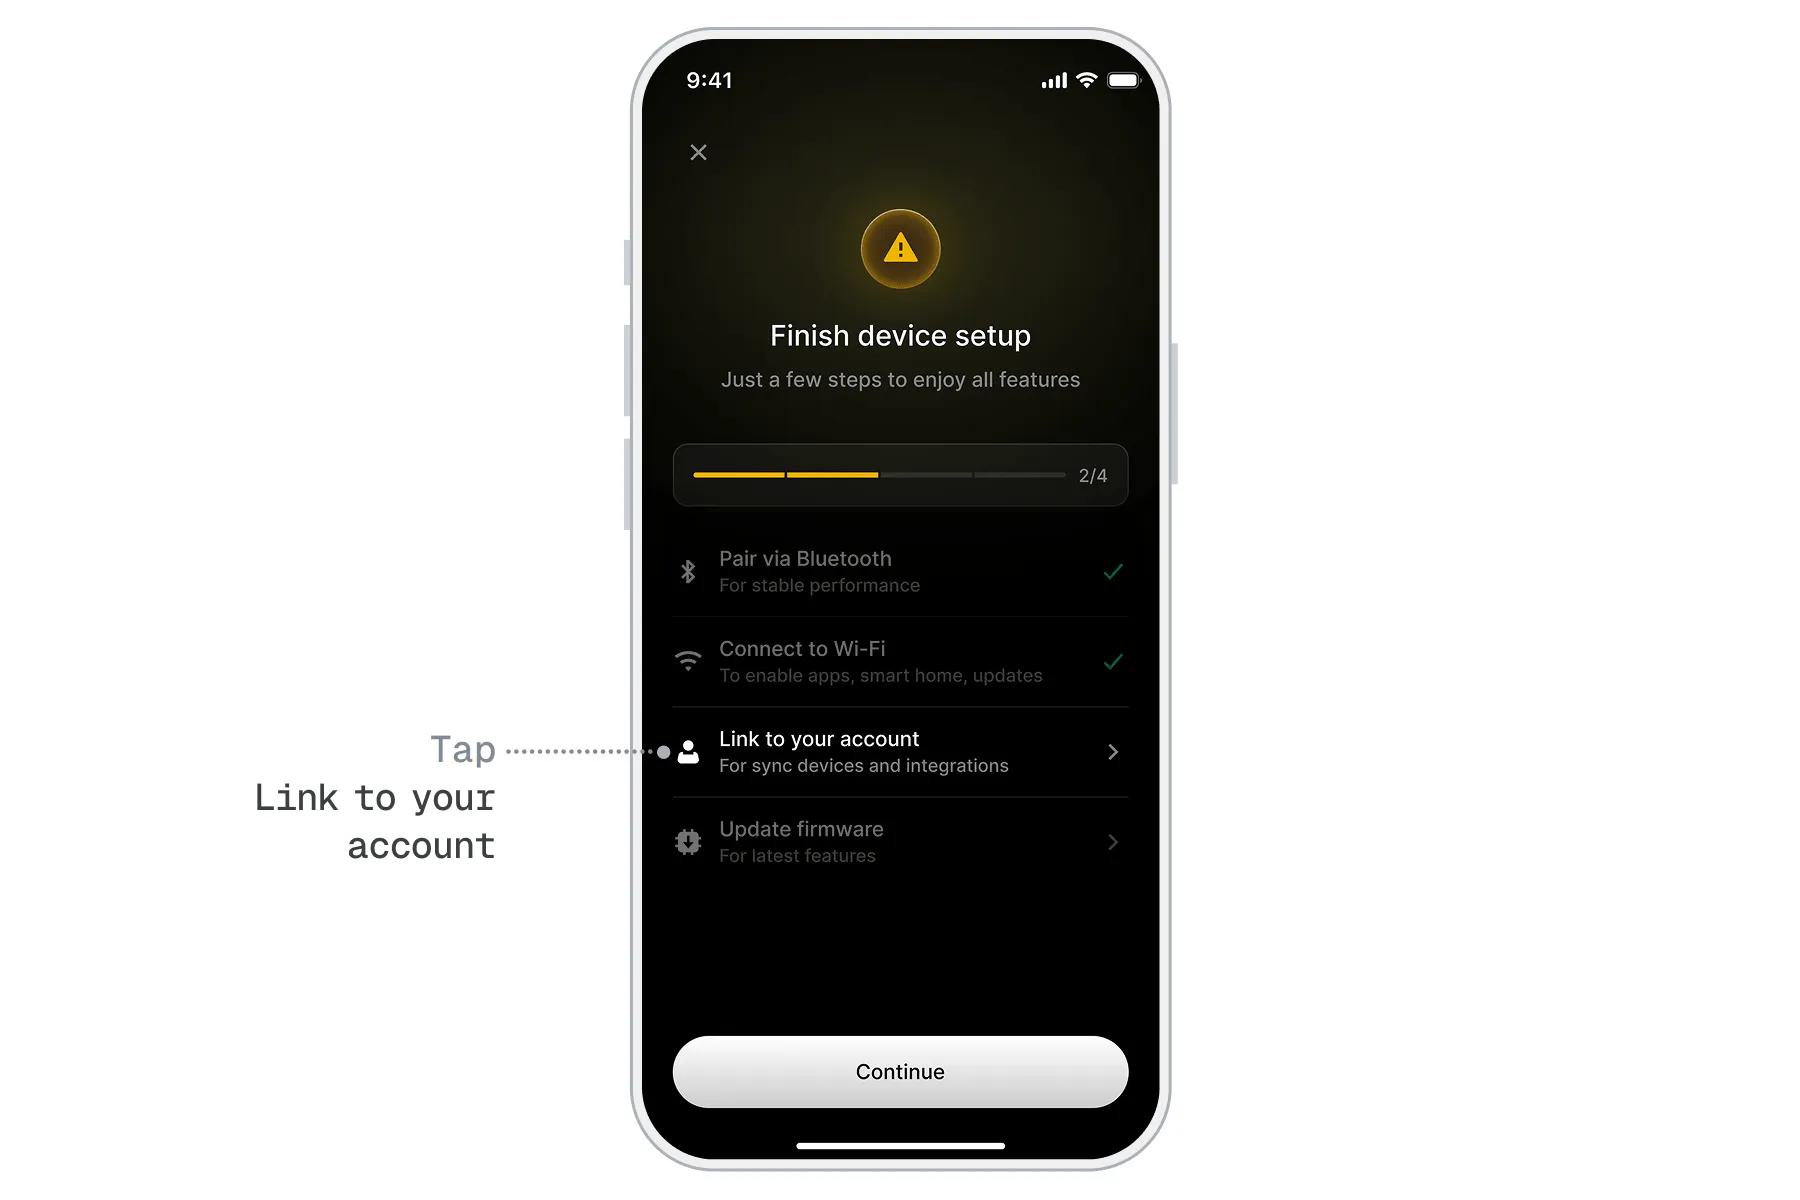
Sign up for your BUSY account with your email address, or continue with Google, Apple, or Microsoft.
Once you log in using the mobile app, your BUSY Bar will be automatically added to your BUSY account.
Step 5: Update the firmware
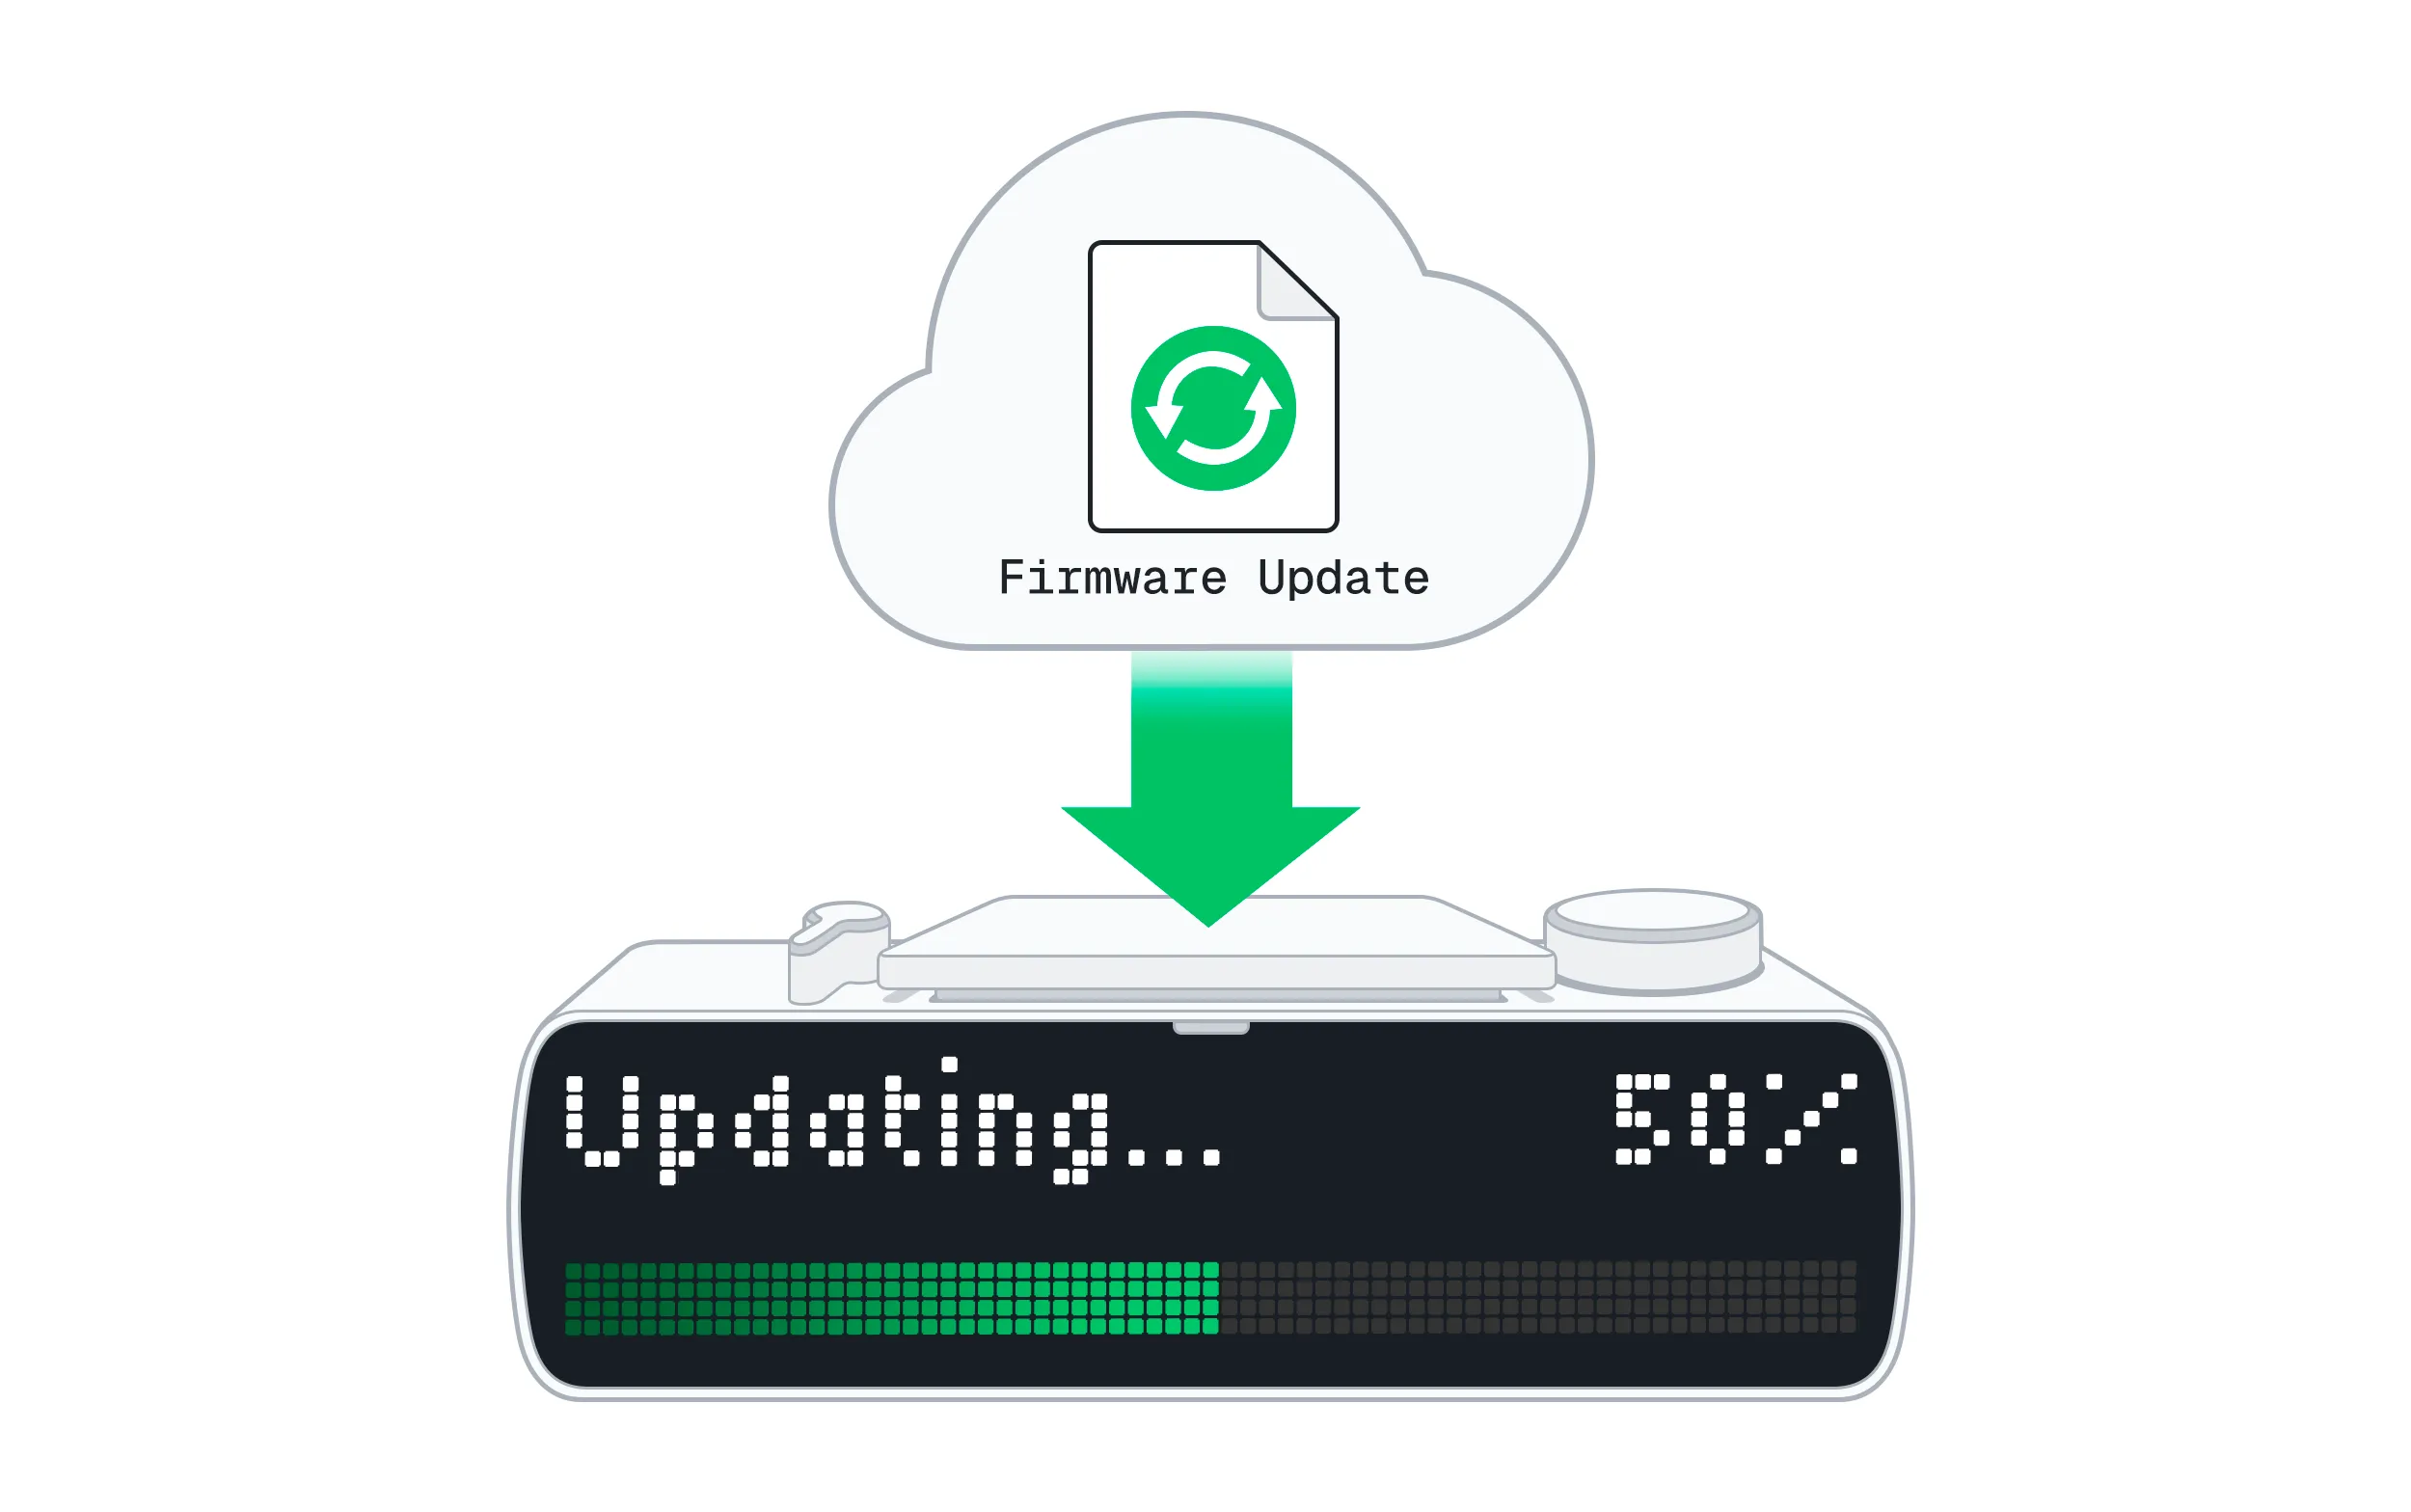
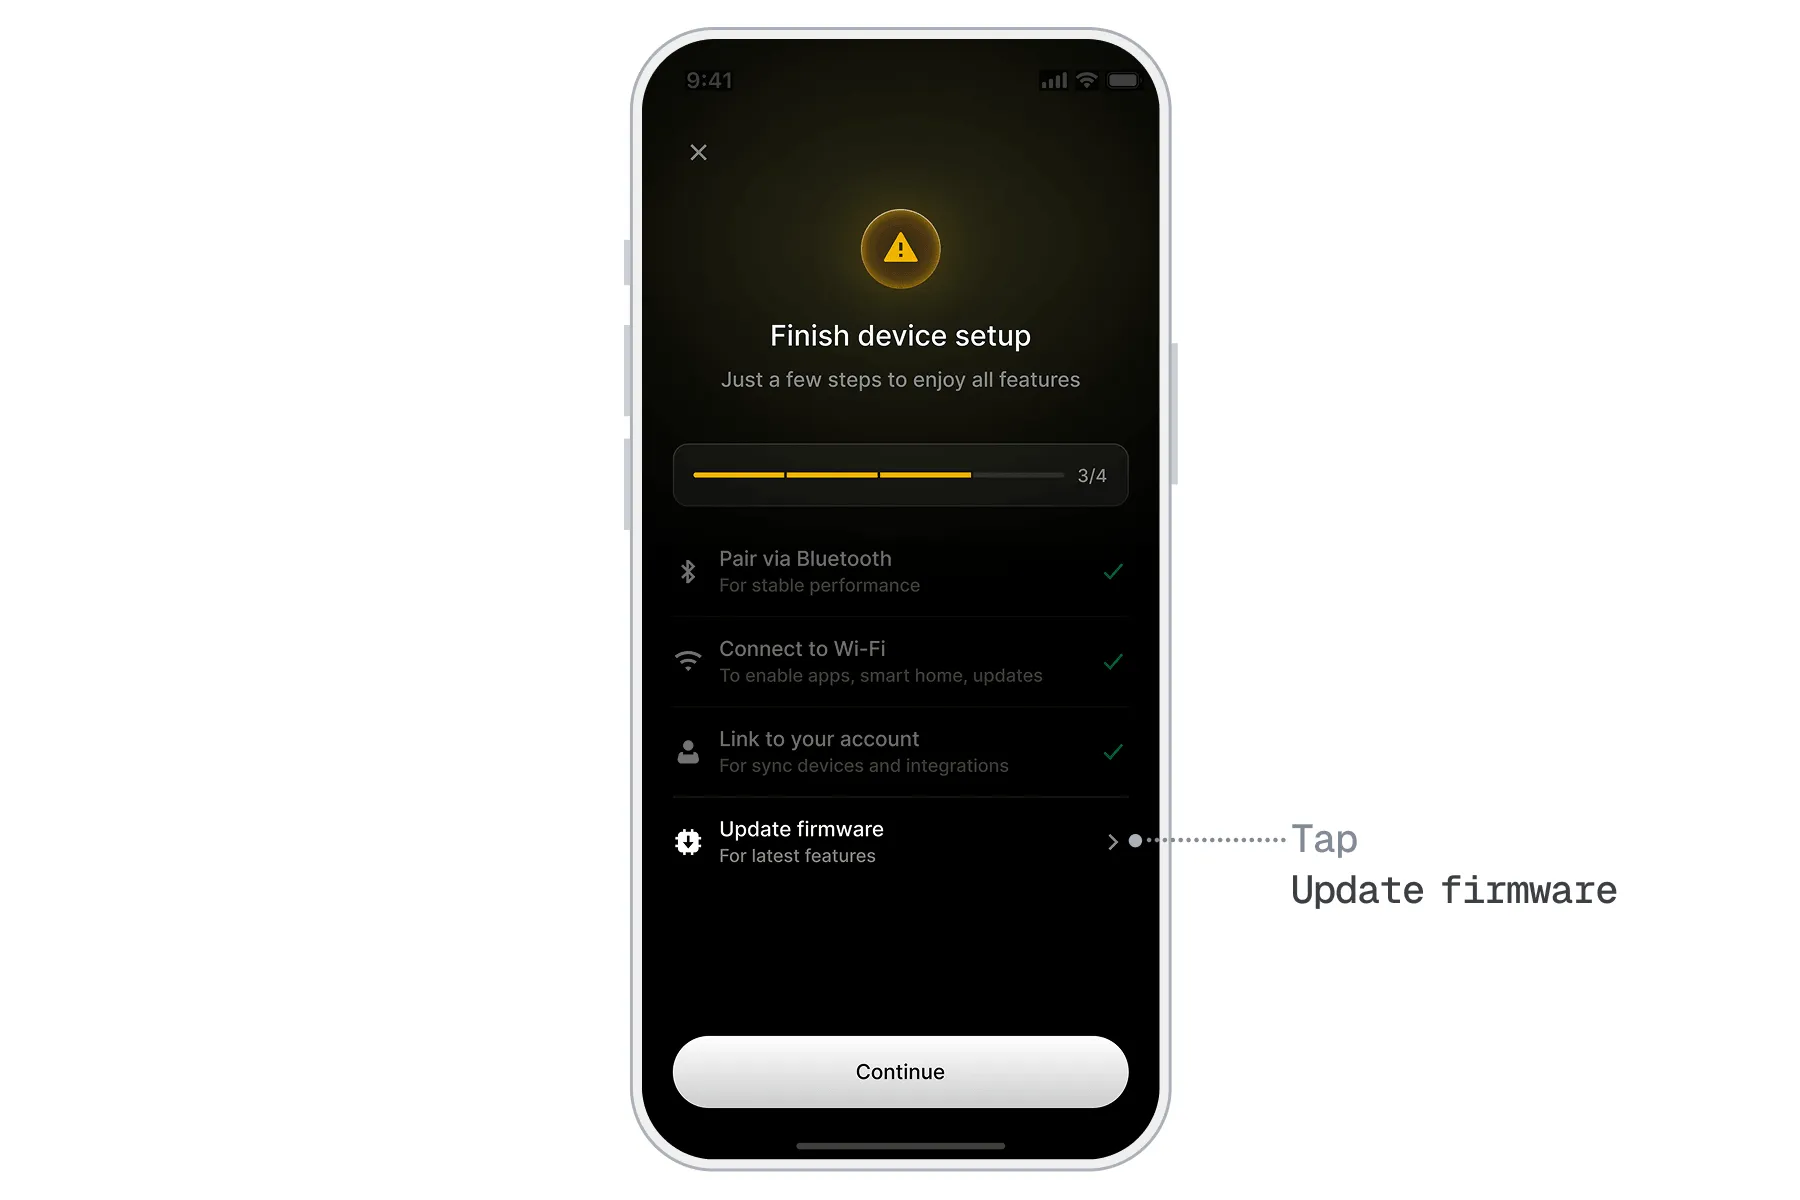
To update the BUSY Bar’s firmware, tap Update firmware. The update will begin automatically — the BUSY Bar will download and install it.
 All done!
You have finished setting up your BUSY Bar, and it’s now ready to use!
Explore BUSY App features
BUSY App is a focus timer and distraction-blocking app available on phones, smartwatches, and computers (Mac only). The app lets you divide work into structured intervals of focused sessions and scheduled breaks. During focus sessions, BUSY App can block selected apps and notifications to minimize distractions.
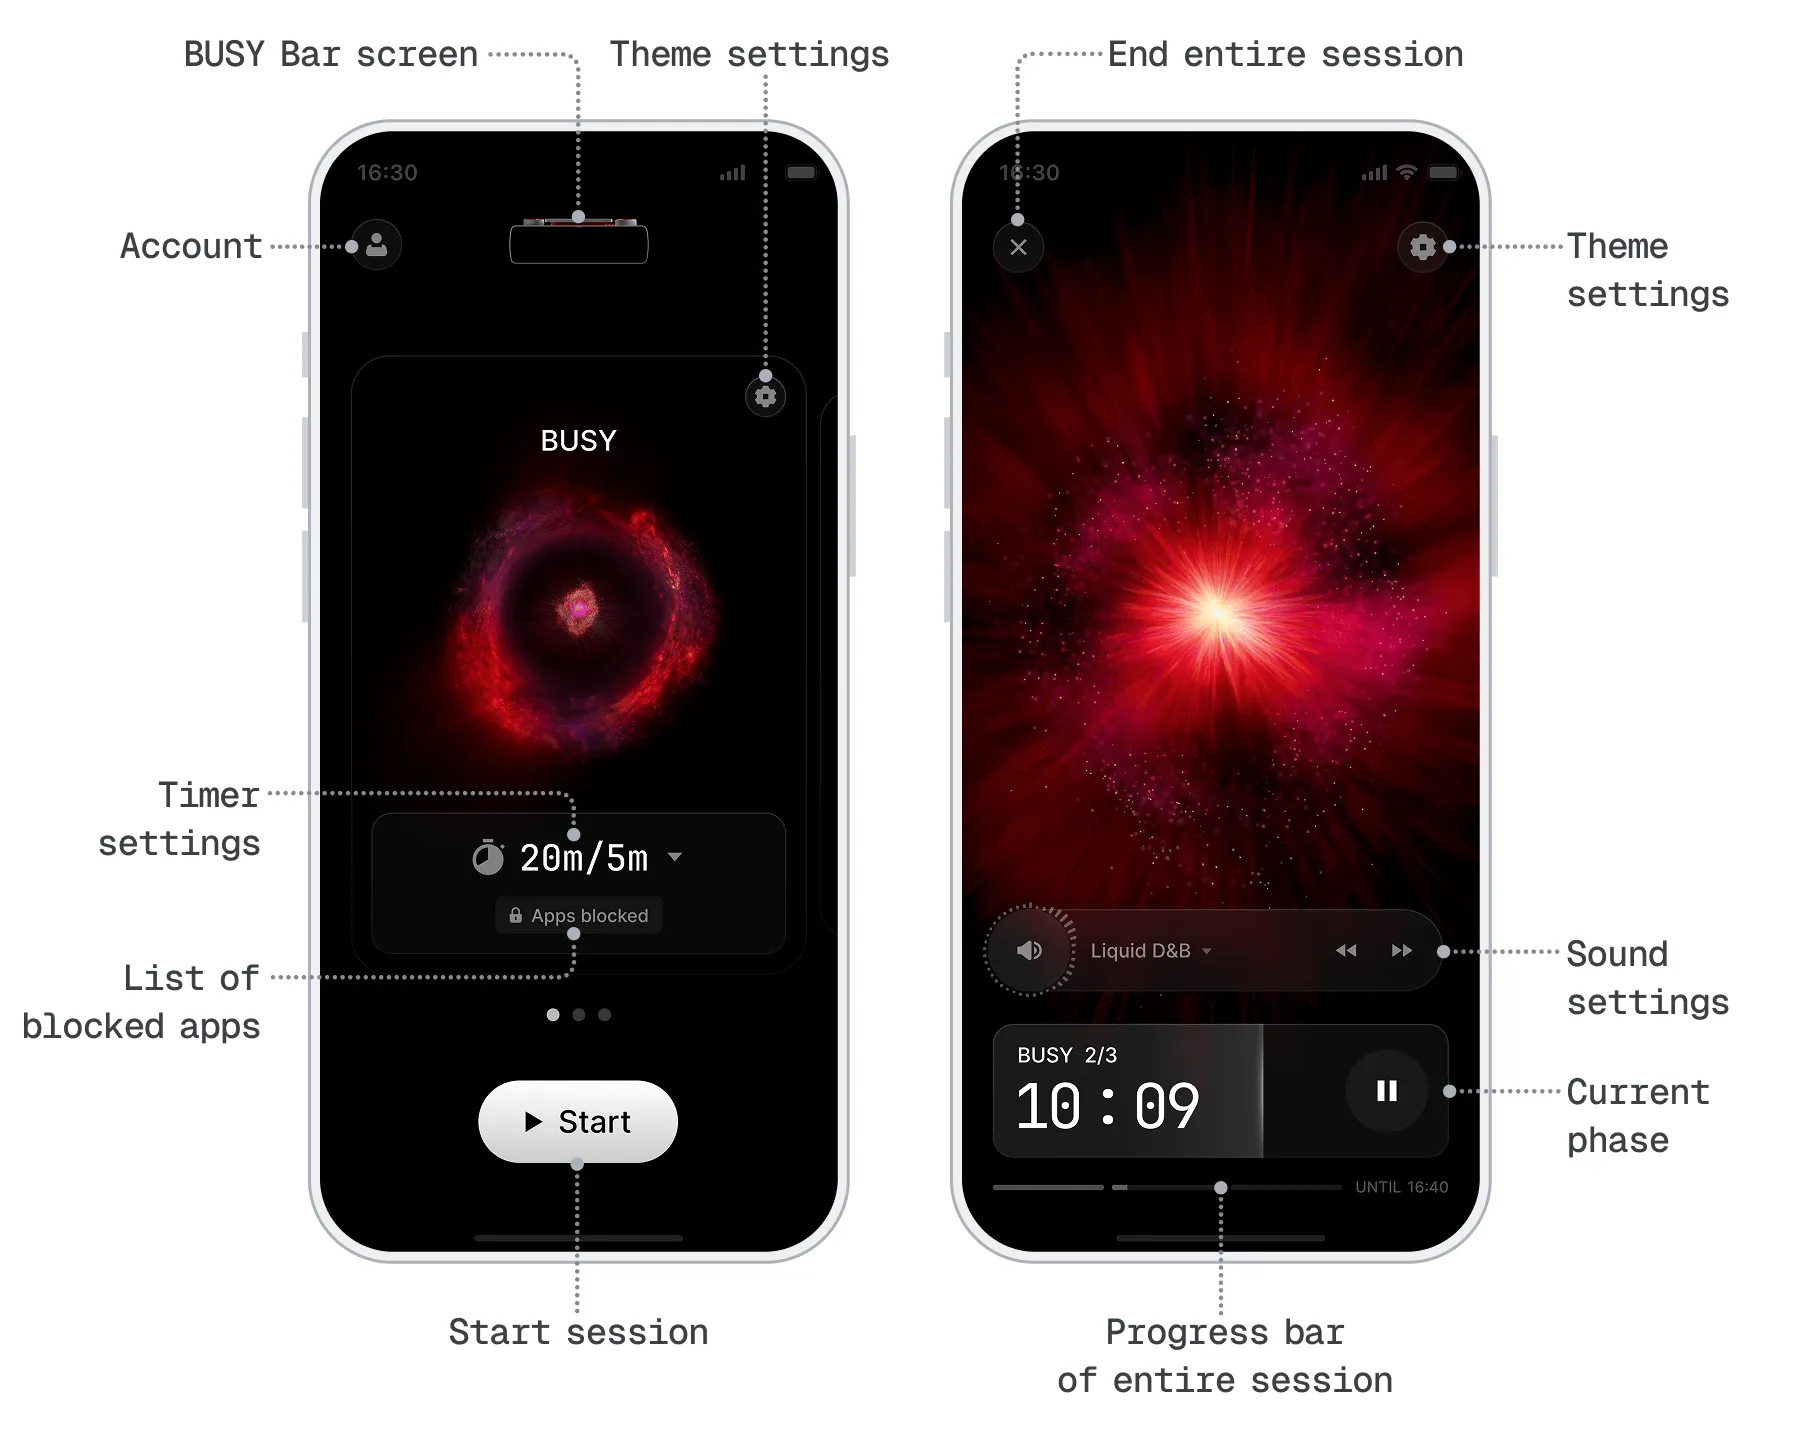
BUSY App works together with BUSY Bar to create a seamless ecosystem: when you start a session on your BUSY Bar, it instantly syncs across all your linked devices. You can also start and manage your focus sessions from any device — the others sync automatically.
BUSY App allows you to remotely customize the focus session, including the duration and the status displayed on the BUSY Bar. It also lets your BUSY Bar automatically display the ON CALL status whenever you use your Mac’s microphone.
Start your first BUSY session
Now that the setup is complete, you can begin using your BUSY Bar with its full functionality. To start your first BUSY session:
Switch your BUSY Bar to .
Press Start / Pause.
A focus session starts on your BUSY Bar and, if connected to the BUSY App, also on your phone.
Control your focus session
You can control the session from any connected device. Try pausing the session by pressing Start / Pause on your BUSY Bar, then resume it by tapping the  Play button in BUSY App on your phone.
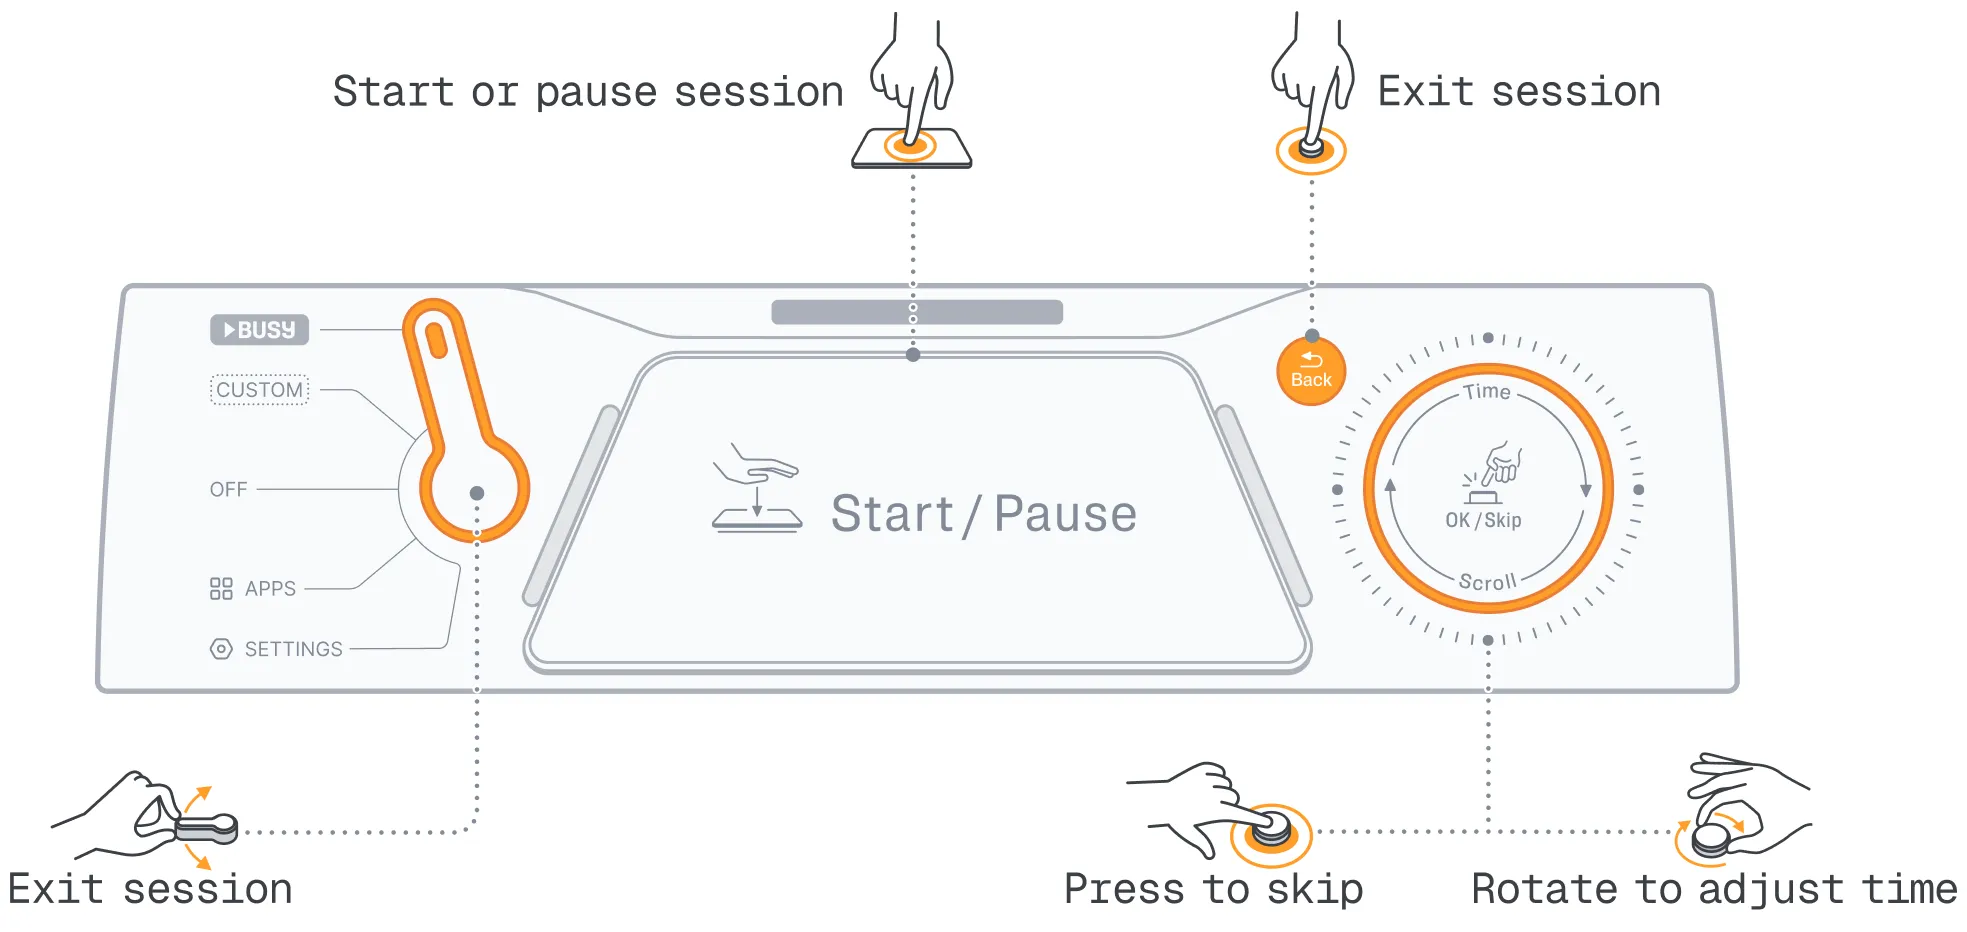
Once a BUSY session is active, the controls adapt in the following way:
- Start / Pause button — Pause your focus session.
- Scroll wheel — Rotate to adjust time, or press to skip the current phase.
- Mode selector — Move to immediately end your session.
- Back button — Immediately end your session.
Change mode settings
By default, BUSY mode is set to an interval timer: 20 minutes of work and 5 minutes of rest, repeated for 3 cycles. You can change the timer type, its duration, and the status to display:
Switch your BUSY Bar to mode.
Go to Setup → Timer to set the session type and duration.
Go to Setup → Theme to set the status when in a BUSY session.
How to set up CUSTOM mode
Setting up  mode works the same way as mode — just follow the same steps.
Place your BUSY Bar on your monitor
BUSY Bar comes with a built-in monitor mount designed for quick and secure attachment to the top of your display, so others can see your current status. The mount is compatible with monitors with a top-edge thickness of up to 21 mm (0.83 in).
To place your BUSY Bar on your monitor:
Pull the monitor mount outward.
Place the device on top of the monitor, with the main screen facing away from you.
Push the monitor mount inward to secure it against the monitor’s back.
 Important
Make sure the mount touches the back of the monitor. If it doesn’t, the BUSY Bar could fall.
To learn more about the monitor mount and cable management, visit the Monitor mount page.
Add BUSY Bar to your workflow
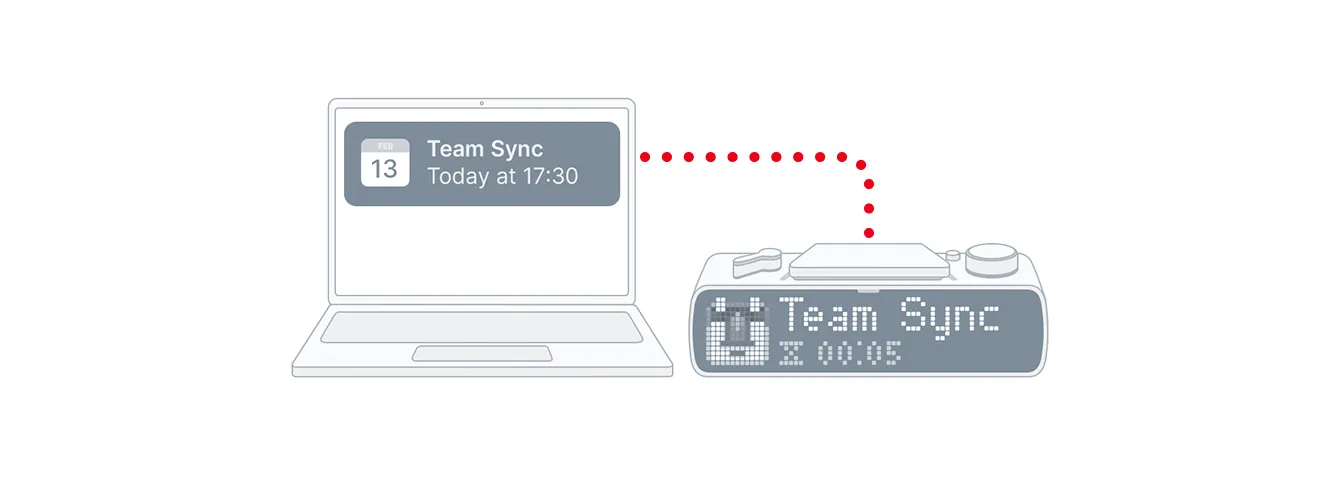
Get reminders about upcoming events on your BUSY Bar and show your status during meetings
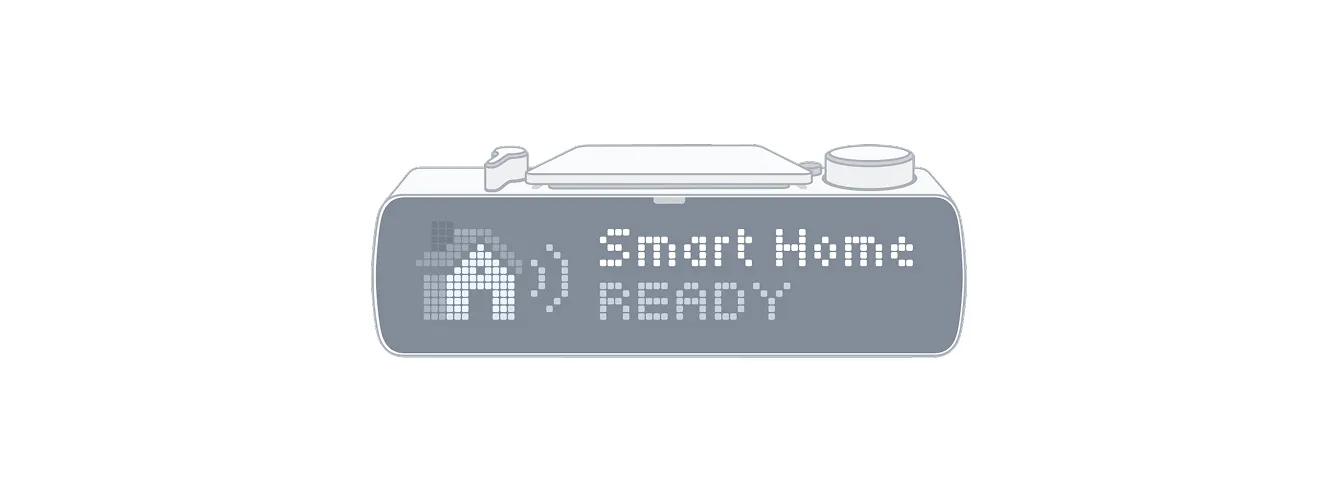
Add BUSY Bar to your smart home and trigger automations the moment you start a focus session
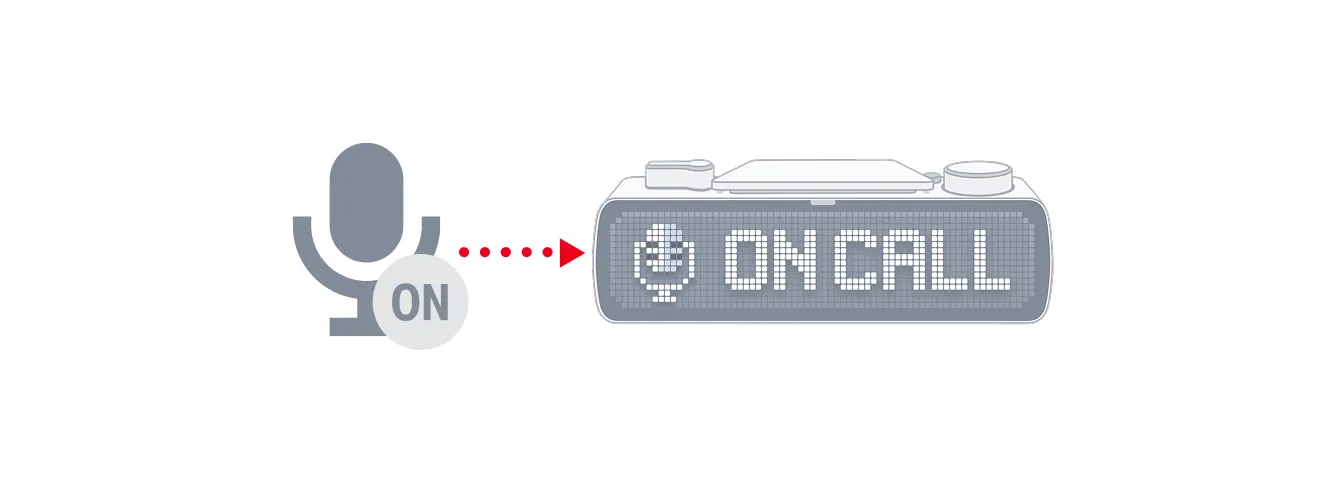
Automatically show ON CALL status, clearly signaling to people around you that you’re on a call (macOS only)
Join the community
As we near the launch of BUSY Bar, you can join our communities on: